The T-Shirt Squares Dress
Dare to go square with this cute t-shirt tunic dress. Perfect to wear with leggings, this dress is great for casual adventures.
Materials
One t shirt for top of dress (I chose one that was too short to begin with)
3-4 old t shirts in a neutral color scheme
Marker
Sewing Machine
Basic Sewing Kit
Rotary Cutter, cutting mat, and plastic ruler
1. Put on the t shirt that you are using as the top. Draw a line with the marker just under the bust line. Fold the top in half, lining up the sleeves and color and cut a straight line where the marker line is to remove the bottom of the t shirt.
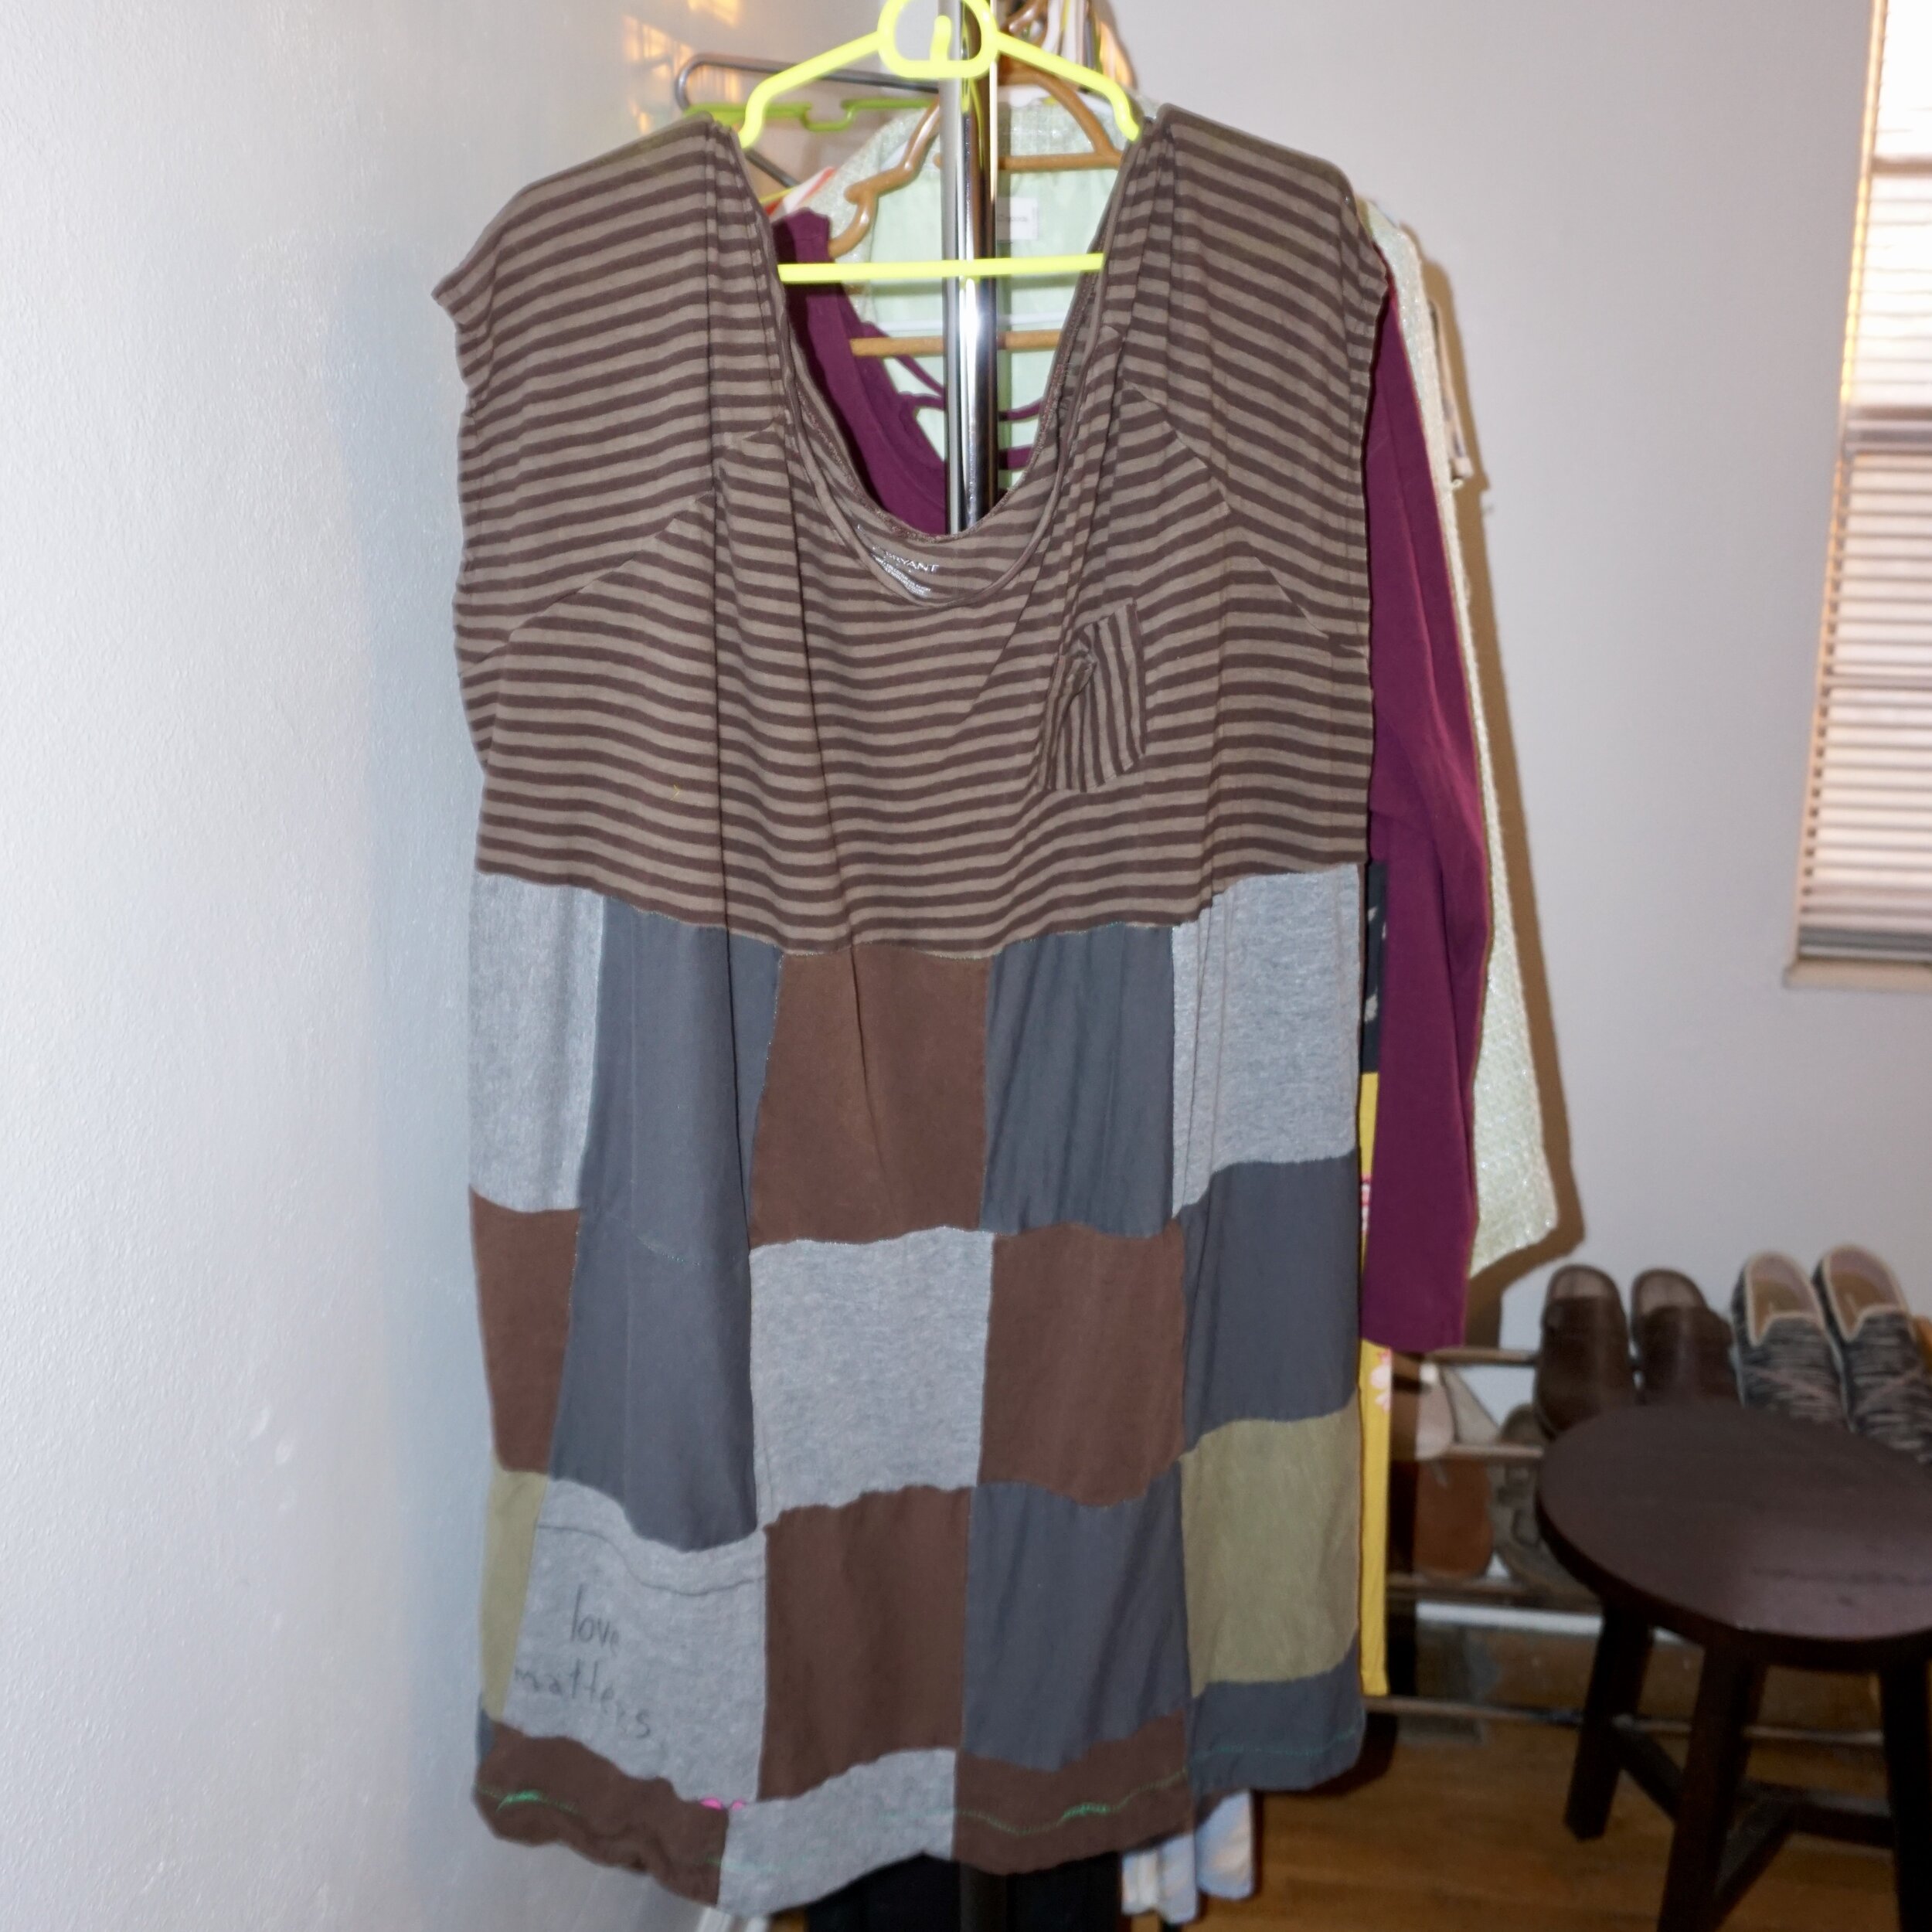
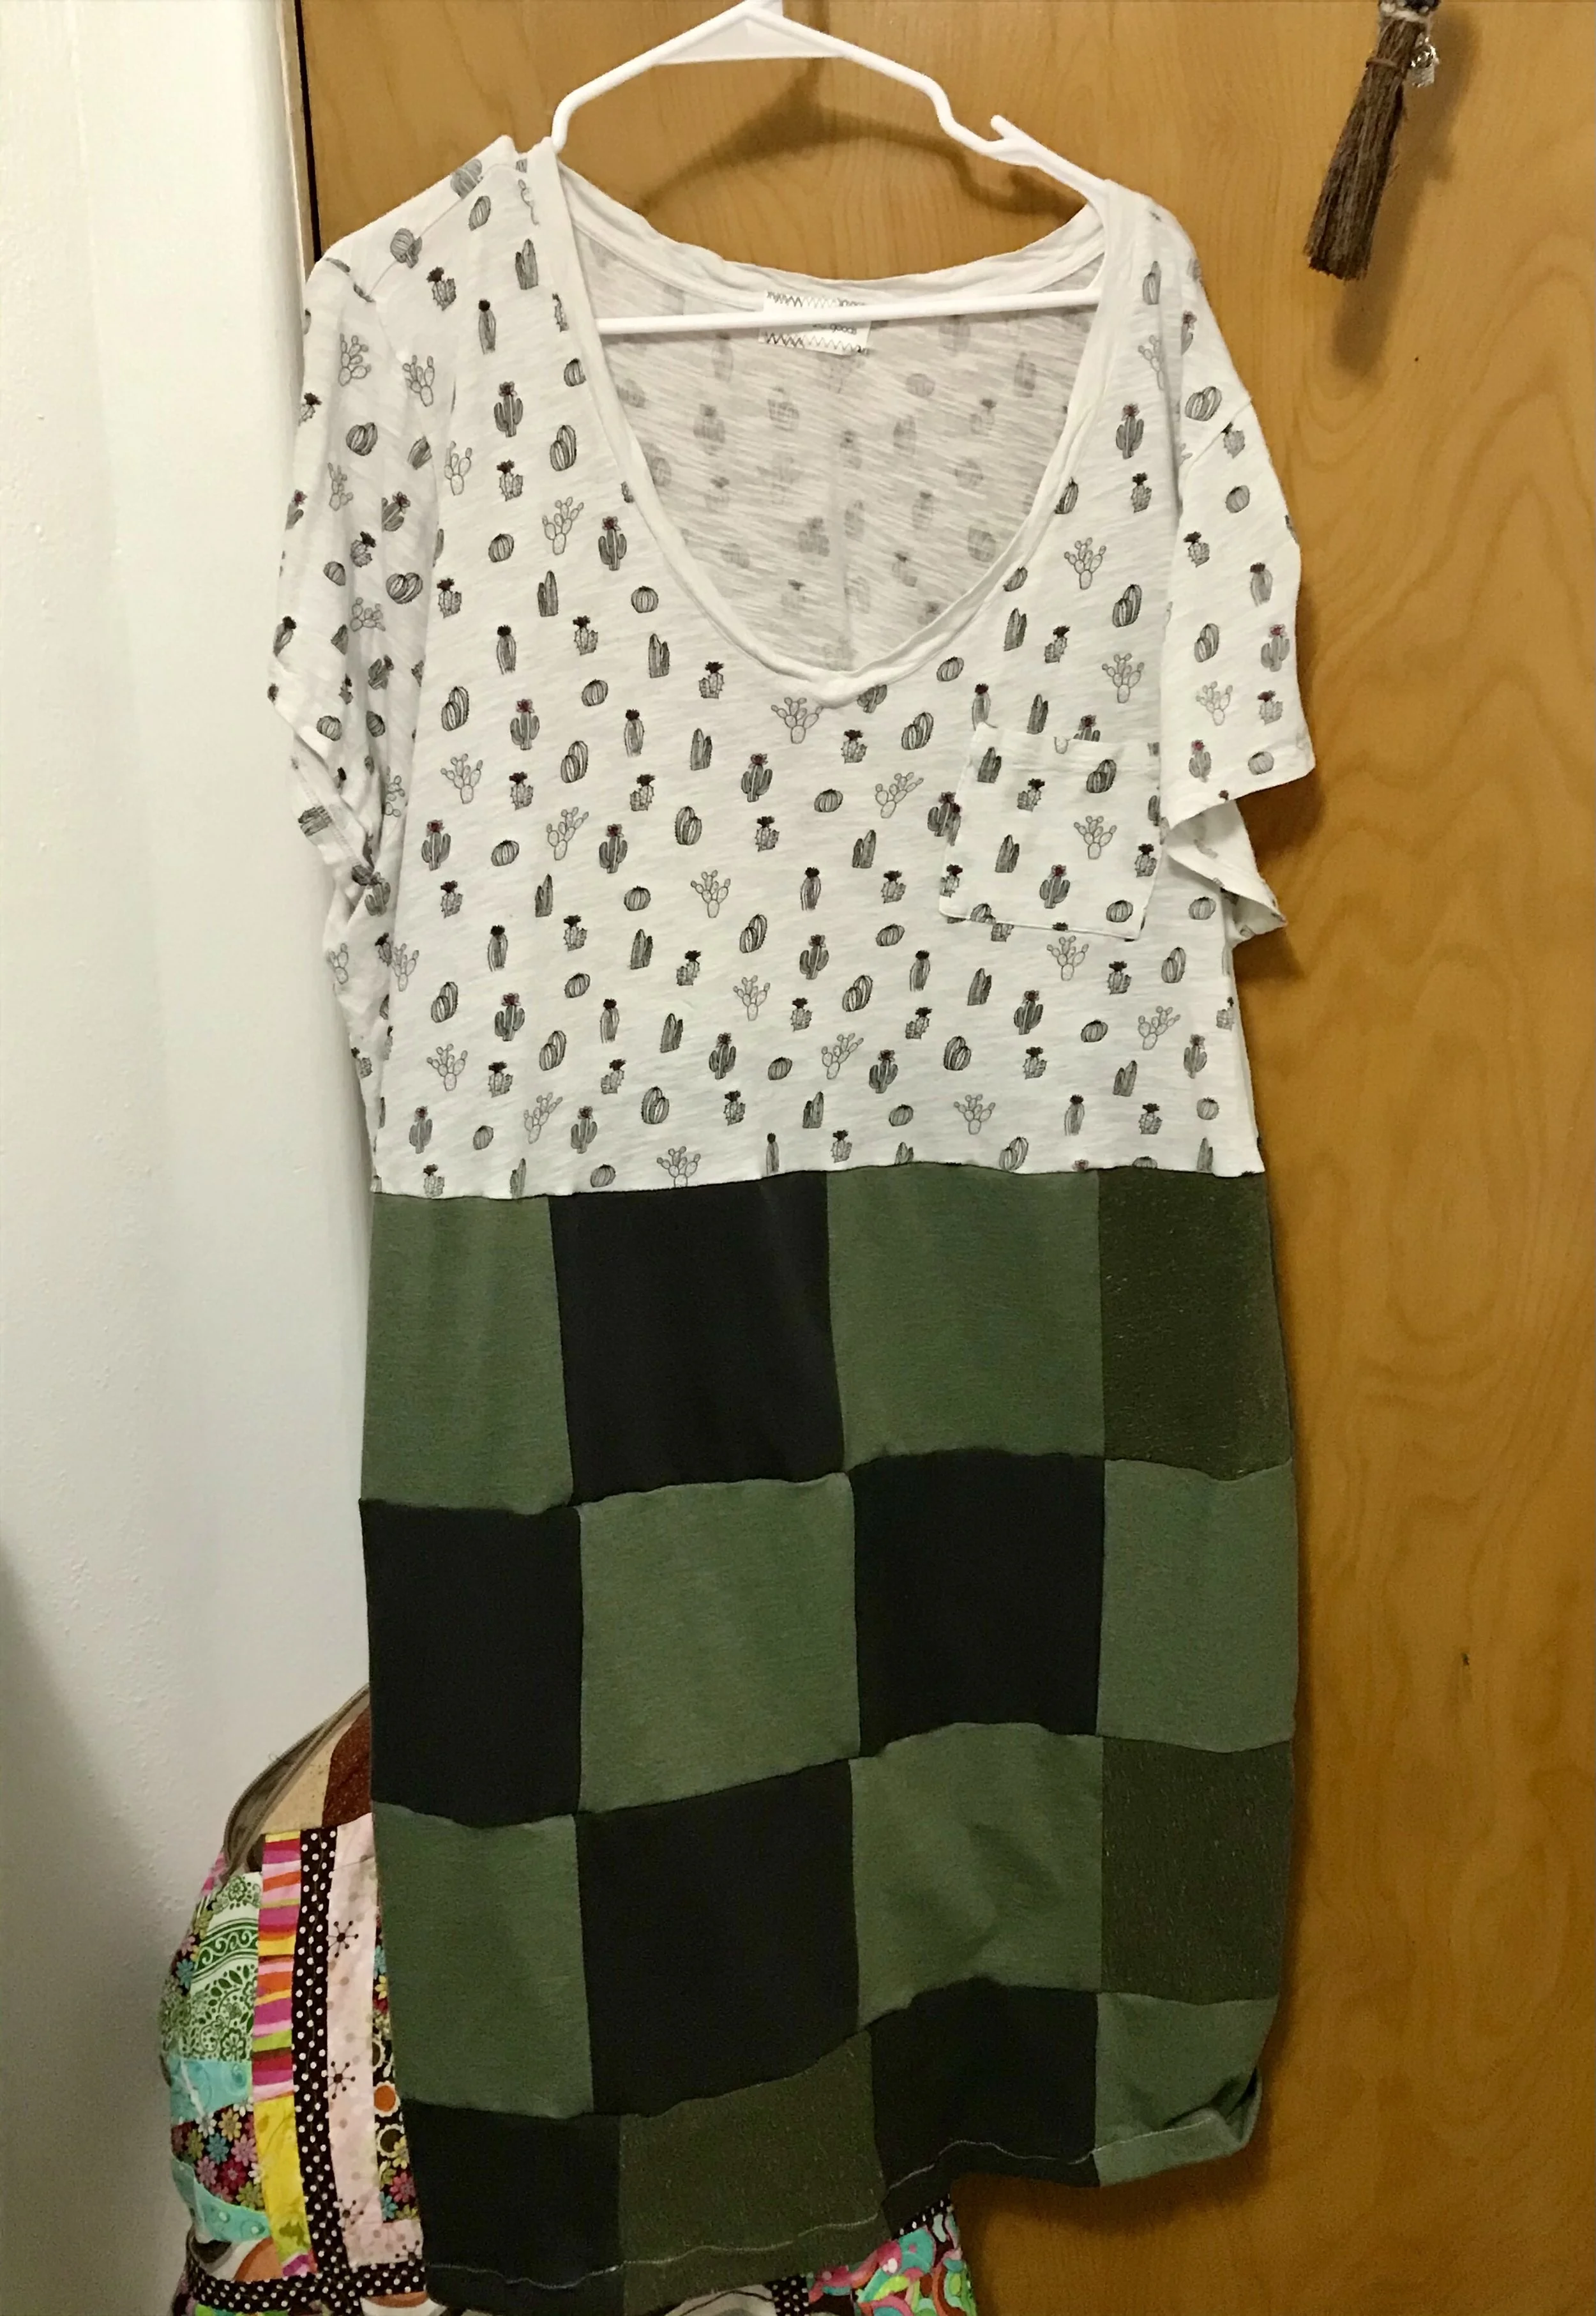
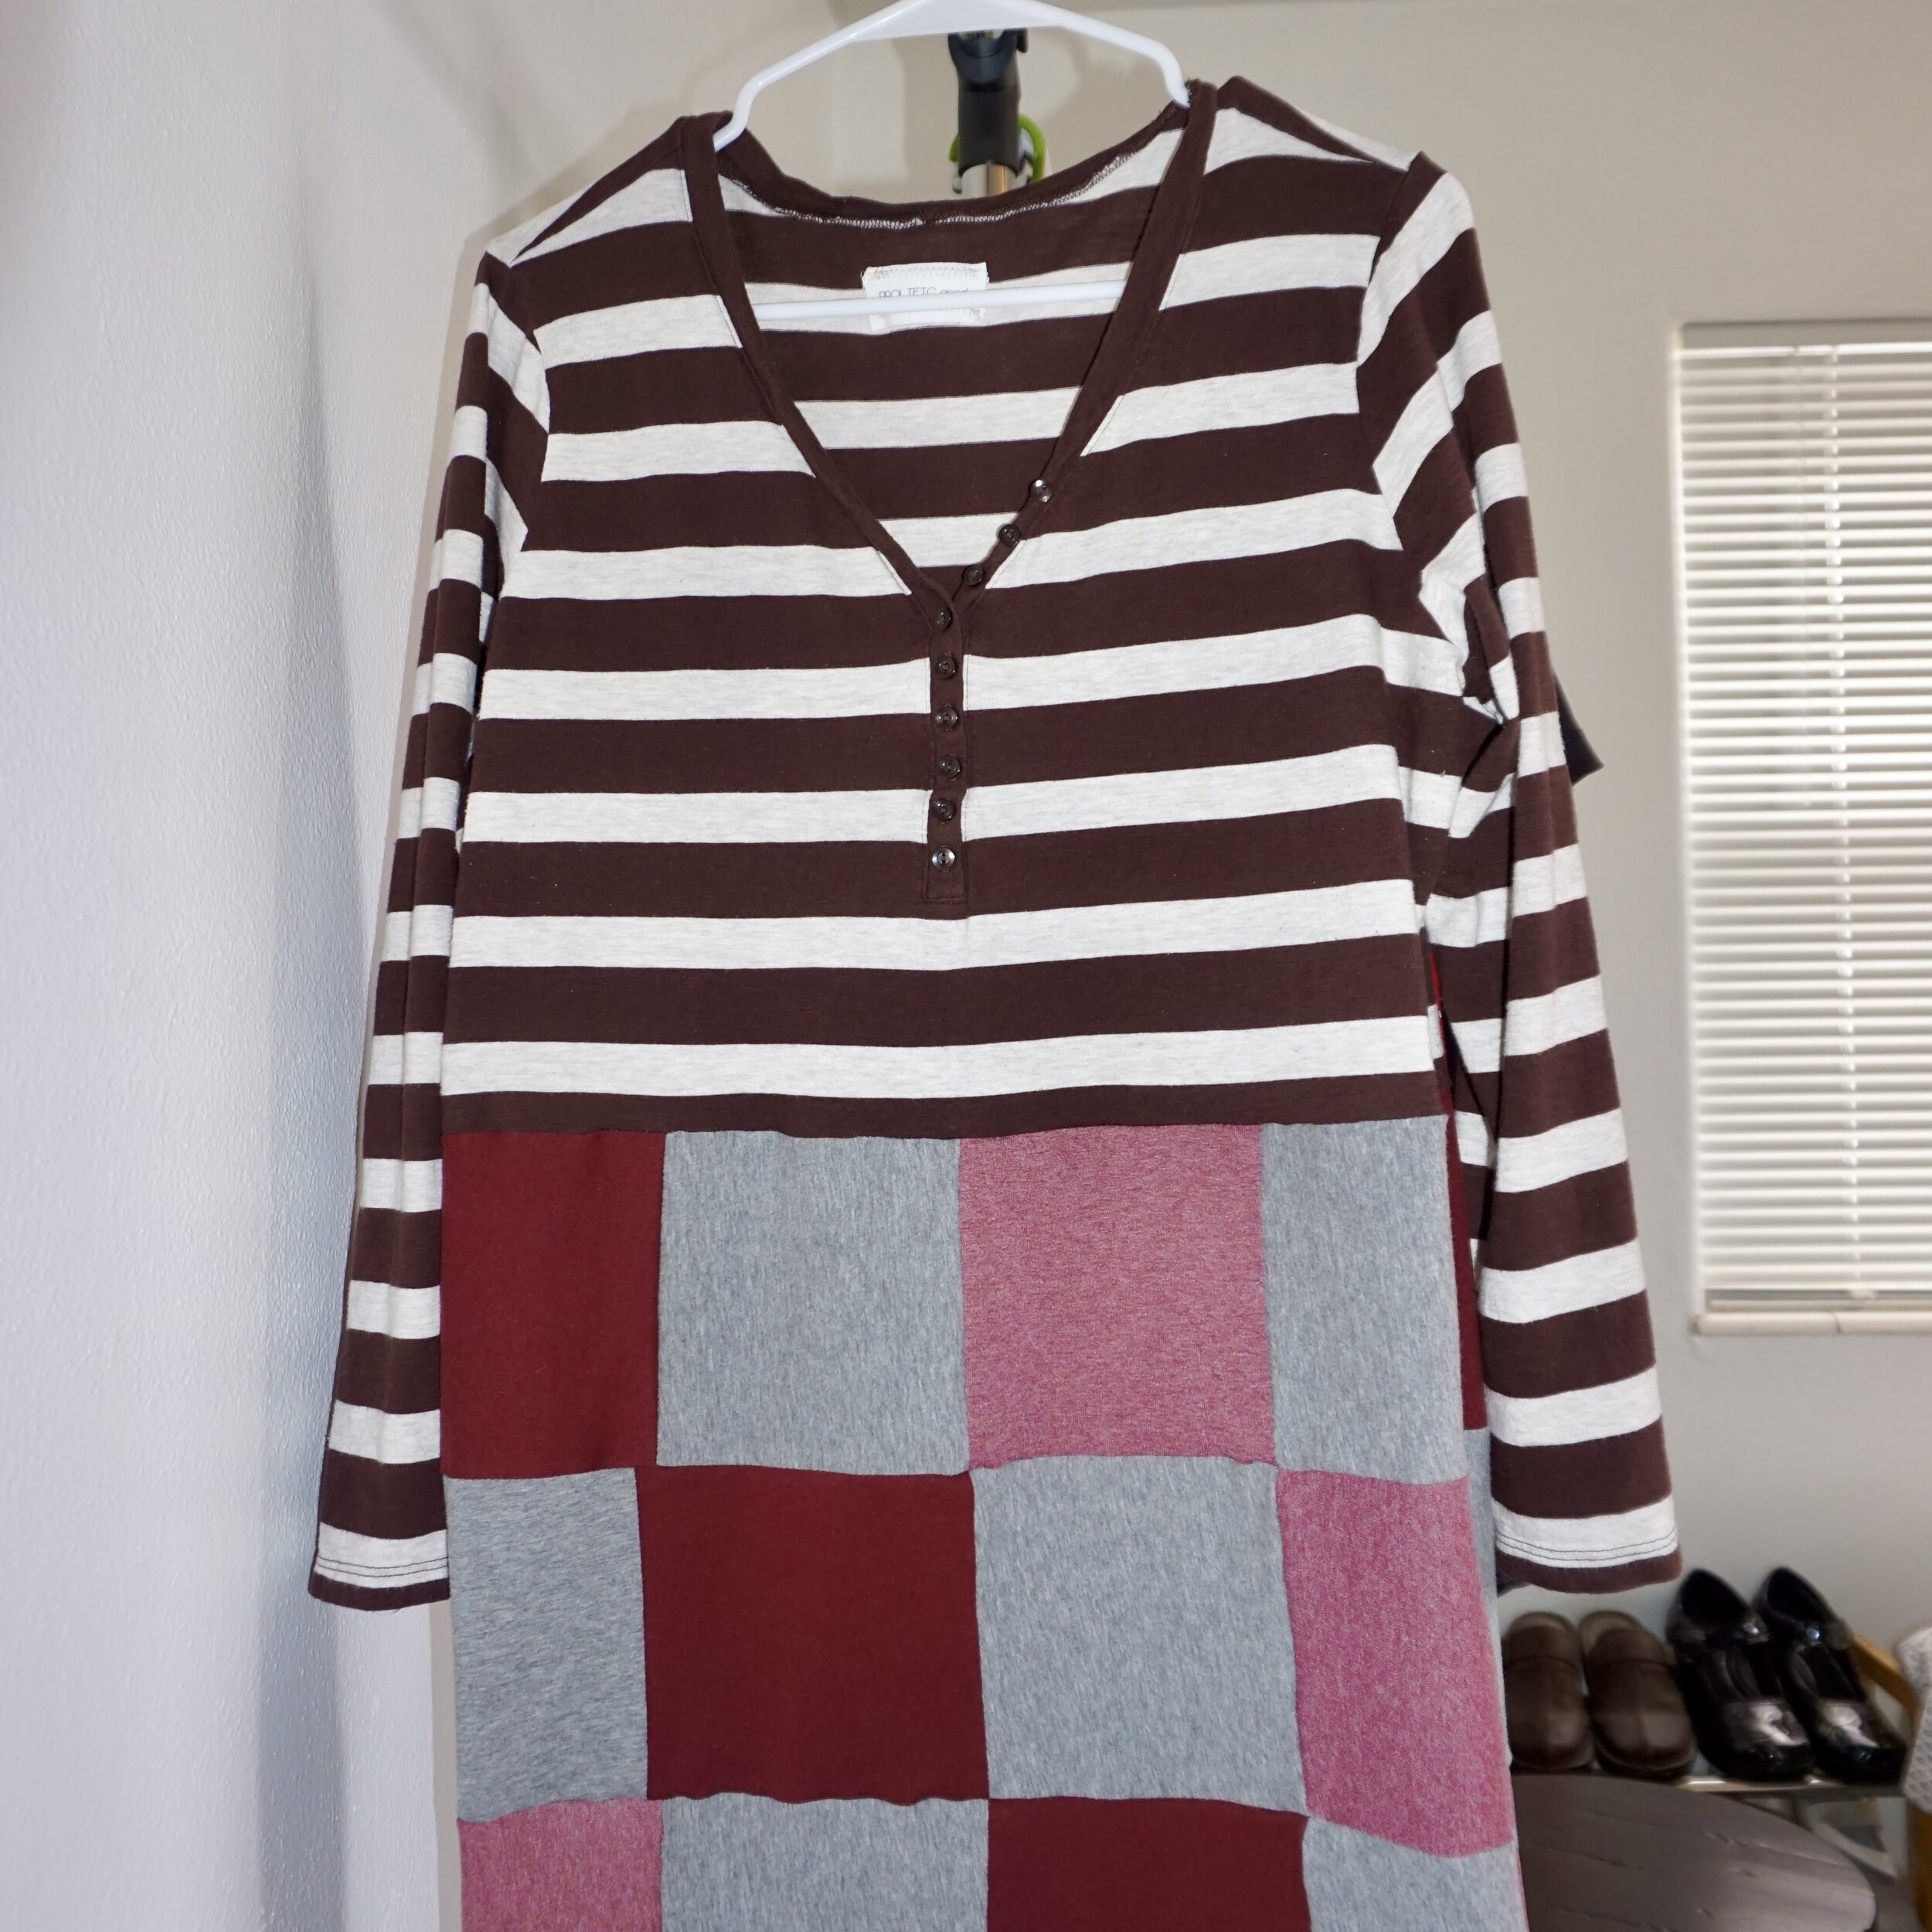
2. Measure the raw edge of the t shirt top to figure out the size of squares you would like to use for the dress. A simple way to do the math is to measure the front of the t shirt top from seam to seam, and then divide that measurement by the number of squares across that you are planning on using. Add seam allowances to that measurement to get the size of squares you would like to make. I chose to use 7 inch by 7 inch squares. You want to be sure the skirting is equal to the size of the top or larger.
3. Cut off the seams and hems of the remaining t shirts and create as many 7x7 inch squares as possible. I used four of my husband’s old t shirts that he was planning on donating. Men’s t shirts are great for this dress because they often come in neutral colors, however you can make it more feminine using florals and patterns.
4. Measure the width of the t shirt top along the bottom hem from left to right front seams. The measurement for my t shirt was 31 inches across.
5. Create 2 panels out of the t shirt squares with a width that is equal to or wider than the measurement in step three. Be sure to factor in seam allowances. My panels were five squares across by four squares down. If you want your dress to be longer, you will want to use more squares for length. Use a narrow zig zag stitch to sew the squares together for best results, my machine was set to a stitch length and width of 4. *Because the knit fabric is stretchy, use care when you start and end the seams. To avoid the fabric getting caught in the machine you might choose to sew without back tacking.
6. Lay the panels together with right sides facing in, pin along the side seams and sew the squares together.
7. Place t shirt top on your table or ironing board so the back of the shirt is facing up and the raw edge is at the top. Flip the skirting portion inside out and pin the top edge of the back panel to the raw edge of the t shirt, starting at the left seam. Sew the back portion, stopping at the right seam.
8. Starting at outer edges of the front, pin panel to top front from the outsides in. If there is extra material when you get to the middle create a pleat by dividing the material into two even portions, fold down away from each other and pin.
9. Sew seam of front portion and turn right side out. Try on the dress and figure out where you want the bottom hem to be. Iron the bottom hem under and sew.
Enjoy your new t shirt dress! If you have any questions about making this project feel free to contact me.