• Info + Contact
  • Books on Amazon
  • Blog
  • Eco Shrine Boxes
  • Free Your Voice: Art and Journaling Class
  • Trashy Eco Art Journal
  • Work
    • Fantasy Garden
    • Portraits and Figures
    • Storytelling Art
    • Ordinary People
  • Menu

Kat Sturges. Eco Artist.

  • Info + Contact
  • Books on Amazon
  • Blog
  • Eco Shrine Boxes
  • Free Your Voice: Art and Journaling Class
  • Trashy Eco Art Journal
  • Work
    • Fantasy Garden
    • Portraits and Figures
    • Storytelling Art
    • Ordinary People

fashion sketch by Kathryn Sturges

Fashion Sketching

October 14, 2024 in Project Upcycle

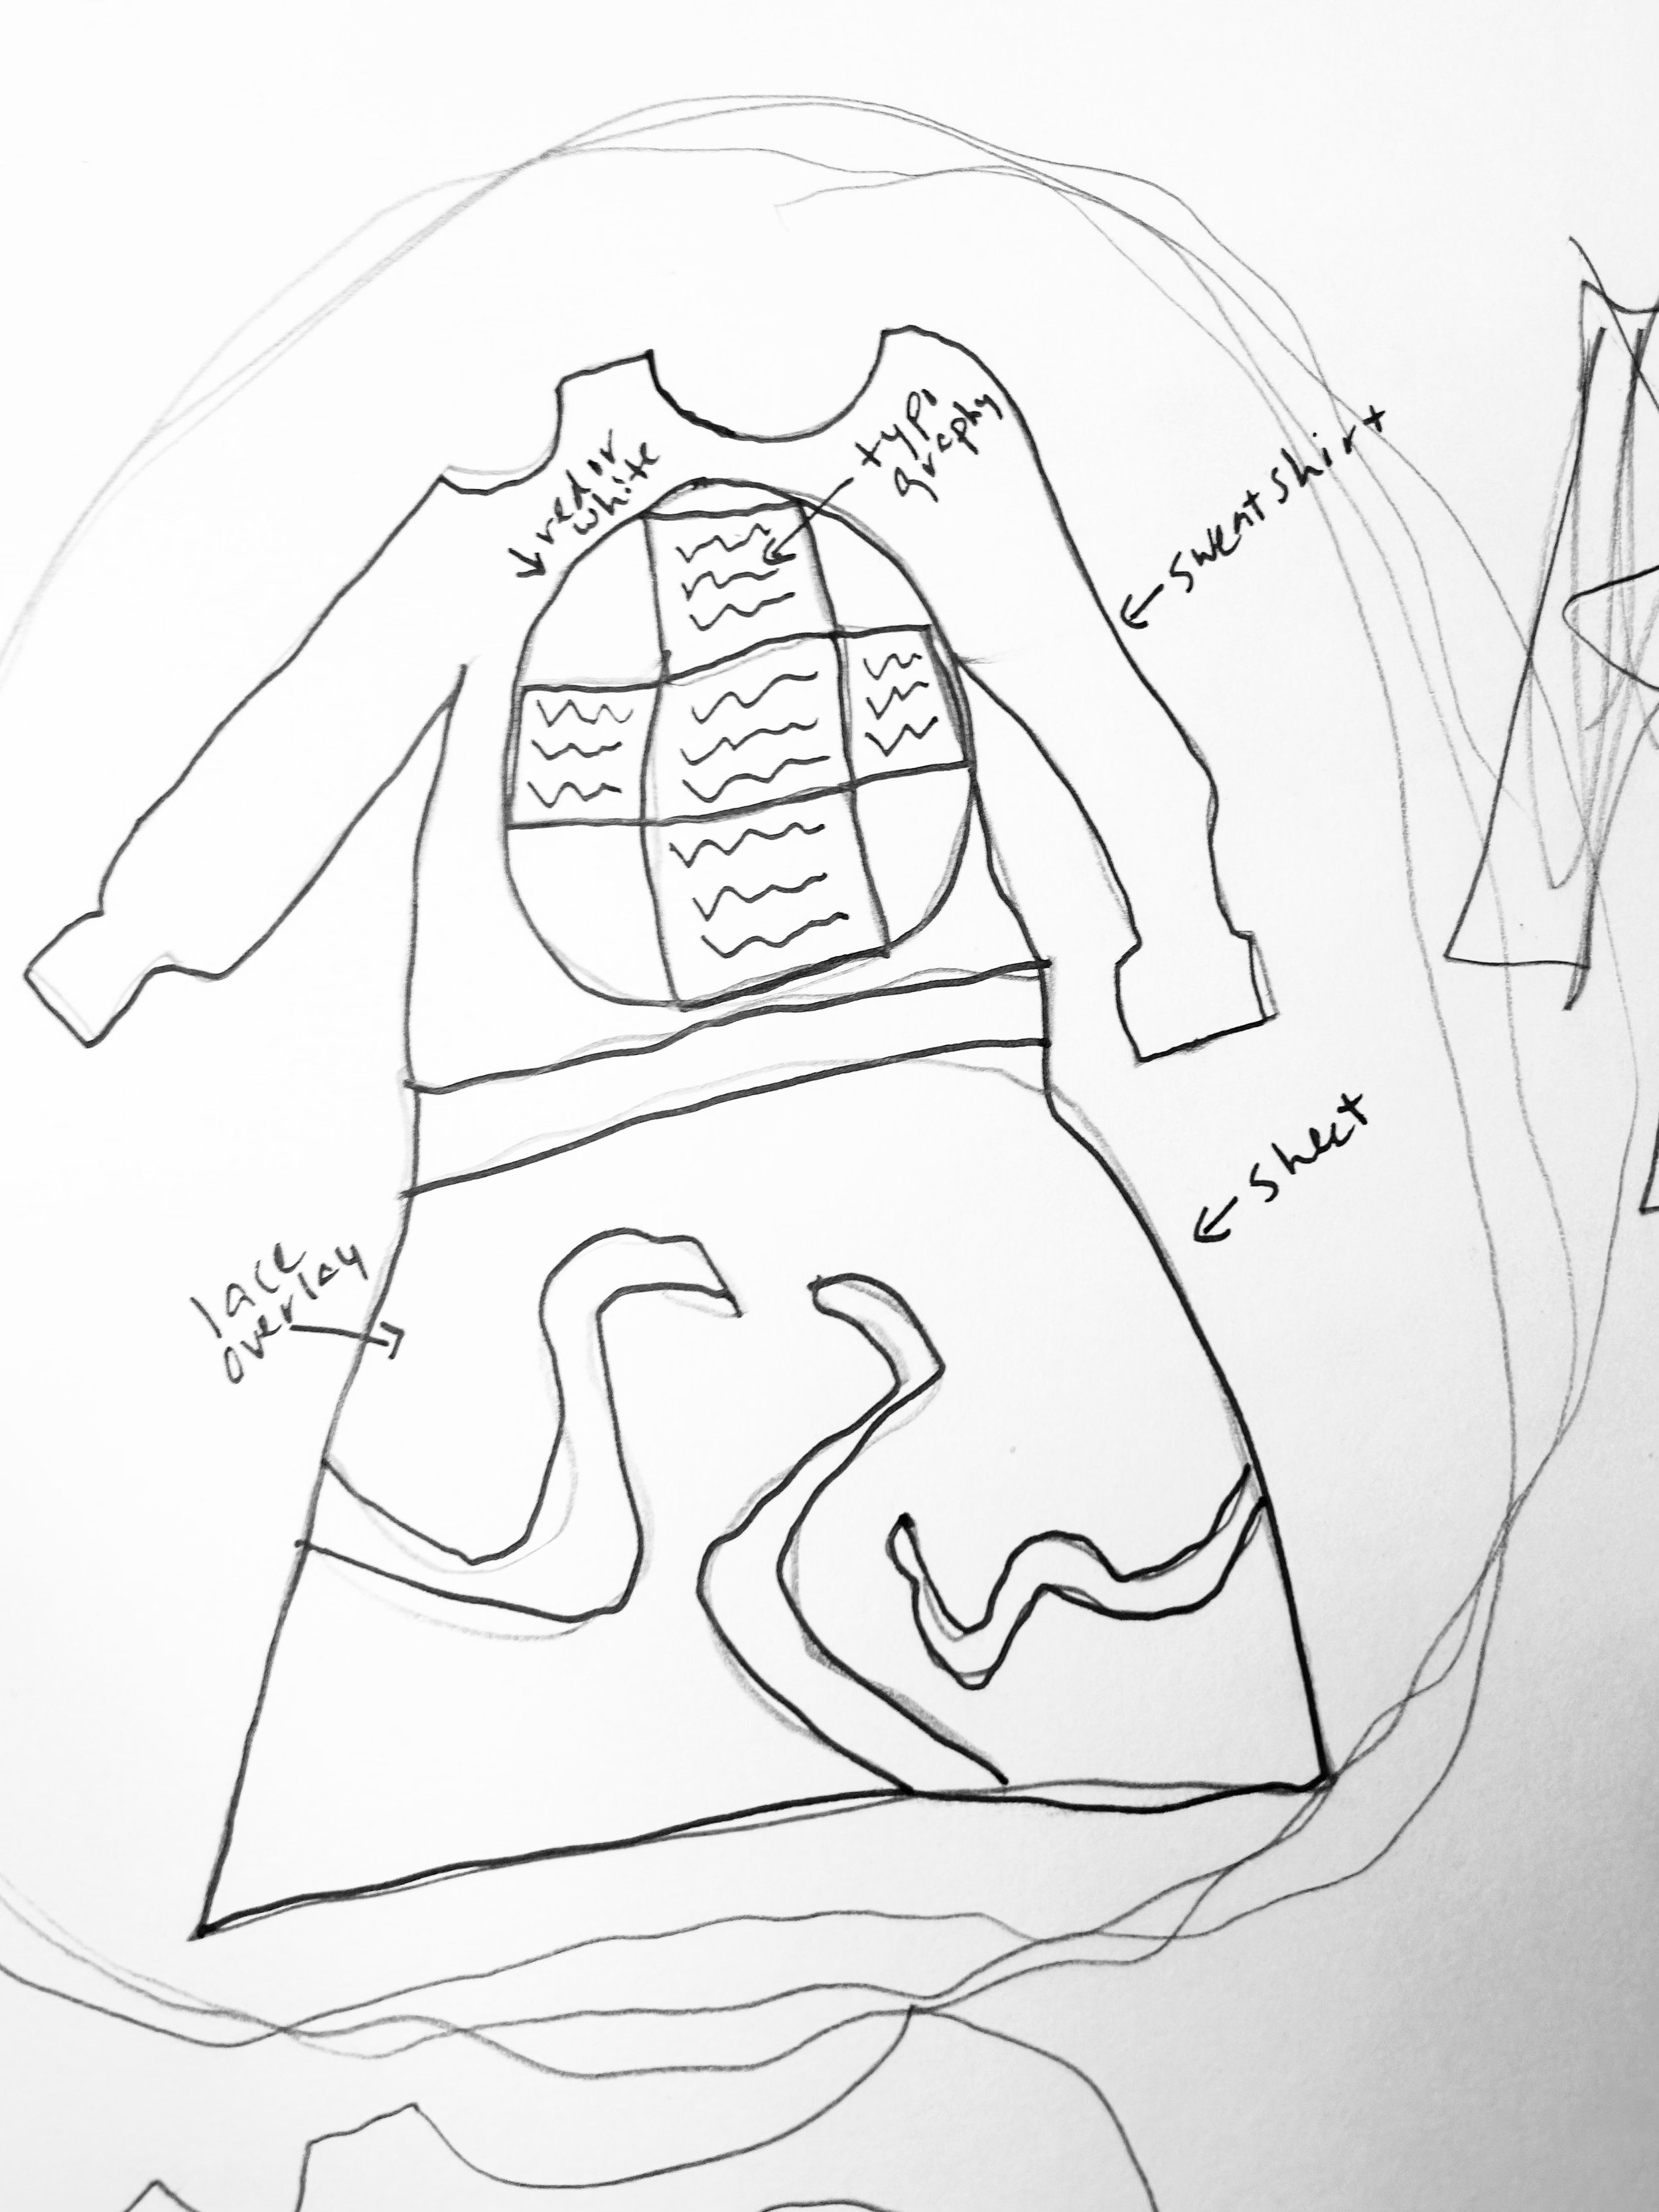
I haven’t written much about fashion sketching, because it’s just something I do when I sew. I never got that much into sketching clothes as an art form. Sure, I have a book on the subject, and I keep meaning to learn how to draw different fabrics and styles! But for the most part, unless I’m basing a work of art on a photo, the clothes I draw are usually pretty simple.

When I’m designing an upcycle though, sketching often plays an integral part in the design process! The sketches I do when I’m sewing help me to figure out the best design, fabrics and look I’m going for. Sketching comes in handy regardless of what you are sewing! I used to keep a composition book handy in the sewing room, along with Sharpie markers and a pen. And I would sketch out each quilt idea I had, or pillow or other project before it came time to sew. That way I could make the mistakes on the paper instead of wasting fabric.

Sketching fashion is great when you are struggling to decide on which elements to bring to a design. On this particular project, I had a couple of elements that were forming the basis of the design, and I was struggling to figure out what fabric to go with for the underskirt. I was also struggling to figure out which overall design to use on the top. After drawing a few different looks, it was easy to see which one I like the best!

When you sketch a design for a project you are making, let it be a rough sketch. Unless you plan on sharing the drawing as part of your process, feel free to make it scribbly and messy. I keep my sketches to myself most of the time when I make things. You don’t even need a set notebook, just grab a sheet of paper. I’ve used printer paper in a pinch!

The next time you cannot figure out what you want a project to look like, take it to the page and get visual! Try out your ideas with pen, marker and paper before you get sewing! It can help you commit to a look and avoid energy wasted.

Button Down Dress into Goth Jacket

October 02, 2024 in Upcycle Clothing

I’m getting back in that sewing room, and loving every moment of it! I had a series of setbacks. But when you love doing something, you will always come back to doing it. I say the same thing about people! The people who belong in your life will always come back around.

Onto the project for today! Do you have a button down dress in your closet that either doesn’t fit, or that you just don’t love? I have just such a dress. I bought it and then never felt like wearing it, so it sat in the back of my closet for a couple of years. I’ve decided to turn it into a jacket, perfect for fall!

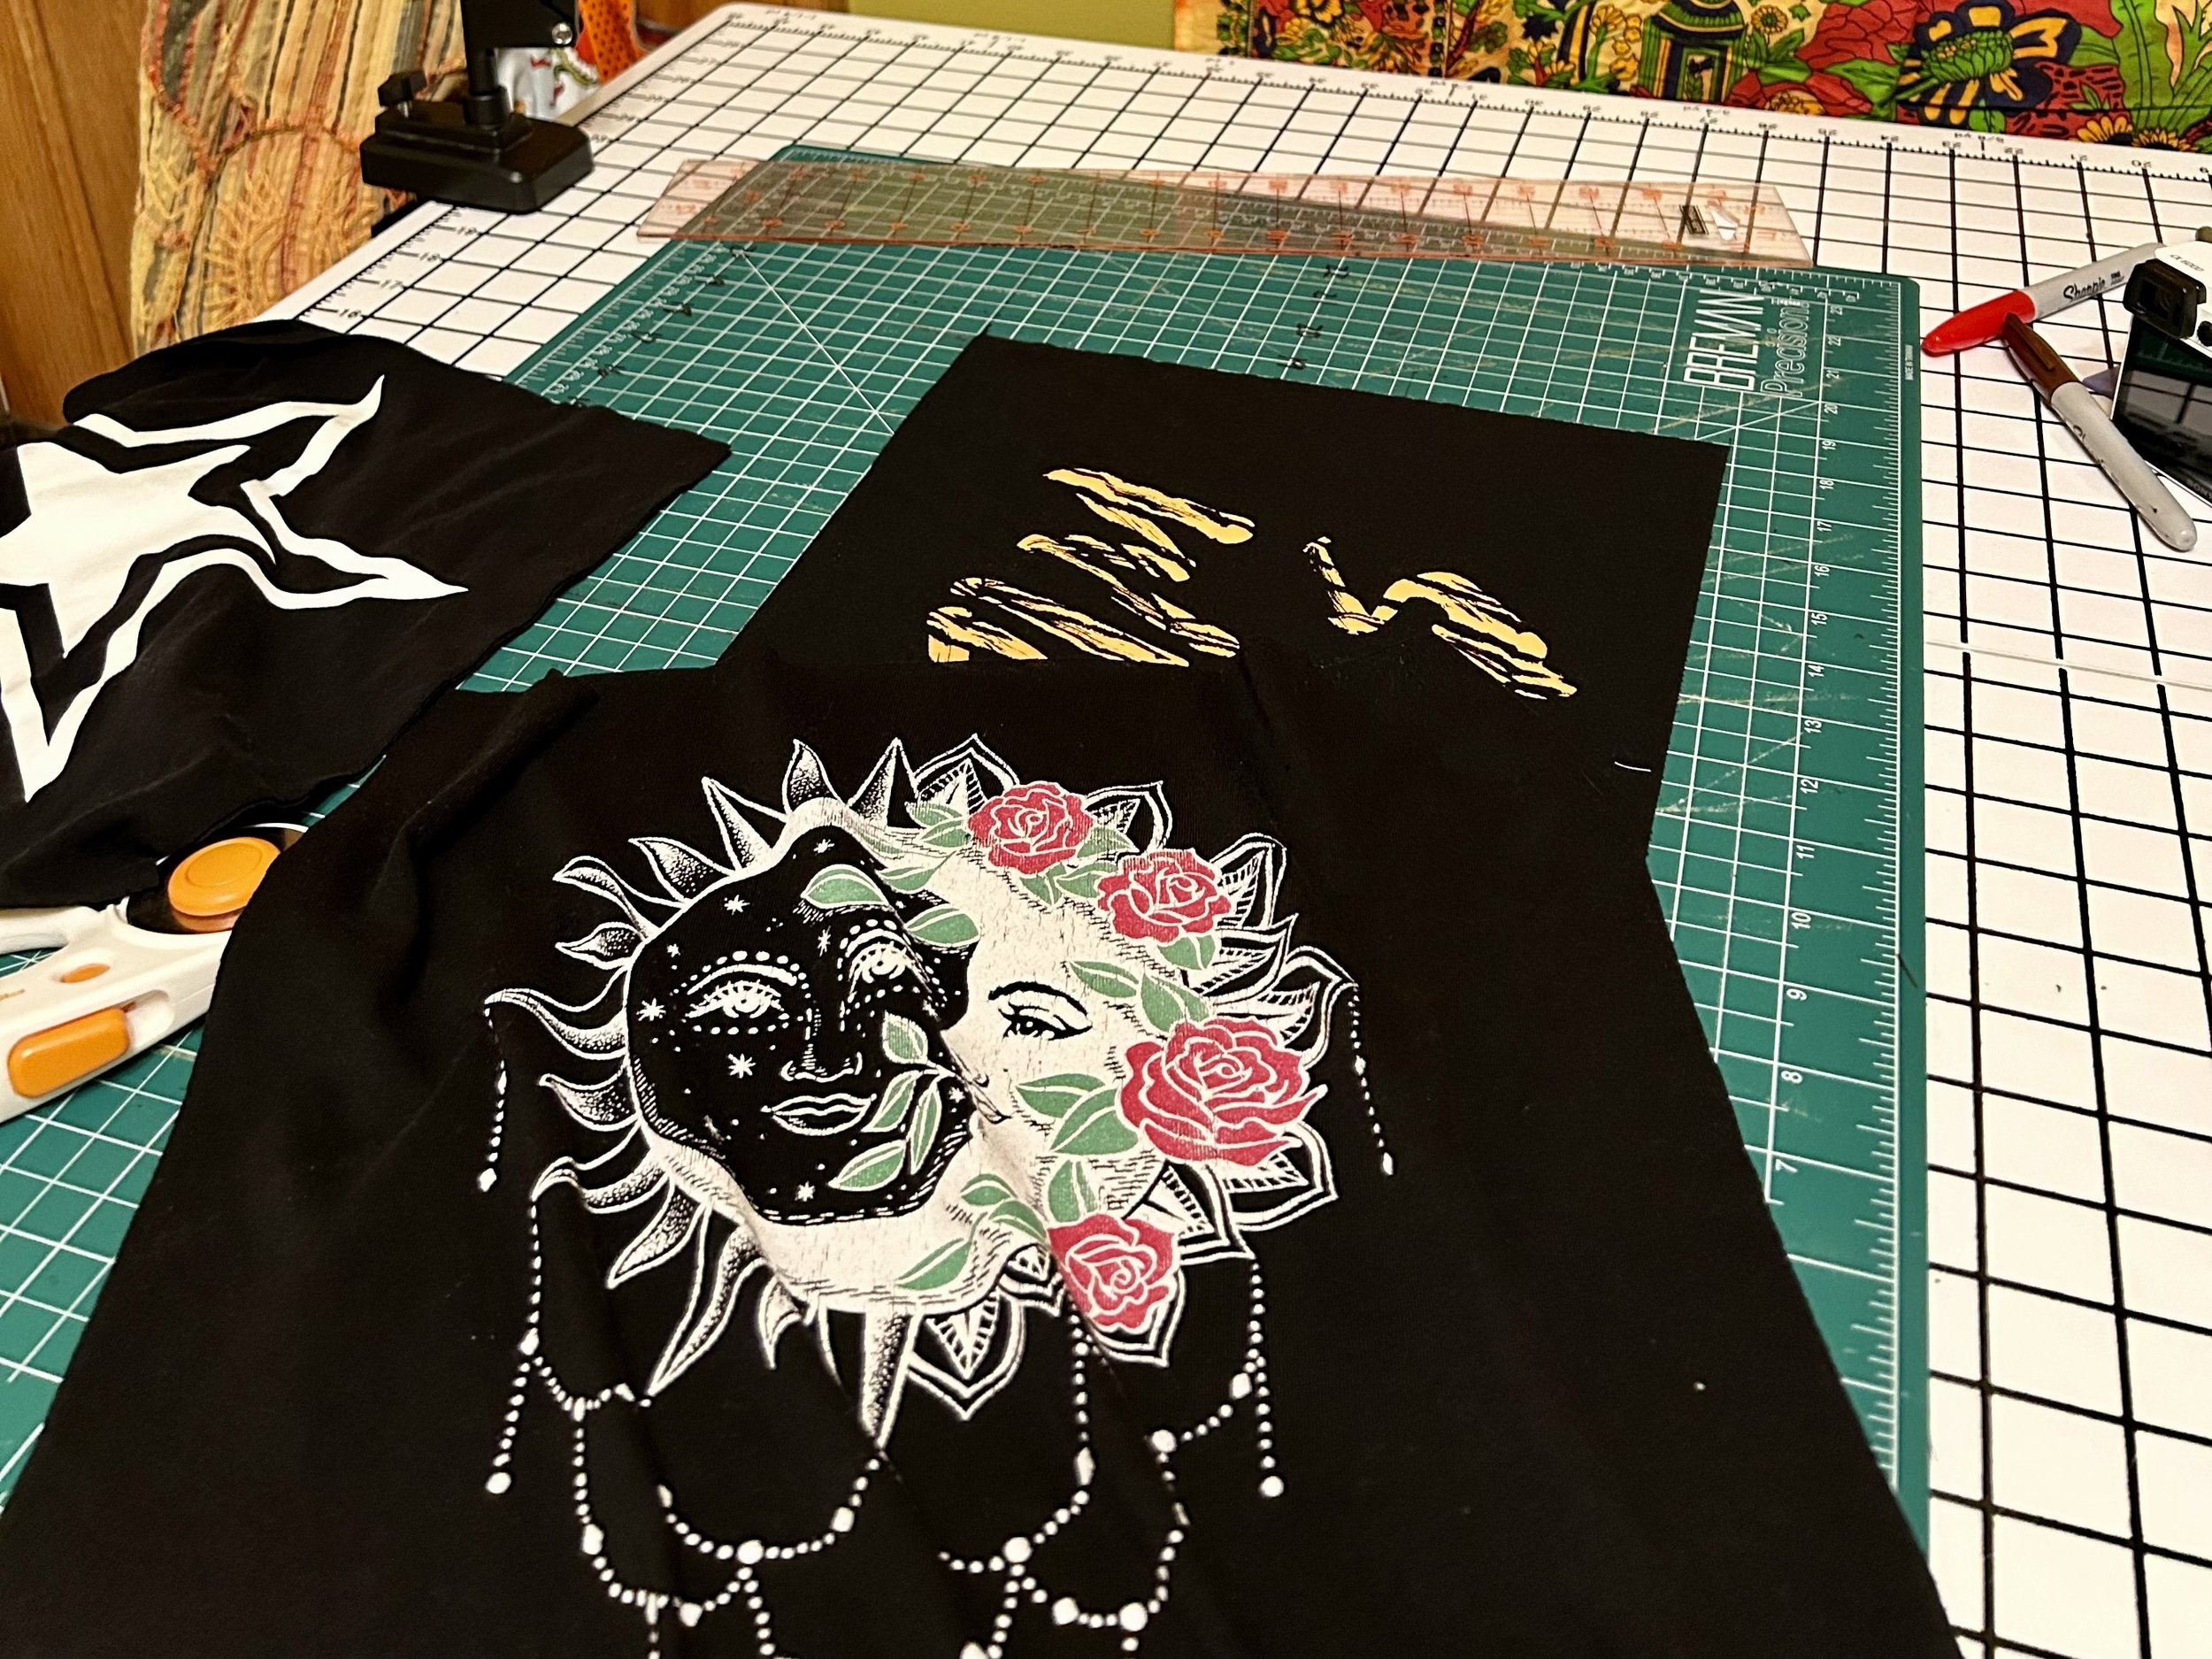
Grab a button down dress that you don’t entirely love, and collect up some old grubby t shirts to go with. Because my dress is black, and I have an abundance of black t shirts, I decided to use up some junky black t shirts from my stash. The white star t shirt was a ringer t, but I felt stupid wearing it! It was one of those things where it just looked a bit too “something”, like maybe trying a bit too hard! LOL. I’m hoping the star might be a cool addition to this fall jacket!

First, I trimmed down the t shirts. I cut around the imagery on the shirts, not perfectly centered but close enough works for me! Then, I cut right up the middle of the back of the dress. There was a large seam there, so I cut on either side of the seam and removed it.

Add inserts wherever you want to add more fullness. I wanted the jacket to be a little less form fitting around the bottom, so I added the insert into the middle back. I created a patchwork of t shirt scraps, then sewed them into the slit. Sew the inserts like a big triangle, similar to what you would sew into bell bottoms. This will make the dress more roomy and flowy, perfect to layer long sleeve shirts under. If the sleeves are tight, you might want to add some panels into the sleeves too for layering space.

Next, make it patchy! I used a wide decorative zig zag stitch, and attached patches on the front and back. If your t shirts are too thin to sew on as is, turn the logos into patches. Make sure you leave room around the logo for sewing, then attach it to piece of muslin that is big enough to include everything you want on the patch. You could add some text appliques, fabric paint and a bit of lace. T shirt fabric slips around a bit when you are sewing it, so use fabric glue or a glue stick first and let it dry overnight. Sew everything onto the muslin. Then attach the patches onto the jacket.

Add pockets if you wish, along with any other details that make it sing for you! I’m so ready to wear this jacket everywhere this fall! A quick level up to my style is much appreciated!

Turn a Tank Dress into a Patchwork Skirt

September 22, 2024 in Upcycle Clothing

It’s finally fall! And I’ve got an equinox project just in time for the cool temps. Outside, the summer heat is being replaced by foggy nights and cool overcast days. If you have a tank dress in your closet, it might be getting too cold to wear it now. But if you turn it into a skirt, you can wear it all year round!

I bought a patchwork tank dress from Healing Heart Design Co on Etsy, and I already knew I was going to alter it in some way. It is pretty challenging to find clothes in my size on Etsy. Most upcyclers don’t get into plus sizes, and often the ones that do are not in my style. What is a woman to do? I bought a couple dresses and a sweatshirt from Healing Heart, knowing full well that I was going to upcycle the dresses.

If you have one too many tank dresses, get out your fabric scraps and give this project a try!

  1. Cut off the straps of the dress. Be sure to cut below the underarm seams so that it is a straight line across the top. Then, cut along the side seams of the dress to create two pieces.

  2. Figure out how wide to make the patchwork! Measure your waist and low hip, and see which measurement is bigger. Take the bigger measurement of the two, and add eight to ten inches. Write that number down. Then, measure the width of the front and back pieces. Add those measurements together. Subtract that number from the waist or hip measurement you wrote down. Divide by two. The resulting number is the width of the side patchwork panels. The length will be equal to the length of the dress panels.

  3. Create two patchwork panels for the sides. If you want to add length to make it a longer skirt, add panels to the bottom to add that length. Add patchwork along the sides, then sew back together. I already had a stack of patchwork squares, so it was simple to just grab squares and sew. I added two rows of squares along each long side of the front panel, then reattached the back panel.

  4. Trim off the excess fabric along the top and at the hem.

  5. Add an elastic waistband. Fold over the waist of the skirt, and press. Then sew along the raw edge, leaving a two inch opening. Feed elastic through, and sew the ends of the elastic together. Then close the opening.

  6. Hem the bottom! Add trim, lace, or just a basic zig zag stitch all the way around. Add pockets or an applique at this stage too! Make it something you can’t wait to wear.

I hope you are enjoying the first day of fall! I’m rocking my new skirt in patchwork heaven!

Five Tips for Creating Fabric Art with Meaning

August 14, 2024 in Fabric Painting

At the most basic sense, sewing is a utilitarian skillset. Sewing clothes, home decor and quilts satisfies basic needs. When you sew a dress or handbag, or sew a quilt to keep warm, it automatically feels special because you made it yourself! Making meaningful art starts on a personal level. Making something that means something to YOU is where it all begins.

I started out sewing handbags and bellbottoms, and at the time the pieces I was creating didn’t feel very meaningful. When I sewed my first quilt, I realized that fabric art can take on so many layers of meaning! I mean, sure, you can make things just because you enjoy making them. There is no shame in that; none at all! But when you infuse meaning into a work, it becomes elevated somehow from the other stuff you have created. Suddenly it becomes an heirloom piece. It becomes part of your legacy.

Truly, meaningful art and fabric art can share part of your story. It can also share your opinions and be a way to share about your values. Infusing your works with meaning can ultimately make a difference! You can use your art to spark a conversation, to get your point across…it can become your mouthpiece to say what you want to say.

Here are five tips to infuse your fabric arts with meaning!

  1. Colors tell a story! Colors mean different things in different cultures, and colors have a lot of personal significance. The colors you choose for a work can help get the overall mood across and set the tone for the message behind the work.

  2. Prints and patterns speak volumes. Fabric arts are kind of like collage in visual art, because there are so many different fabrics to choose from. This might sound obvious because seamstresses are used to choosing fabrics for various projects, but the prints you use can either add meaning or make the meaning more challenging to decipher. Let the prints and patterns be part of the storytelling in your fabric art.

  3. Surface design as a design element can add a lot to your toolkit. You don’t have to know every extensive way to add your own mark making to fabric, you just need a way to write and a way to paint. A lot of seamstresses simply print designs onto fabric with their home printer! That alone can add so much meaning if you print a photo or other imagery that means something to you. Printmaking and block printing are two additional ways to get an image on fabric. Let your method be thoughtful to the message you are trying to convey.

  4. Embroidery and stitching can add layers of meaning. I have not ever been a hand stitcher, however if you love stitching by hand, taking the extra time to stitch on your pieces adds so much. Hand stitching is an act of defiance in modern culture, where everything can be purchased with the click of a button. Machines do most of the heavy lifting nowadays, and when you stitch by hand it adds an imperfect, human element to a piece.

  5. Shapes and applique also tell a story! The shapes and applique elements you add to a piece can completely infuse your piece with meaning. Applique is the fastest way to add an element of surprise or to tell the story you are trying to convey visually. If you are trying to express meaning visually without words in fabric art; applique is a simple way to do that!

I hope this sparks some ideas! As a seamstress, I’ve tried a lot of different ways to get my point across in my sewing. And I bet you have some tried and true methods that you absolutely love too! Be open to trying new things and think outside the box the next time you create a fabric piece! When you create fabric art with meaning you will treasure that piece for years to come!

Kathryn Sturges’ books now featured at Beaverdale Books!

Books Now Featured at Beaverdale Books!

July 08, 2024

My husband and I went to Beaverdale Books today, and dropped off copies of my books! IT IS OFFICIAL! If you live in Des Moines or if you are visiting the area, stop by Beaverdale Books and ask for books by Kathryn Sturges!

When I self published “The Faeries of Octo Bay” a year ago, I had no idea how ground breaking becoming an author would be for my creative life! Writing and illustrating books have become two of my favorite things, and I hope to do both of them for years to come.

When my friend Isaac Beltran of Curiosity Comics proposed that I do a faerie book, I jumped at the chance! That book took me about a year and a half to create. Each illustration was hand drawn on 11x14 inch paper, then carefully painted and inked. It was a true labor of love!

Swing by Beaverdale Books, or find my books on Amazon! I’m just getting started creating books! There are more on the horizon!

Prev / Next

Sewing Blog

I started blogging nearly 15 years ago, and over that time my blog has transitioned many times! Today it is mostly a collection of fashion upcycling posts and sewing ideas. I have been transitioning the website to focus more on art and storytelling! Enjoy!


check out a tag or two!

  • Art Play
  • Book Club
  • Creative Living
  • Eco Art
  • Eco Lifestyle
  • Empower Yourself
  • Fabric Painting
  • Fashion Break
  • Fashion Fixes
  • Make Art that Matters!
  • Project Upcycle
  • Seasonal Projects
  • Sewing
  • Sustainable Crafting
  • Upcycle Clothing