
3 Painted Pumpkins That Create a Woodland Scene
*In this tutorial I used Liquitex Acrylics, because that is what I already had on hand. For an eco-friendly alternative try these Natural Earth Paints! They have a kit for kids that is affordable and should work great on most surfaces.
Hiking, camping and treks through the woods are some of my most cherished memories from childhood! In the Midwest, the fall season brings trees bursting with vivid colors, chilly crisp nights and weekend afternoons best spent hanging out by the campfire with people I love.
In the spirit of the woods, these pumpkins create a fall scene that is perfect for the season. Get out some paints and have some fun with these family friendly projects! Each pumpkin would look great on its own or create multiples of your favorite design for added impact. Add your own twist by using your favorite color scheme.

1. The Artful Acorn Pumpkin

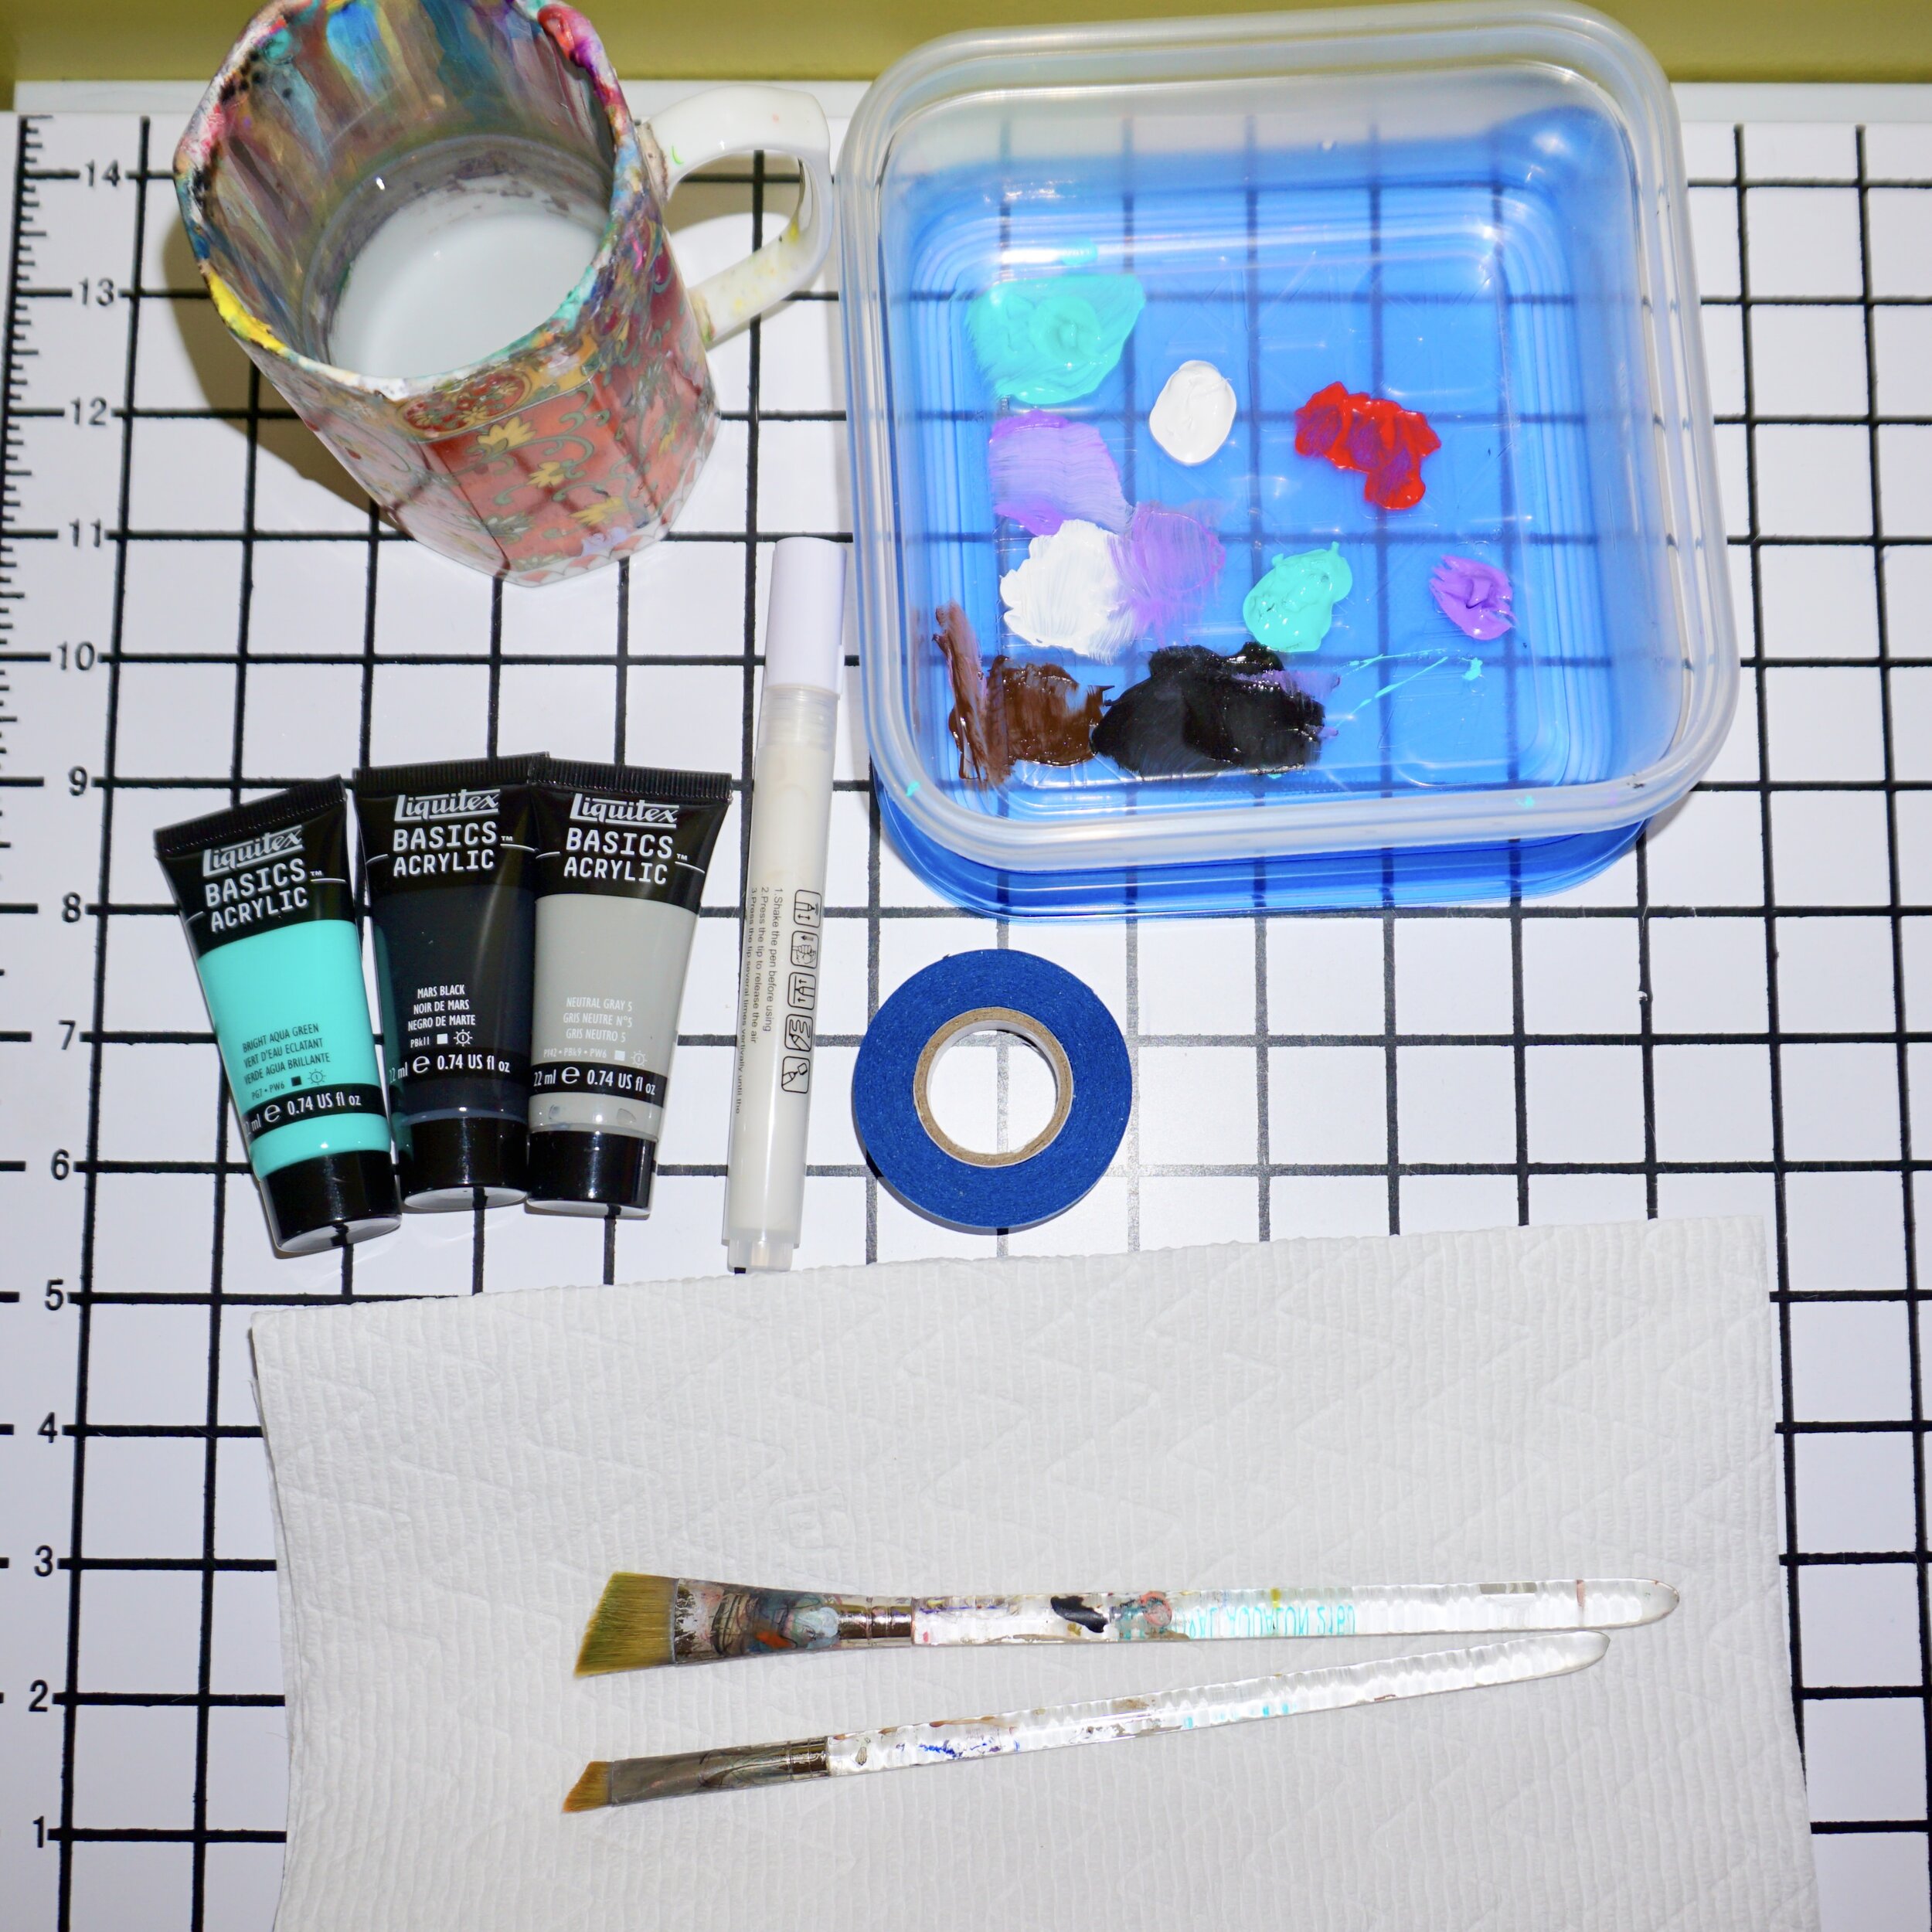
Materials:
one small pumpkin, the one I used is a Lakota variety
acrylic or craft paint in dark brown, sea foam green and opaque white
1-inch-wide paintbrush or foam brush and cup of water
removable artist tape
q tips
paint palette
paper towels
paper pad or wax paper to protect your work surface
Step 1: Dampen a paper towel and clean off the surface of the pumpkin, then blot dry.

Step 2: Apply artist tape around the pumpkin in a horizontal line, about one-third of the way down from the top. Next, apply a second row of tape about one quarter of an inch up from the first row of tape.

Step 3: Put smaller pieces of tape along the top indentations of the pumpkin, starting at the stem and stopping at the uppermost horizontal piece of tape. Be sure to press the edges of the tape down so that the paint doesn’t seep underneath for a crisp edge.
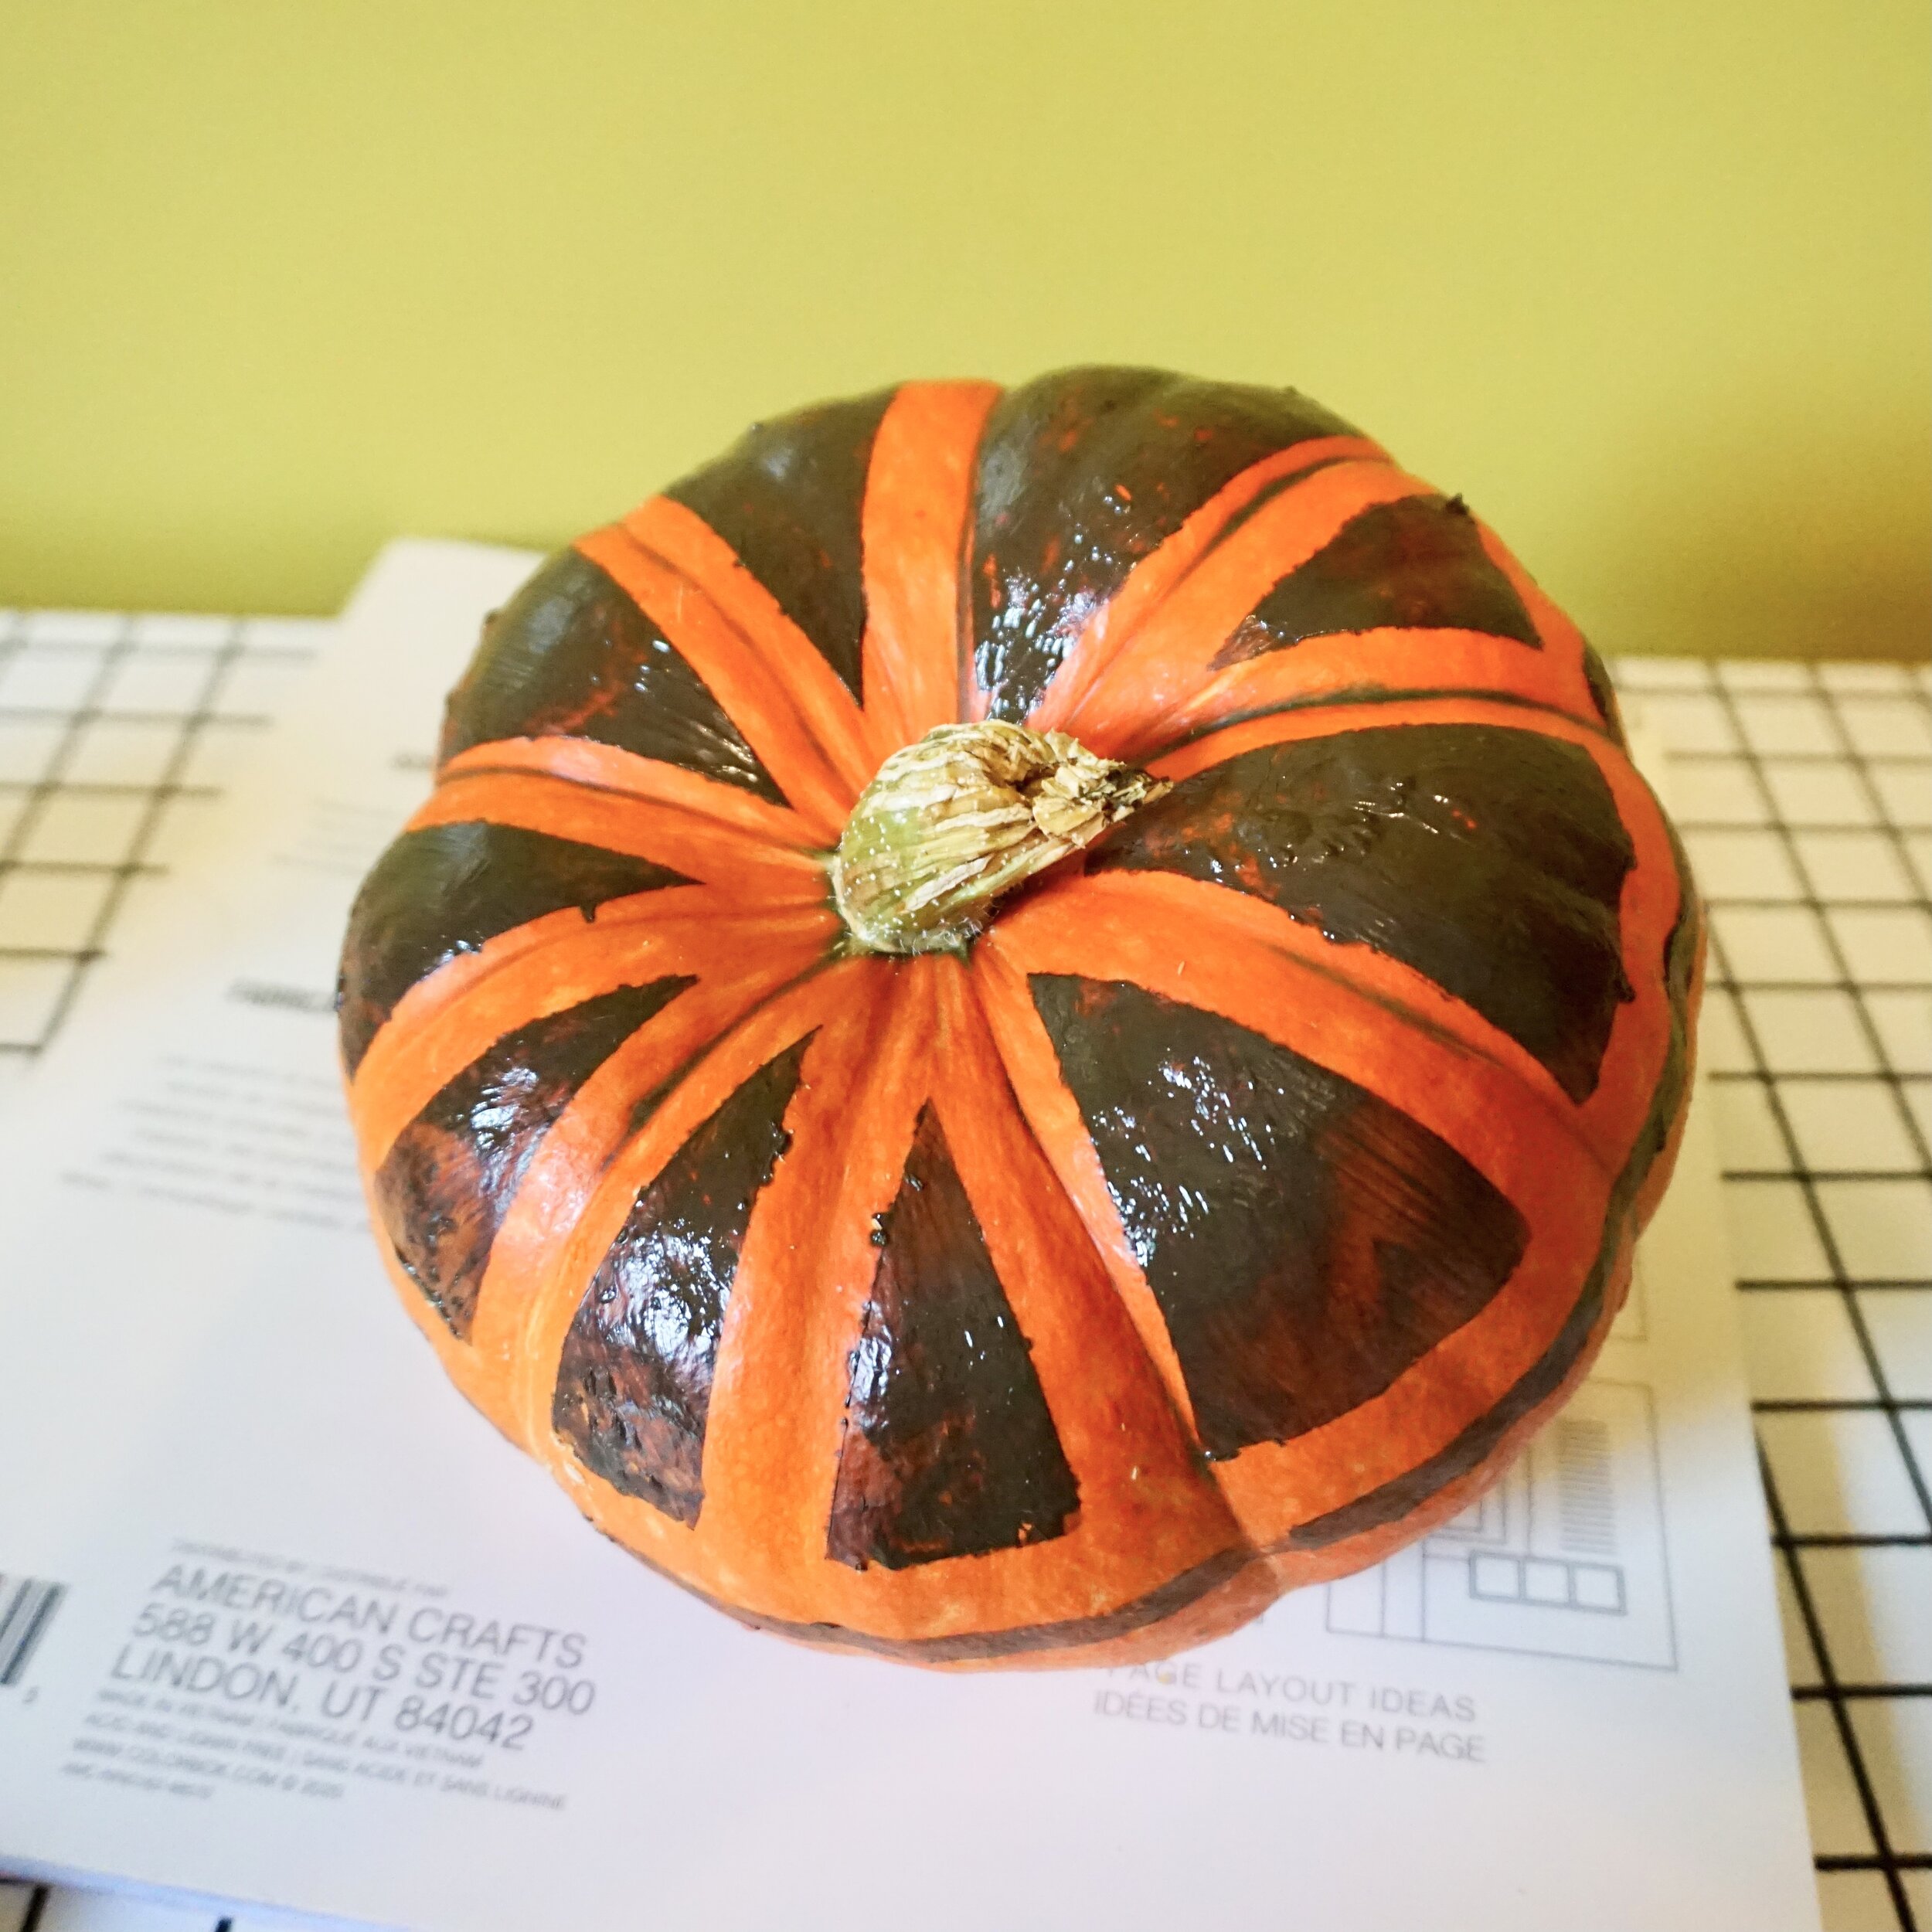
Step 4: Grab your paintbrush and dark brown paint. I went with traditional brown, but you could use purple, blue or green for a fun effect! Just make sure to choose a color that contrasts with your pumpkin.
Step 5: Dab the paint onto the open areas in between the tape, staying above the bottom paint line. Try to work quickly because acrylic paint dries quickly, and you want to remove the tape before the paint has dried. It is okay if the paint looks kind of splotchy, it will add to the overall effect of the design. Once you have the paint coat down, remove the tape carefully. Let the first coat dry.
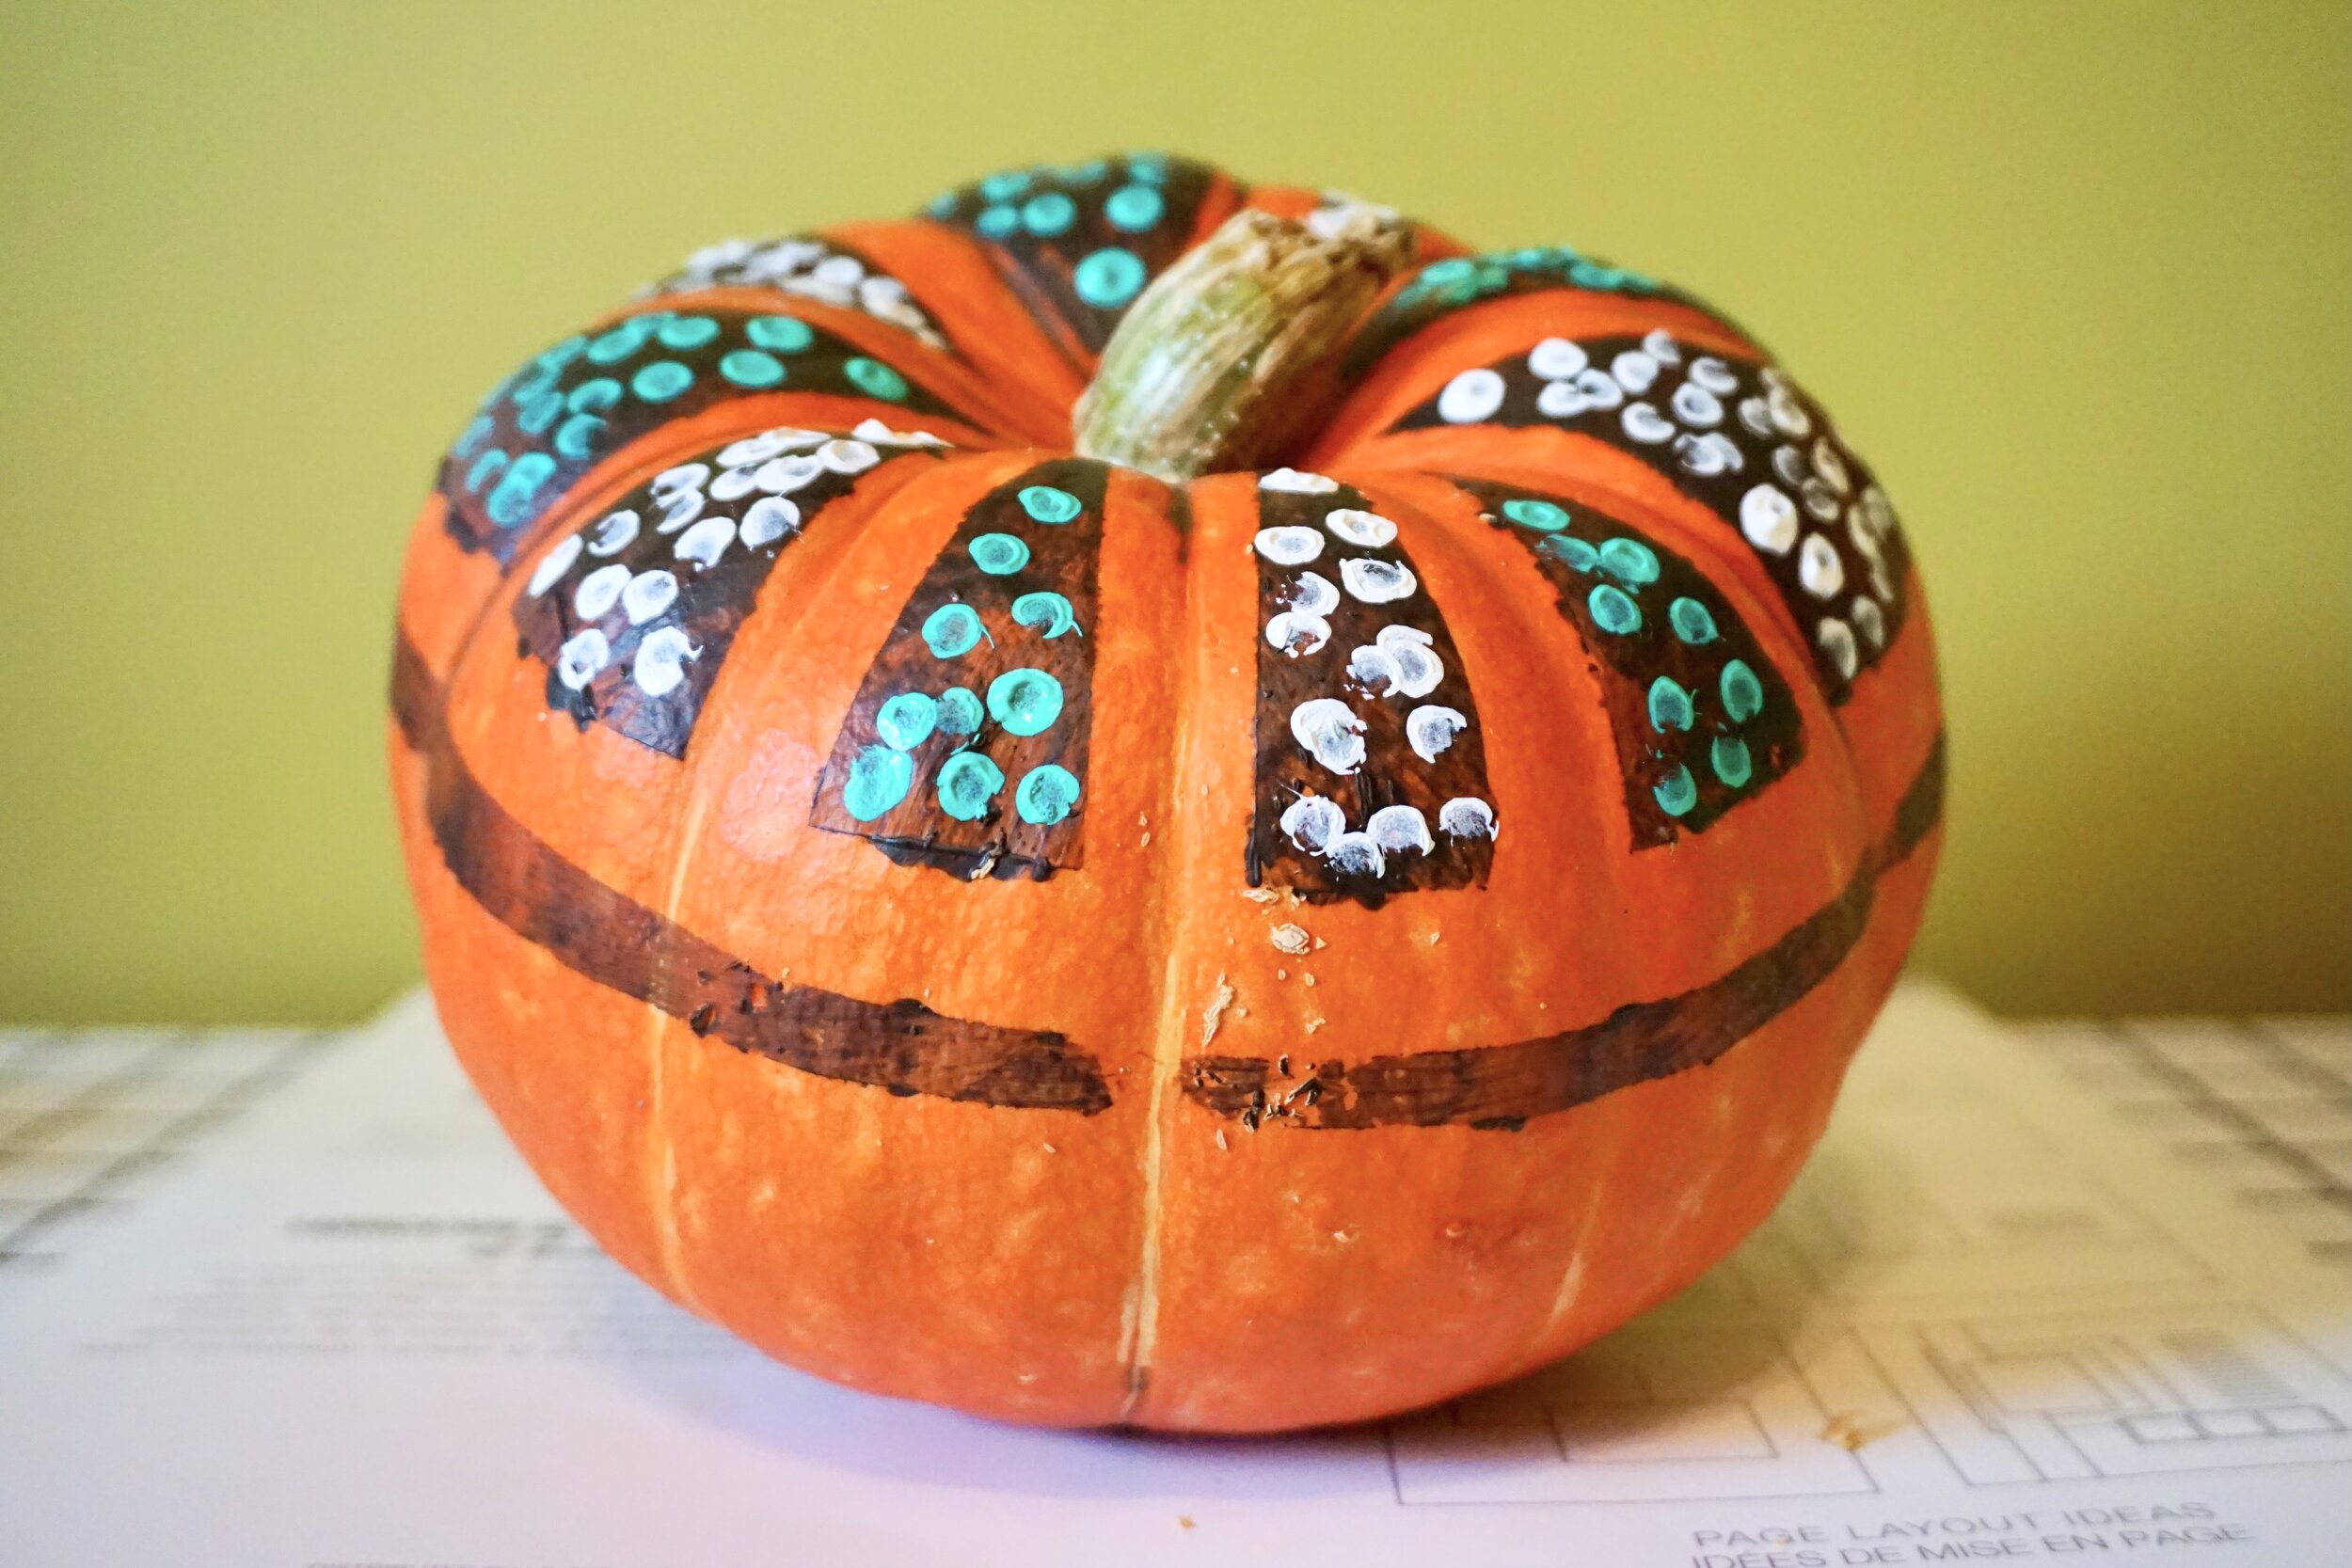
Step 6: Once dry, gather up two contrasting opaque paint colors and some q tips. I used an opaque white and sea foam green, but feel free to go with any colors that sound fun to you. If your paints are more translucent, simply mix with some opaque white which will help the paint color stand out against the dark brown.
Step 7: Using the end of a q tip, put dabs of paint onto the triangle shapes you painted near the top of the pumpkin. Overlap some of the edges of the dots for a laid-back look. I alternated the two colors for a pretty effect. Let dry and you are done!

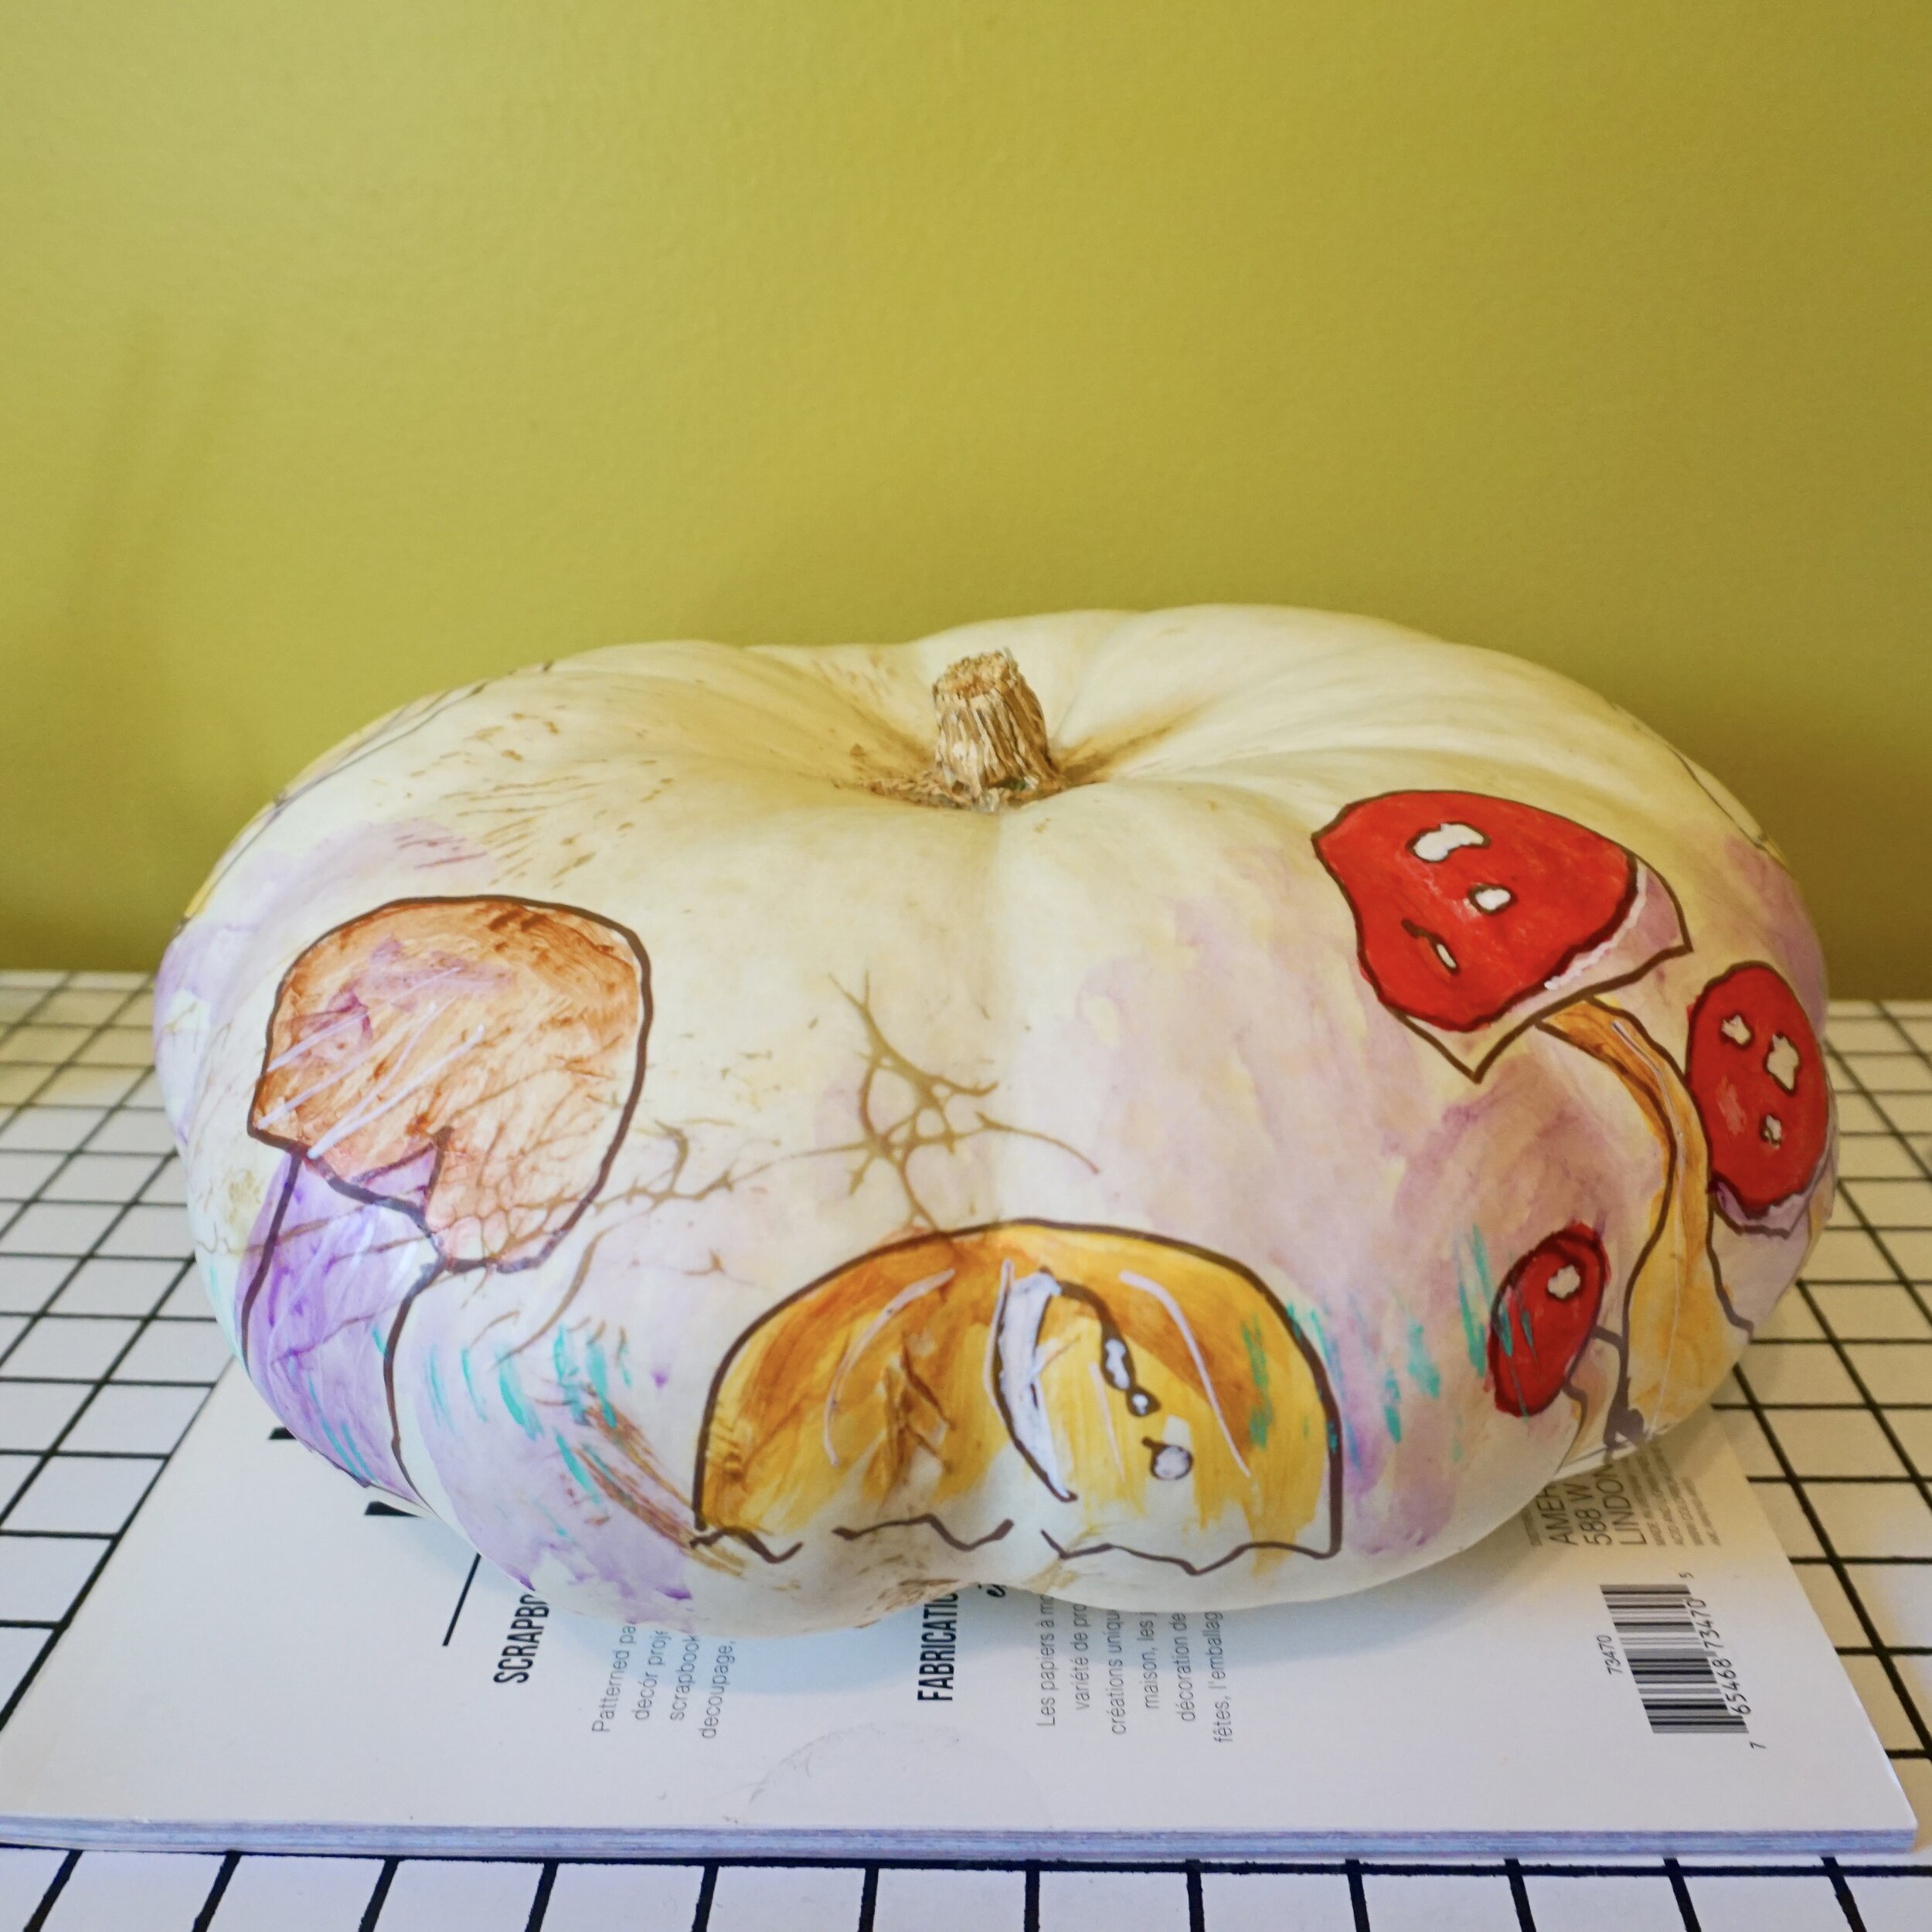
2. Woodland Mushrooms Pumpkin

Materials:
large white pumpkin
cup of water and paint brushes
white and brown acrylic paint markers
acrylic or craft paint in red, copper, dark brown, yellow ochre, sea foam green, raw sienna, white and purple
ponytail holders
small rectangle of thick cardboard
paint palette
paper towels
wax paper or paper pad to protect your work surface
Step 1: Dampen a paper towel and clean the pumpkin, blot dry.


Step 2: Grab a brown paint marker and draw the mushroom shapes around the pumpkin edges. I drew mine at mostly the same height, but you could vary the heights of the mushrooms for a pretty look. Let the marker dry before the next step.
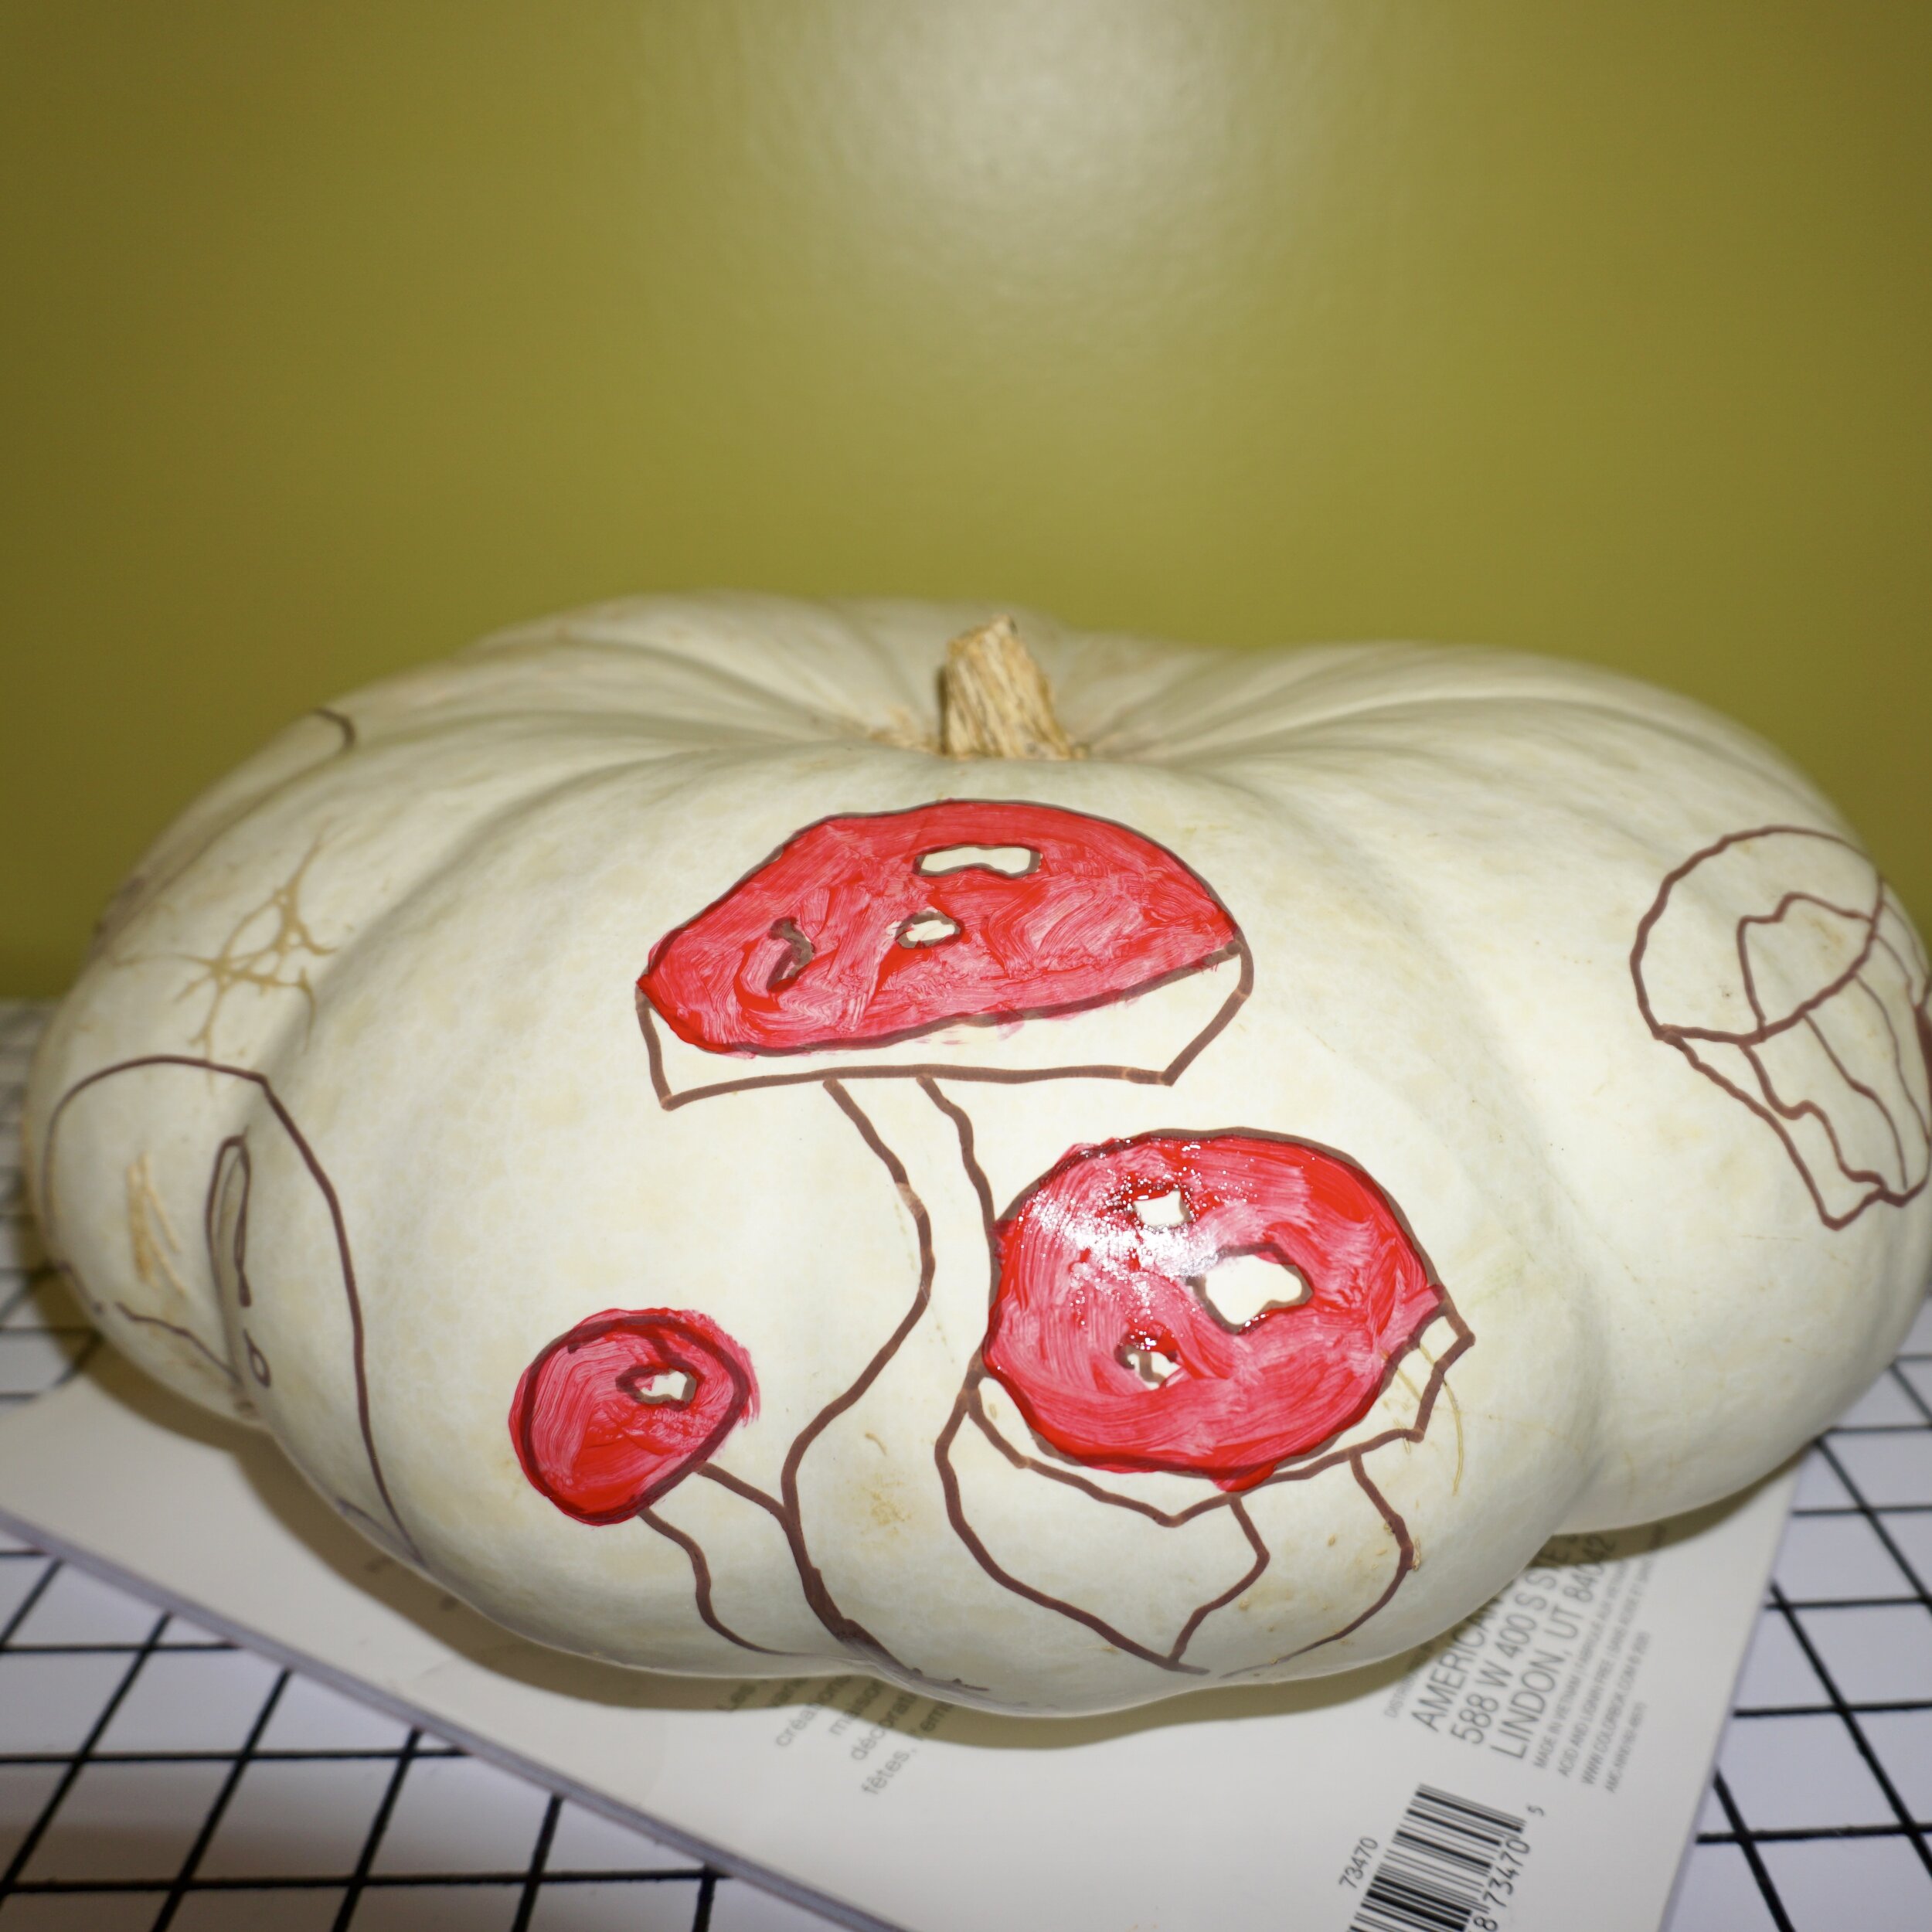
Step 3: Dip your brush in water and press it onto a paper towel to remove some of the water. Then paint the mushrooms, rinsing in between colors. For a sheer wash of color, put a dab of paint onto your brush and then dip it in the water. Gently blot the brush on the top edge of the cup, and then paint. Continue to dab the excess water off the paint brush in between colors throughout the painting process for a thicker coat of paint. You may want to do two coats of the red paint for a more saturated hue. If you go outside the lines that you drew, wet down the mistake while the paint is fresh and dab off the area with a paper towel.

Step 4: I used yellow ochre and copper for some of the mushrooms. Copper paint has a sparkly sheer look for a beautiful effect. For darker accents I used a deep purple. Add little smudges and accents within the mushroom shapes for a stunning intricate effect.
Step 5: Paint a sheer wash of purple in between the mushrooms for a cohesive look. Let everything dry at this point.
Step 6: As an additional element, add some artful grassy spots. Make a stamp by wrapping a few ponytail holders around the rectangle of cardboard. Arrange the rubber bands so that they lay flat on the side you will be using for a stamp. You can line the bands more straight up and down for a uniform look or put some to an angle.
Step 7: Dab some sea foam paint onto the rubber bands and then stamp in between the mushrooms. Overlap some of the stems for a pretty effect.

Step 8: To finish, grab your white paint marker and add some details. Outline some of the lines add accents to some of the mushrooms and stems. Let dry and you are done!

3. Moonlit Woods Pumpkin
Materials:
cup of water
paint palette
2 angled paintbrushes; one medium and one small
acrylic or craft paint in grey, black and sea foam green
white acrylic paint marker
removable artist tape
paper towels
Step One: Dampen a paper towel and clean off the pumpkin, blot dry.

Step Two: Choose the best side of the pumpkin to create your woodland scene. Pick a side that is mostly smooth with few imperfections. Apply horizontal lines of tape along the top and bottom of the pumpkin.

Step Three: Apply vertical lines of tape that extend slightly past the top and bottom horizontal lines. Vary the width between the lines and make some slightly angled. Smooth out the tape, pressing the lines down for a smooth paint edge.


Step Four: Using your medium paint brush, paint in between the tape lines. Load your brush with a lot of paint for a nice thick coat of color. Working quickly, rinse off the paint brush in between colors and blot the brush onto a paper towel so that the colors are saturated. When you are done painting, carefully and quickly remove the tape before the paint dries.

Step Five: When the tree trunks are completely dry, add some branches with the small angled brush. My branches are mostly straight and about one to two inches long. Starting with the lightest color, add a few branches. Then work your way through the darker colors. My branches are short, mostly straight lines to create a retro look. Less is more, try to only add one to three branches per tree.

Step Six: Once the branches are dry, add the moon. Use the inside of your roll of tape as a template or find another small circular object to trace. Grab the white paint marker and trace the template for a small circle. Then fill in the shape with dots and dabs of paint marker. Let dry and you are done!

