
This tree was part of my Craftsy pattern collection last year. Make a fabric tree for the holidays, or do one in your favorite colors for all year round! This is the perfect project for upcycling old linens or an old dress. You will need about three yards of fabric total.
Read More
Thrifty Holidays for When You are Broke
This post is probably not something you will see very often. But I wanted to write this, because a lot of people in the USA are struggling financially. It is totally cool to have a thrifty Christmas! Giving pre-loved items to others, or giving items you bought but never used is a great way to share what you have. It is also eco-friendly and an Earth conscious way to show people you care without dropping tons of money on stuff they might not even need. I have gifted items I bought for myself that didn’t work out. Some of them still had tags, and some didn’t!
One thing that is huge in my family is “regifting”. That is when you receive a gift, don’t like it, so you give it to someone else. I don’t think there is anything wrong with that. But be sure that the giver doesn’t find out! I have given my Mom many gifts, only to later see one of my sisters using the gift! And that kind of hurt a little bit. So be thoughtful with “regifting” and give and receive graciously.
Some items that are great for giving when you are broke are things like pre-loved books, art and craft supplies you bought but never got around to using for the makers in your life, candles from your collection if you have too many, handbags and fashion items you bought but then never wore, pre-loved jewelry, items like semi-precious stones from your collection, ornaments or other small decorative items.
Another idea is to just buy some jars, and fill them up with the necessary ingredients for a cookie recipe. Include the recipe with the jar. Or make some homemade granola and gift that! Christmas cookies with a card are pretty much always a welcome gift too, unless someone is on a diet.
Yet another idea is to get some small tins, and fill them with a vial of essential oil along with some small items that remind you of the recipients. You can prime the tin with gesso and paint it, or collage paper onto it.
In the past, I was especially thrifty with gifting. I’m not sure it was always appreciated, but I was working with a meager amount of money. Do small touches with the gifts, like include a bookmark with a pre-loved book, or add other little touches to the gift to make it more thoughtful.
Christmas is about sharing and caring, and when you give with love, it often doesn’t even matter what the gift is. Sometimes it is the thought that counts more than anything else!
Sewing for the Holidays
Anyone who sews will tell you how busy it gets when November rolls around! Because if you are anything like me, that often means the Christmas sewing begins! This year I’ve decided to sew a couple of gifts, and I’m making some gifts for my Mom to give to her friends. I also sewed a Christmas tree skirt for my Aunt a month or two ago! So I’ve been merrily creating a festive season for myself and others this year.
Christmas sewing can be really fun if you prepare ahead of time. And making gifts for friends can feel fun, save you lots of money, and you can be sure your gift will be original and well appreciated. This year, if I have time, I will also be making some Christmas decor for my home. Truthfully I’ve never had much by way of holiday decor, so it sounds fun to deck the halls and walls this year!

A work in progress for Christmas
Here’s a quick list of some ideas to make for the holidaze on the cheap! If you don’t feel like sewing gifts this year, consider supporting small shops on Etsy! There are so many great gift items available that have been thoughtfully created by makers everywhere.
A basic fleece blanket-There are sewn options and no sew options…I’m making one for a friend!
A simple wall quilt-You could even paint a wall quilt with acrylic paint for a no wash option, or get some fabric markers and paints to deck out a bit of fabric. Add a little applique, lace or small touch. Pop it in a frame, and you are good to go!
Sew some Christmas ornaments or other holiday decor.
Simple fabric baskets filled with some self care items like lotion and aromatherapy scents.
Make a wall pocket for storing smaller items.
Plushies for the kids, or grown ups who love collecting!
Pillows are a great gift for the home decor enthusiast, or you could even do a bedroom set for your child.
Make fashion accessories! Sew basic scarves with fabric squares or upcycled clothes. Or make some basic drawstring backpacks. These items are great for the fashionistas in your life!
Make emoticon pillows or other felt plushies. These are so easy to make, felt is really easy to work with because it doesn’t fray. Get creative with it!
Sew a pj set or sexy robe for your partner! Or embroider some bathroom towels with funny sayings on them. I did this one year and my husband and I got a huge laugh.

Basically the list is endless, and I hope some of these spark your imagination. Put some thought into what your recipients could use or what they already love! The best gifting advice I have is figure out what “they” like, instead of buying things “you” like. That way your gift will be super specific to the person you are giving it to.
Gifting is my love language, and I think that’s why I love Christmas so much! It can be a wonderful time to show someone how much you care. Happy gifting!!
Decorating Shenanigans!
My history with decorating is a sordid one…mostly because I’ve never been that into decorating at all! In college I had black curtains and scarves hung up on my windows. The curtains were a cut up sheet! In my college days I didn’t have money. And over the years I lived in squalor a lot of the time, so decorating was the furthest thing from my mind.
My Mom had always decorated in the house I grew up in. But that decor felt like it wasn’t meant to really be used or “lived in”, with adult spaces off limits to me and my sisters. After I got married, my husband and I had wealthy friends who lived in suburbia, and their home was immaculately decorated. I hated walking in to be overwhelmed by all the chemical perfume aromas and knick knacks that seemed trivial and meaningless.
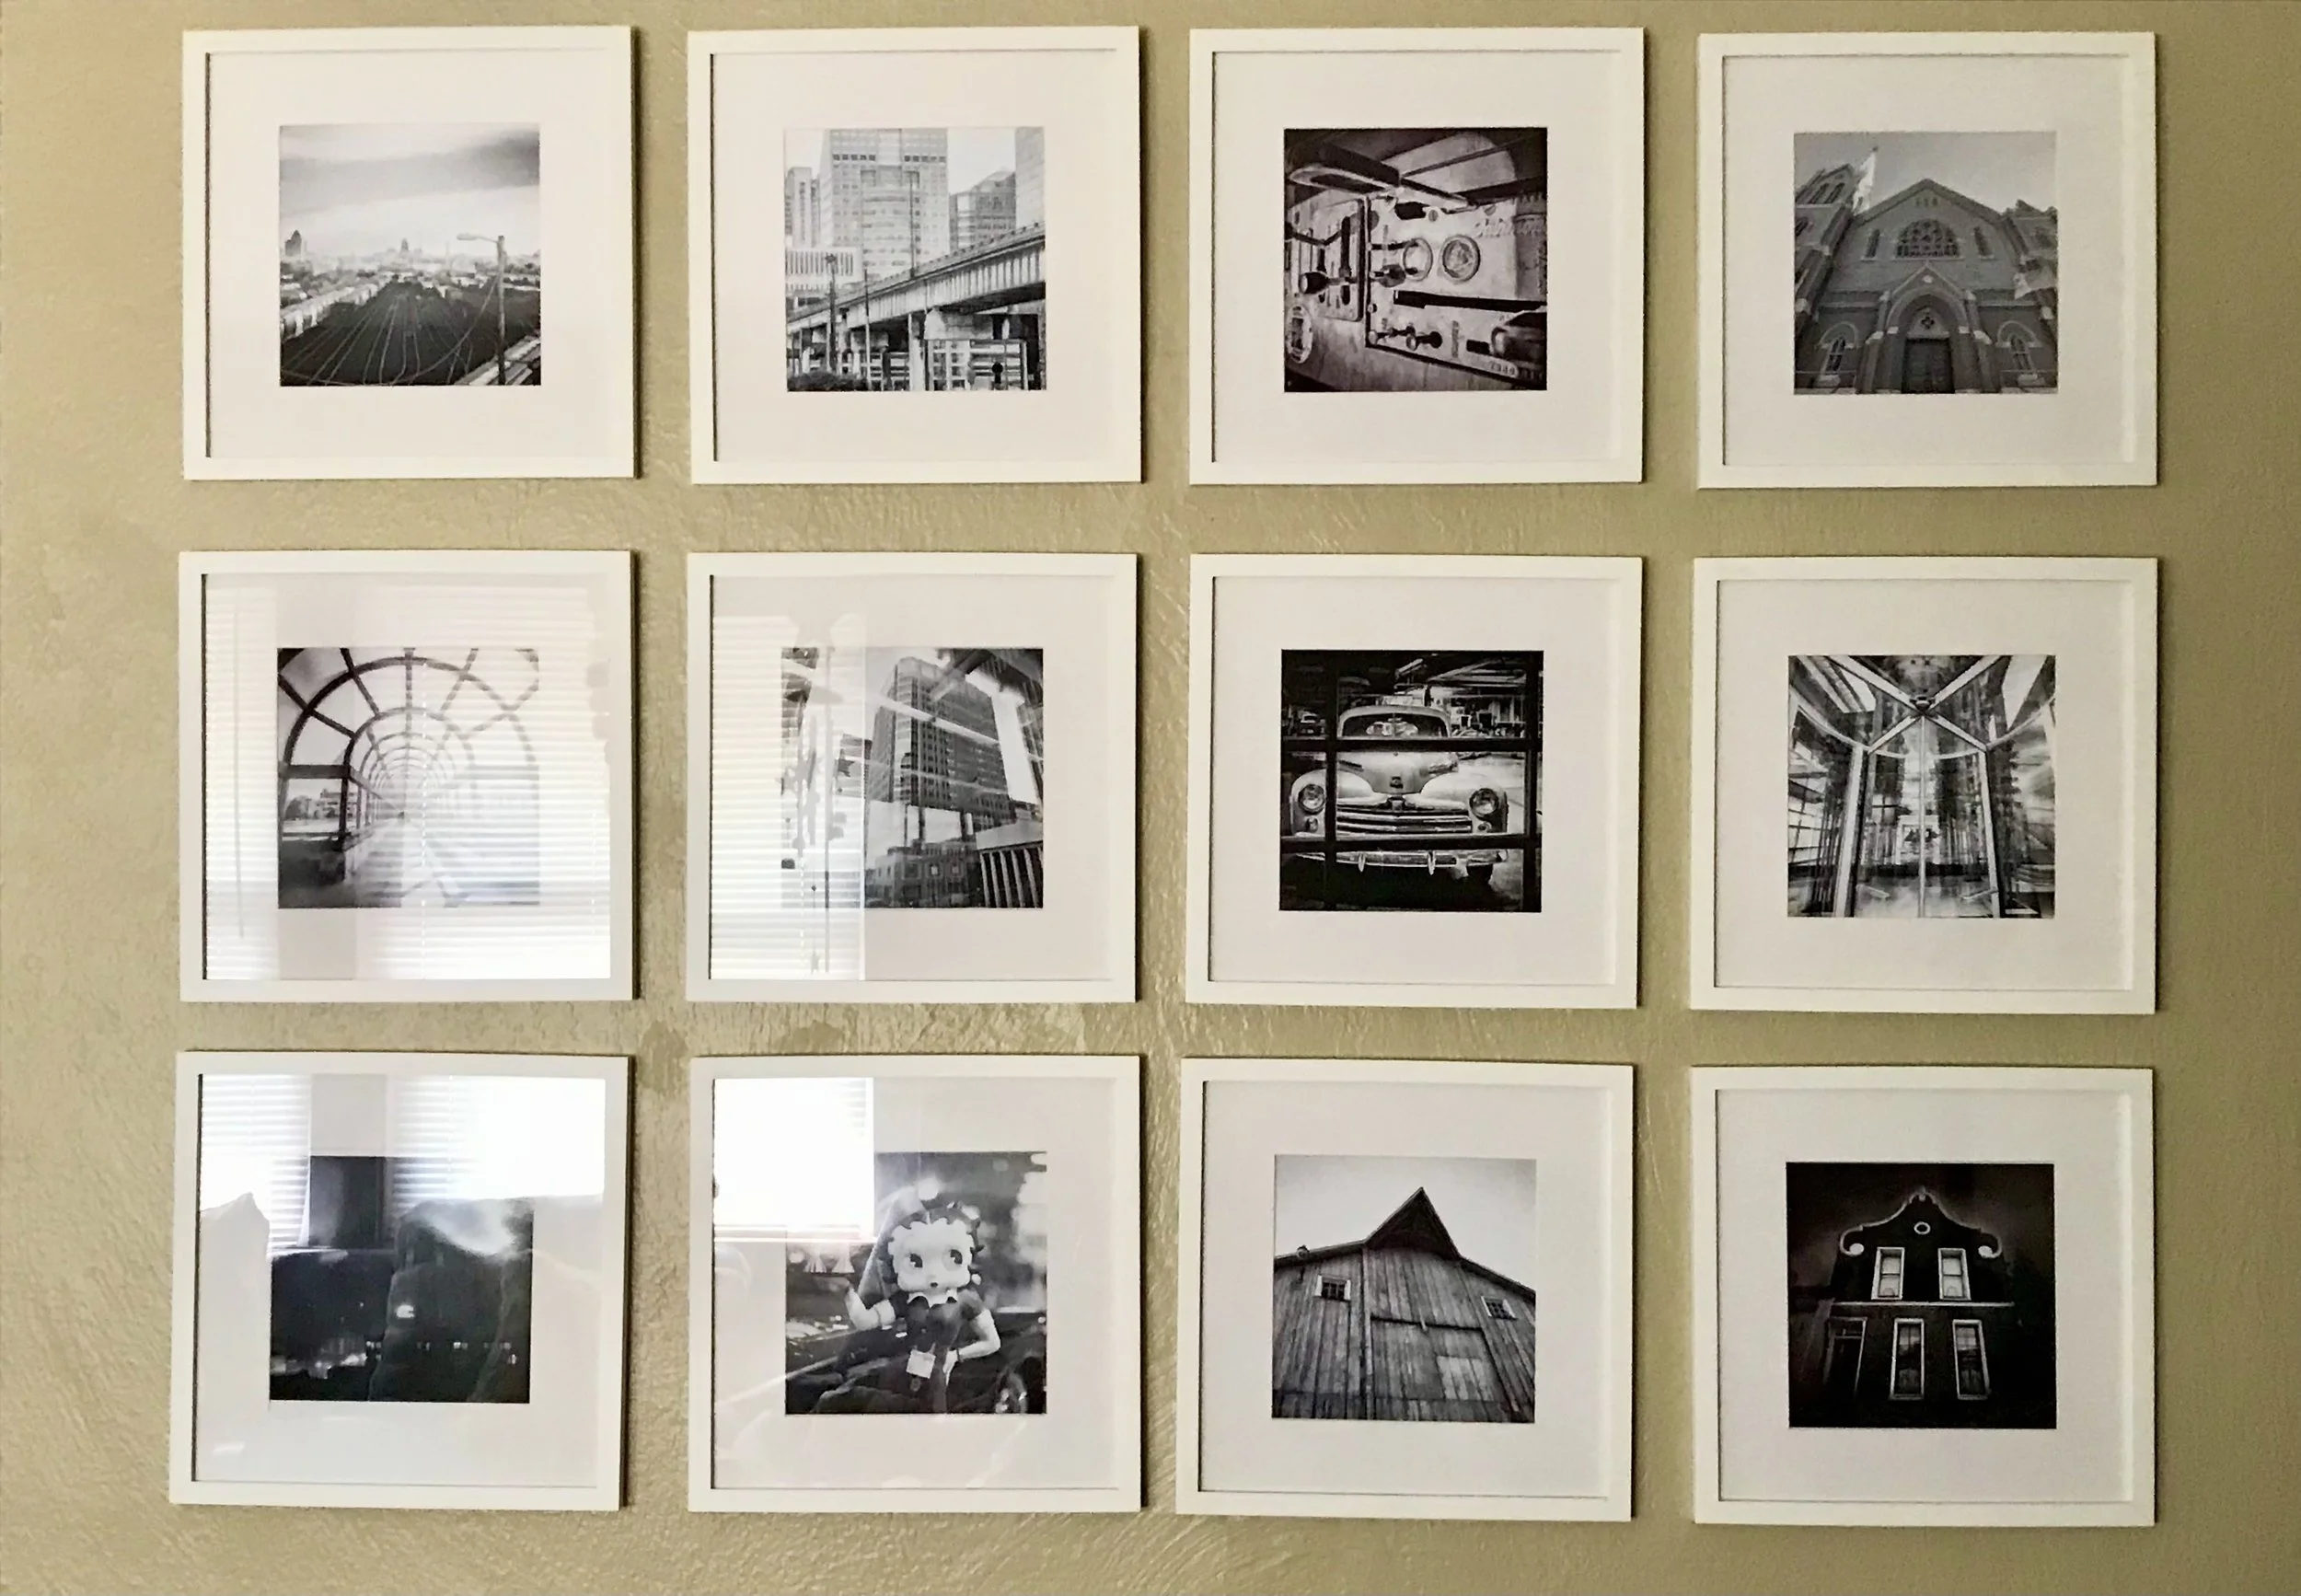
Our wall of photography, all shot by my husband! We used to do adventures around our city and neighboring countryside. This wall commemorates our adventures. We were together when he took each of these photos!
Decorating used to seem like it was something only for the women with picture perfect lives and lots of money! And I didn’t have either. When I started sewing, I started making my own soft furnishings like pillows and blankets. And that started to give my space something of a cozy warm vibe. I collected knick knacks slowly over the years, usually gifted to me. And I developed a love of collecting stuffed animals and Eighties dolls like Cabbage Patch Dolls and Care Bears…nostalgia from my youth.

My living room soon after my husband and I moved into our current home. The desk in the far corner is where I do all my art and spend much of my time! This room has changed some since we initially moved in.
I moved from rural Iowa to downtown Des Moines about eleven years ago. Before that all my furniture was hand me downs from my husband’s and my parents. When we moved we decided to just not have furniture, so we could start fresh. We dreamed of being able to buy our own pieces. And in time we bought our first couch! It was exciting, I still remember when we got it!

I displayed these tapestries in the sewing room right after I moved in. The elephant symbolizes family to me! I have since changed the decor in that space nearly a dozen times over the course of a few years.
I decorate the sewing room, because I have free reign in there. My husband likes to approve of things that go in the main areas of the house, and we have a different sensibility about what belongs in our spaces. I love color and art everywhere, and he loves more of a minimalist vibe. He bought me a bunch of picture frames to frame some of my artwork for the living room. Yet we still can’t agree on which of my thousand works to frame.

My home is a work in progress, and I love moving stuff around to see how I can shift the energy in the space.
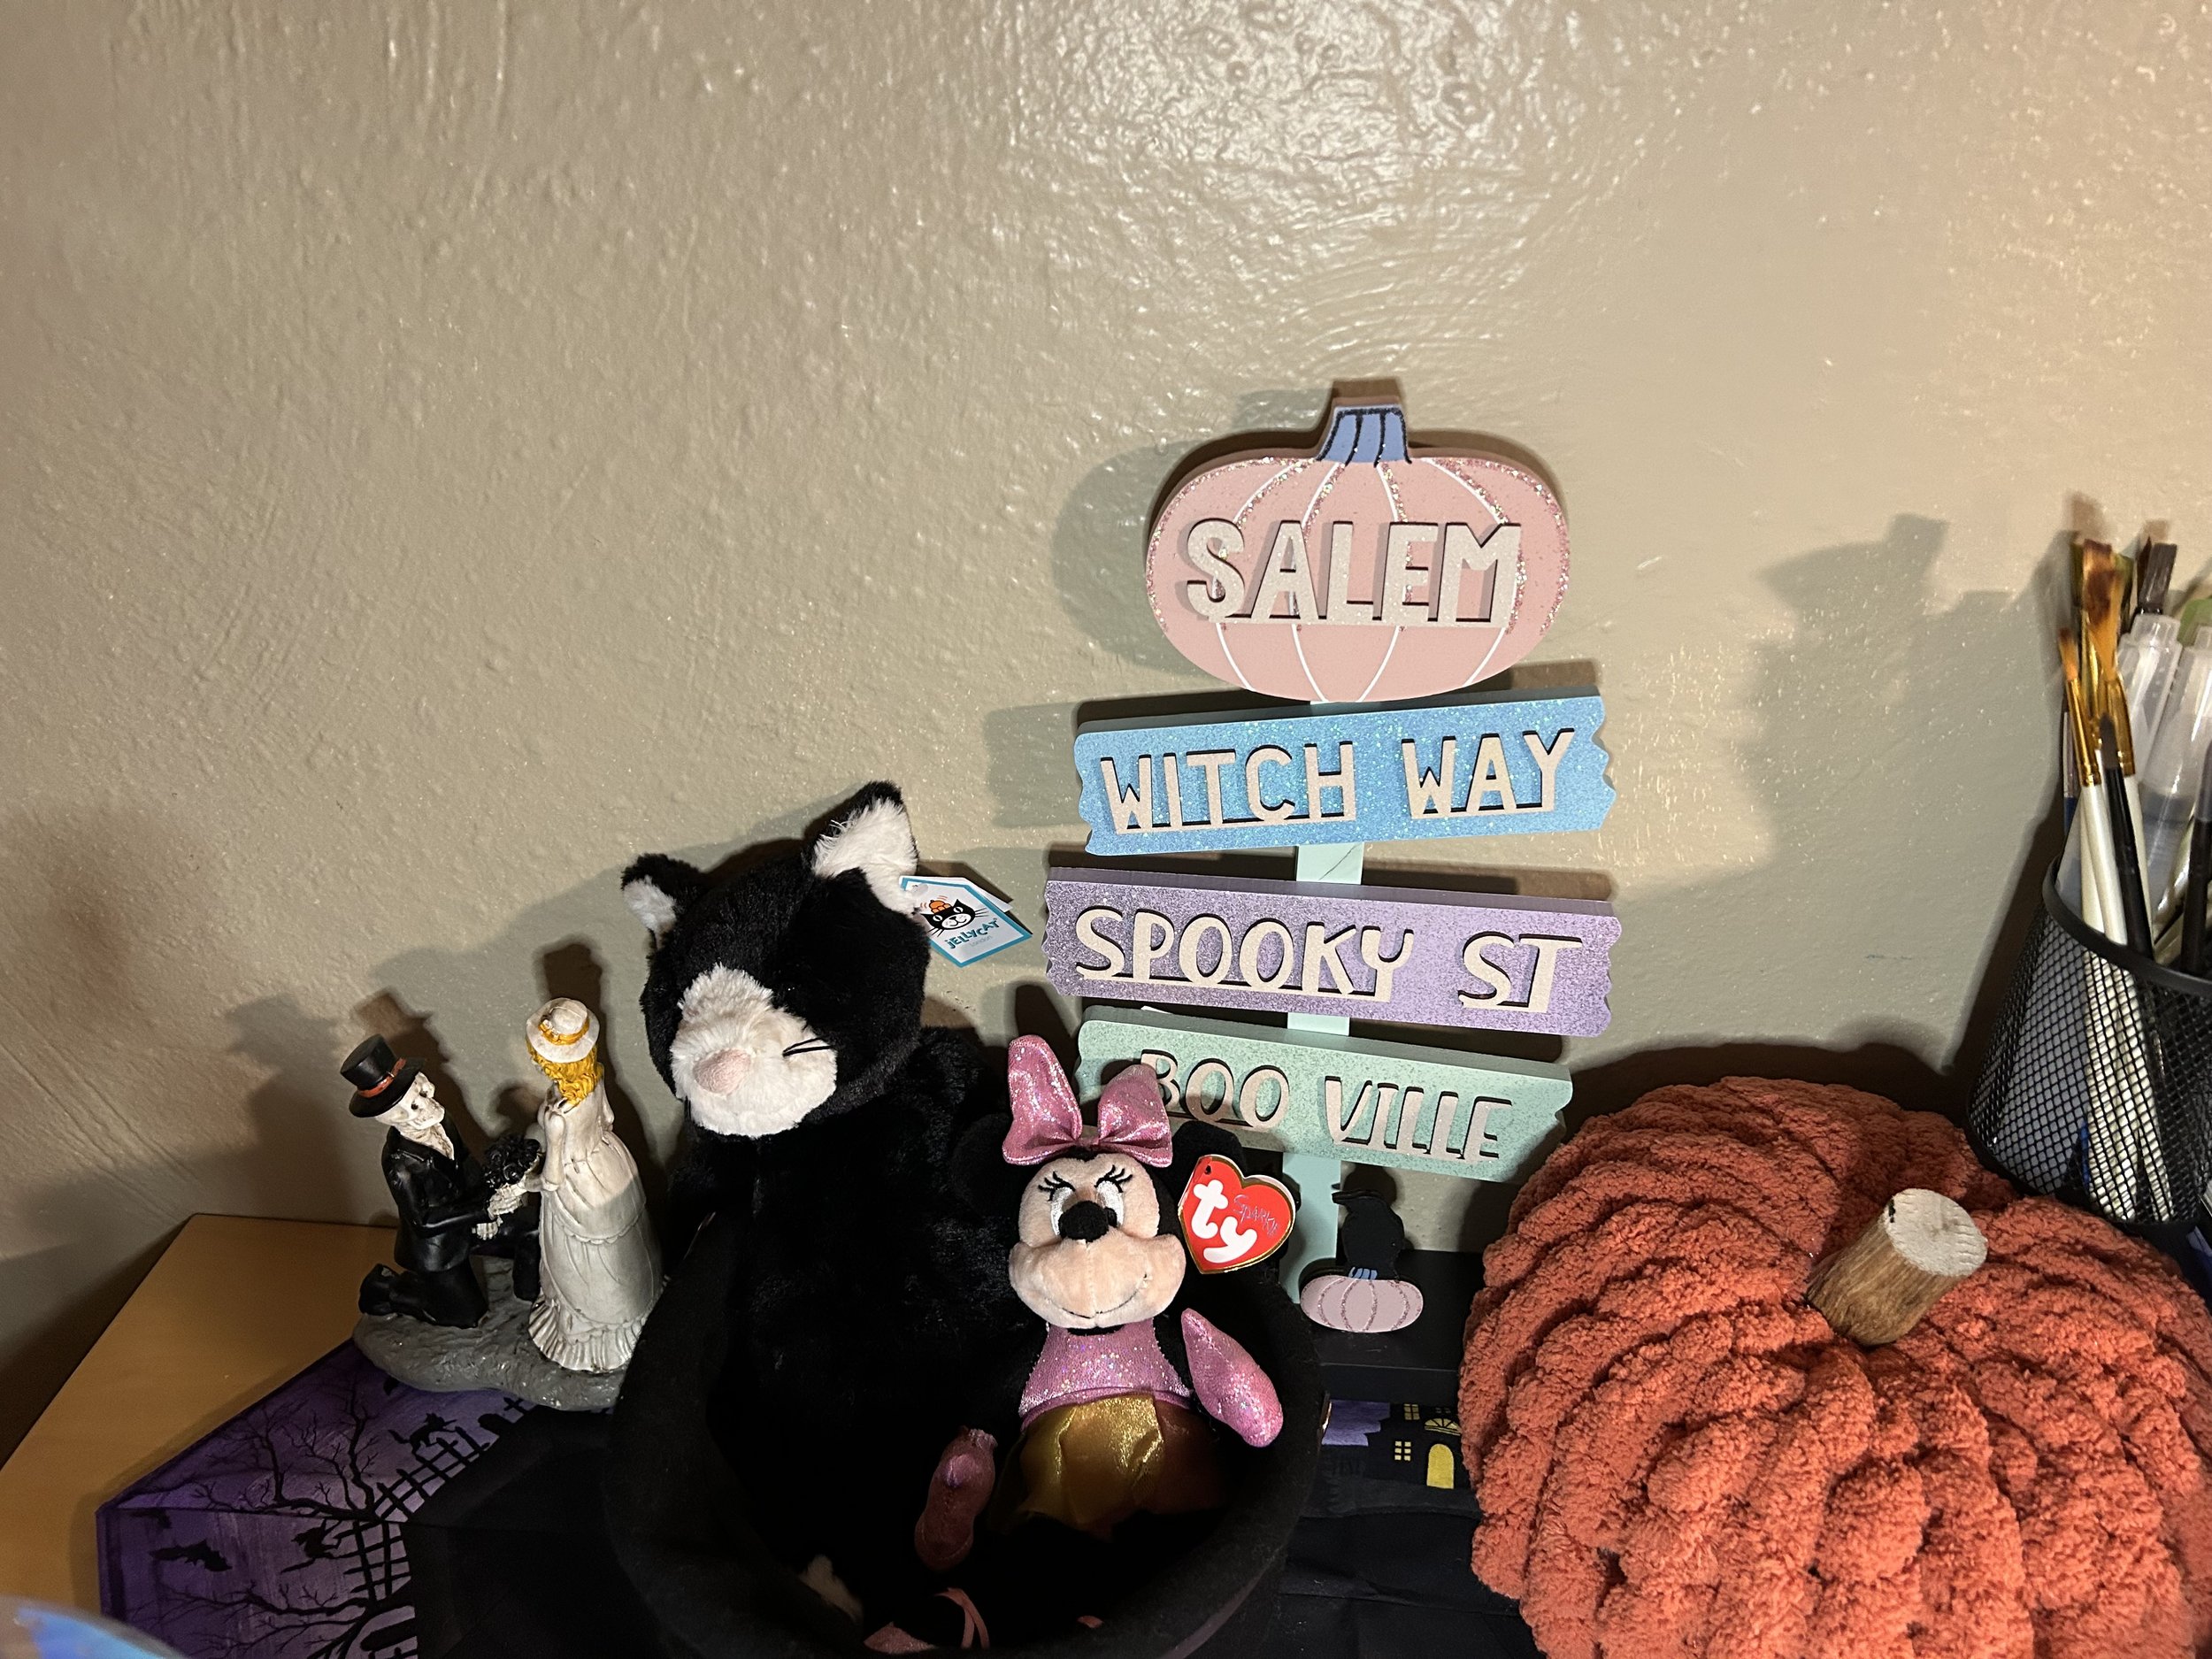
I’ve decked out my art table with some Halloween things that I got on a 70% off sale at Michaels right before Halloween, and I have a vision board on my art table. Somehow I’ve become really partial to Halloween because it is a low pressure holiday that is just meant for fun. I’m also creating some little spaces of joy here and there in nooks and crannies.
What does decorating mean to you? Are your spaces comfortable for you, or inviting to the people you share your spaces with at all? What could you do to make your space more functional or more of a soft place to land?

Taking Selfies to Figure Out Your Style
I’ve been trying to find my style, and seriously it has been challenging! When I look at my wardrobe, I see a lot of odds and ends that don’t really match each other. I see my typical home attire of jeans or yoga pants and t shirts, hoodies. But then I see nicer clothes that get pushed to the back of my closet for those times I want to look more put together.
There is absolutely nothing wrong with having a mix match wardrobe! I’m not the kind of person to scrap everything and create a capsule wardrobe of thirty pieces that look nearly identical. That just isn’t me, and it probably isn’t you either. Men can pull that off rather easily, however it is very feminine to mix up your look.
Photos are so revealing! You can learn a lot about how your clothes fit by taking selfies, along with learning what you love about your current wardrobe and what would be fun to change. This is also a great project to try before a date or job interview. It gives you the benefit of understanding how your clothes look, before you commit to an outfit.
Here is my method of taking selfies!
Find a spot in your home where you can close the door and be comfortable.
If you have a point and click camera, it should have a self-timer mode. Learn how to set that in your camera manual or online. The best setting on my own camera for selfies is the auto setting, which self-adjusts focus.
Place your camera across the room from you, ideally on a table or shelf with a small box or stack of books under it. Aim the camera toward the spot where you plan to stand. Then press the button, and a light should come on along with potentially a beeping sound. Give the camera a few seconds to auto focus before you step into frame. Then step in the frame and get the photo.
Lighting is important, but with today’s editing software it is easy to bump up the brightness, to a certain extent. Make sure there are overhead lights in the room you are in. I take photos day or night, and typically they turn out great as far as lighting goes. The key is to let the camera focus before you step into the frame. Use bright light, or daylight if possible.
5. The idea is not to take pics of yourself when you already know you look sloppy, lol! If an outfit makes you feel good, take a photo. Experiment with pairing different pieces from your closet together. Choose accessories or other fashion elements for your looks. Try to get photos of yourself in the clothes you wear the most, and what you wear for going out.
Selfies can really help you figure out what clothes make you feel the most confident in your wardrobe, and fine tune your look. You never know how clothes really look on you until you take a photo! The great thing about selfies is you can close the door and get in front of the camera without anyone else seeing you. It gives you privacy to play with your style. Once the photos are finished, go back through and look at them all! Take some notes about the things you like and what you wish were different. If there are certain pieces you want to stop wearing, do that! Bring in some things to make yourself confident and refined.

Reasons for Defining Your Personal Style
“Style is knowing who you are, what you want to say, and not giving a damn.” - Orson Wells
Lately I’ve been giving my own personal style a lot of thought! I’ve been researching personal style by way of books and even a class I’m taking. I signed up for a suite of classes hosted by Kimberly Wilson, author of “Hip, Tranquil Chic”. Truth is though, I’m taking what she says with a huge grain of salt. She only wears black, which seems like a “safe” way to dress. It doesn’t seem all that risk taking to just suit up in black clothes every day? I might have a bias though, because I love color! And I love experimenting with clothes, because it is just plain fun.
Here are my reasons for trying to define my personal style! I’m going to document my process on the blog, with hopes that someone out there might be grappling with some of the same questions.
I am tired of wasting money on clothes that don’t work. It might seem cute on a model online, but once a lot of items get home and I actually try them on, many pieces just flat out either don’t fit right, are uncomfortable or wind up going unused. Also, clothes have gotten way more expensive! And I already have plenty of clothes, I don’t need anything from a store.
I have too many clothes. And I know the quick answer is to just donate everything extra, or give it away. Even though thrift stores are a great step in helping reduce the impacts of fast fashion, I don’t think they quite go far enough. Because really, even thrifting encourages the cycle of production. If you think about it, the more people buy, the more businesses create. I just want to buy less clothes in general. I am interested in thrifting, but I don’t rush it. Typically clothes sit for an entire year unworn in my closet before I thrift those pieces, just to be sure I won’t wear or alter them in the future.
It is hard to take care of a huge wardrobe. I have about ten loads of laundry to wash on any given week. So a lot of it doesn’t get done often enough. I’m looking to streamline down to just what I need to get through a week and a half, and then upcycle or sell the rest. I will not be throwing pieces away though, because storing some back up clothes is always a good idea. That way, I won’t have to buy anything for a long time to come.
I’m going through a transitional time. Now that I’m 45, I’ve been reassessing my wardrobe. But not quite in the way you might think! I just want to rock my upcycled clothes on a more regular basis. A lot of women get to 45 and want to dress more matronly, but that isn’t my intention. I’m not actually trying to “dress my age” at all. I more want to express myself with clothes more of the time. Life has transitions; age related, work related or otherwise. Those are great times to redefine your style!
I want my clothes to make me feel more confident. You know that feeling you get when you are wearing something that makes you put your best self forward? I want that feeling more of the time.
Those are my main reasons for defining my personal style! You probably have some good reasons of your own to add to the list. You just know when it’s time to redefine your personal style. Especially when you open your closet and can’t find anything you want to wear. I’ve got more posts coming soon on this topic so be on the lookout!

Ideas for Sewing with Bandanas
in Sewing
I purchased two packs of bandanas on Amazon two years ago, hoping to wear them as head coverings. One pack was made with a polyester fabric, which is super slick and doesn’t breathe. The other was just a bit too small. So the packs of bandanas have been in one of my bins in the sewing room, taunting me, beckoning me, playing with my head! After they played with my emotions for a while, I finally decided enough is enough! I set out to use up those bandanas, and came up with some clothes I’m excited to wear this fall.
The great thing about bandana packs is they come in sets with an assortment of colors. They aren’t usually safe to iron though, and the fabric can be somewhat questionable because they are cheap. Another peculiar thing is they are often slightly off in size. And the fabric is typically really thin, which can pose some challenges while sewing. Just be sure to use a solid zig zag stitch on the edges so the bandanas don’t fray if you decide to trim to a raw edge.
If you love bandanas like I do, or even just need some fresh inspiration, here are some ideas for sewing with bandanas! They are seventies chic, and oh so cool! Some of these would even make great gift ideas for the holidaze coming up.
Decorate with ‘em! You could deck out a living room or bedroom on the cheap. Think bandana curtains, a little bandana blanket, bandana pillows. You could drop twenty bucks on bandanas and add some of your own materials and completely redo a room for pennies!
Sew a bag or backpack! Fall is perfect for hikes in the woods, and campfires. If you want a Pinterest-worthy fall bag, look no further than a bandana bag.
Use bandanas to sew all kinds of clothes! Bell bottoms, skirts, tops. One thing to remember is bandanas are often pretty thin, so you might have to line the clothing to make the fabric more substantial.
Make eco items with them. Reusable shopping tote bags, handkerchiefs, etc.
Cover a notebook or journal, or use in a junk journaling project.
Do a bathroom makeover, and trim towels and a bath rug with bandanas!
Sew a bunch together to create a quilt for your bed. Just sew a patchwork of bandanas together, and then line with faux fur fabric with a couple of layers of batting in between for a super plush quilt.
Wrap gifts with bandanas for the holidaze.
Last but certainly not least, rock them as a head wrap! If you haven’t tried this at least once, you haven’t really lived! LOL!
The list is really endless. Bandanas are like precut squares, but I love the way they look because they are so reminiscent of Seventies style. They are fun to create with because you can use them as is and whip up all kinds of things really fast. I hope this post inspires you to get sewing! I’m getting back in the sewing room to dream up a way to use the rest of my bandanas.

Epolstyle on Etsy
It is not every day that I come across a store that blows my mind….but for the last two months I’ve wanted a dress! Not just any old dress, but a dress that stands for my values…a dress where I can wear my heart on my sleeve.

upcycled dress by epolstyle on etsy
I asked April of Epolstyle a few questions about her makes. I wanted to understand how she got her start, and learn more about her design process. When you see her designs they make you just feel good! What is the secret sauce that goes into that design?
April Marie said, “When I was 12, I wanted to go to a dance. My mom couldn’t afford to get me a dress, and I decided to make my own. I grabbed one of her button up tops and began to rework it until I had my dress. Sewn by hand. I was teased of course, because handmade was not the cool thing, but I didn’t care. I loved it. From then on, I just did my own thing.”
“When I first really began to create for the public, it was patchwork skirts and bags…. Slowly expanding…. My emotions inspire most of my more elaborate designs. Usually sorrow. It sounds funny, but out of the ashes comes a Phoenix! I inspire easily. A funny hat, or a character in a movie…. I would love to change the way the industry views the size gaps. I began intertwining my sizes to fit multiple bodies. As someone who has fluctuated in weight my entire life, it is sad To find a piece I love, and can’t wear because it is Ill fitted or not intended for my body. No matter what my size is at that time. My goal has always been to blow up those lines, and make my pieces to fit all the bodies that love them!”
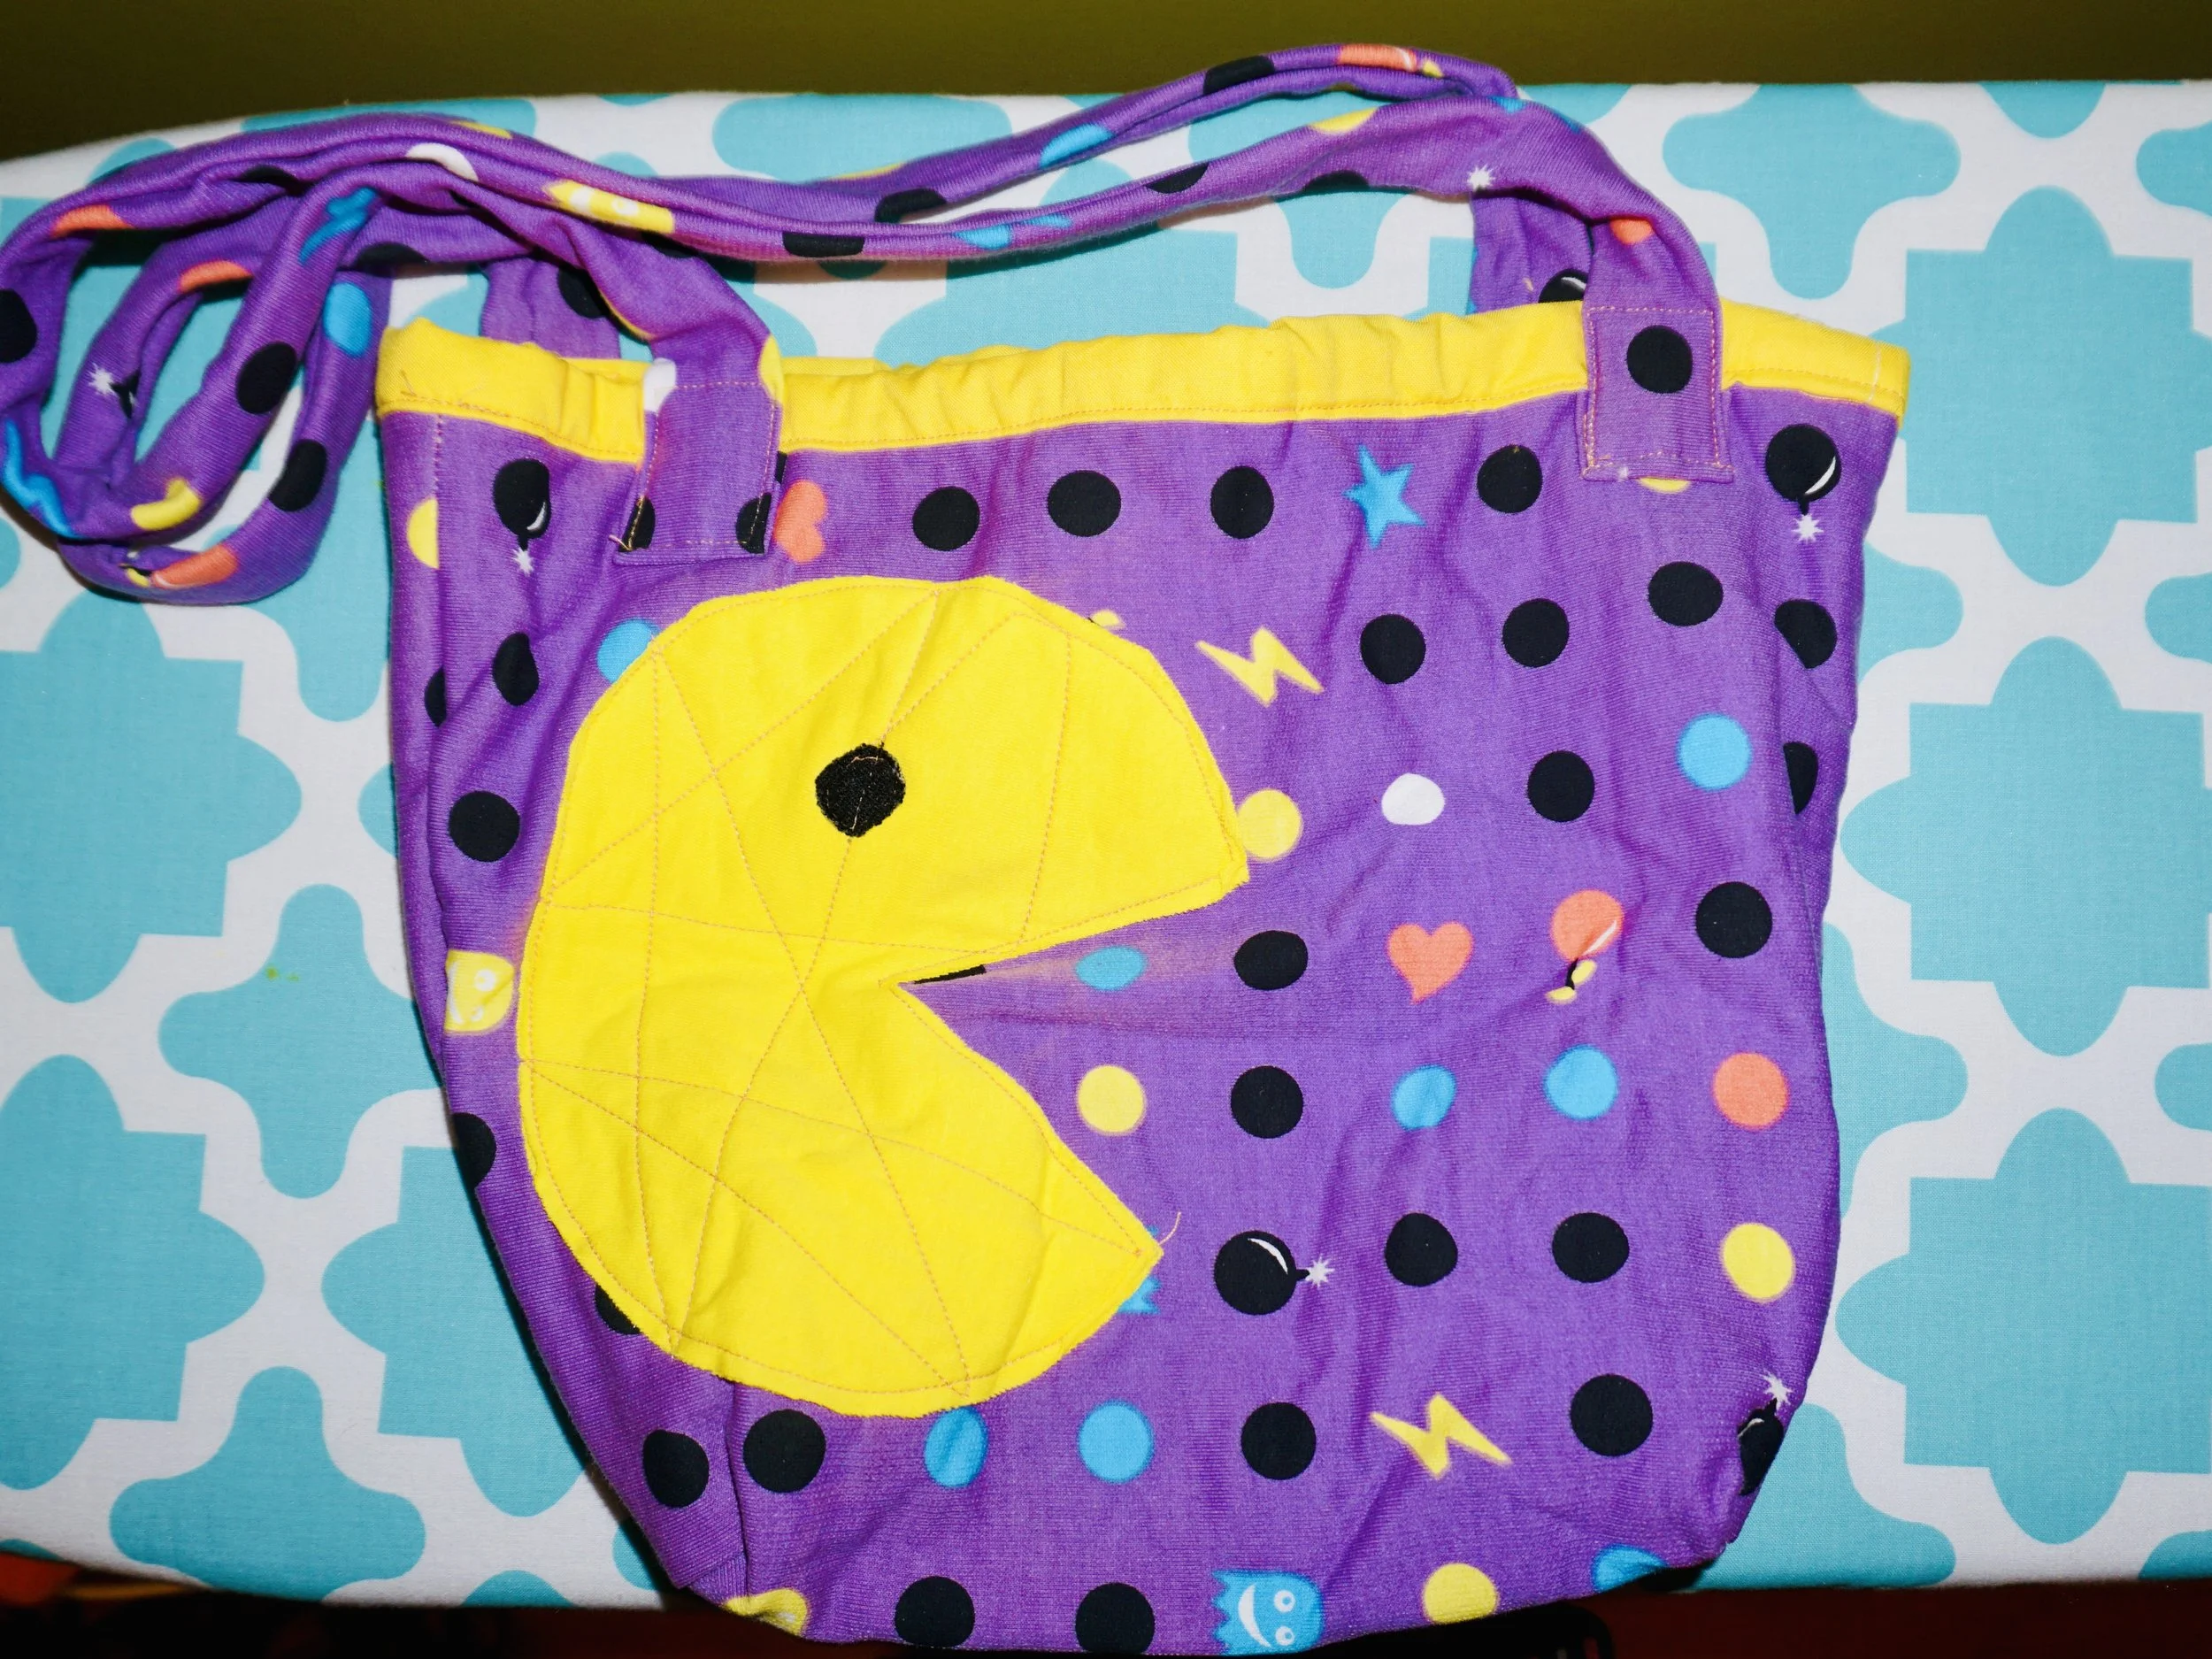
Pacman bag by Epolstyle on Etsy
What I love most about April’s makes, is that she isn’t afraid to have fun with her designs! Each piece is carefully crafted to be comfortable, colorful and out of this world! Epolstyle has an Instagram and Facebook! Follow her to stay in the know about new releases, updates, sales and more!

"The Re:fashion Wardrobe" by Portia Lawrie
in Book Club
Alright…so I think I have been living under a rock for the past few years! Because I kept searching for upcycling books and not finding what I was looking for. Once I changed my search to “sew clothes”, it opened up a doorway to a bunch of incredible books!
This gem of a book, “The Re:fashion Wardrobe”, is a great book for women who want to take pieces in or who have lost weight. You know when you lose a bunch of weight and suddenly all your clothes are too big? or do you have a bunch of men’s oversized items to alter? If you have either of those quandries…this book is perfect for you!
There are lots of projects for working with oversized men’s button down shirts. And for altering jeans and pants. The projects in the book are polished and preppy! Think uber stylish woman who lives in a swanky loft downtown kind of swanky! Or for the woman who loves a streamlined capsule wardrobe with basic colors and finely crafted fitted pieces.
My favorite part of the entire book is the intro about the clothing waste cycle. The author puts a huge emphasis on the carbon footprint of clothes. Which are lessons we can all stand to really learn more about and take to heart.
So, yeah, I recommend this book! The projects look very achievable and you will come away with a whole new skillset on custom tailoring your clothes!

Kawaii Sweatshirt Dress by Kathryn Sturges
Sew a Kawaii Sweatshirt Dress
Alright!! The day has arrived! This sweatshirt has been hanging up in my closet for over two years now! I only wore it a couple of times, but the fit was not my favorite. So it was set aside to upcycle some day…you know how it goes. If you upcycle clothes, you understand the shift from the main wardrobe to the upcycle pile! The sweatshirt taunted me for years, because it wanted to become fabulous!
This project took slightly longer than I originally thought it would. I started it about three weeks ago, but then kept pausing to dream up the next steps. I could have stopped a week ago because the upcycle reached a point of edgy cool that was even better than expected. But I wanted to go all the way with this one, and add a slight steampunk twist!
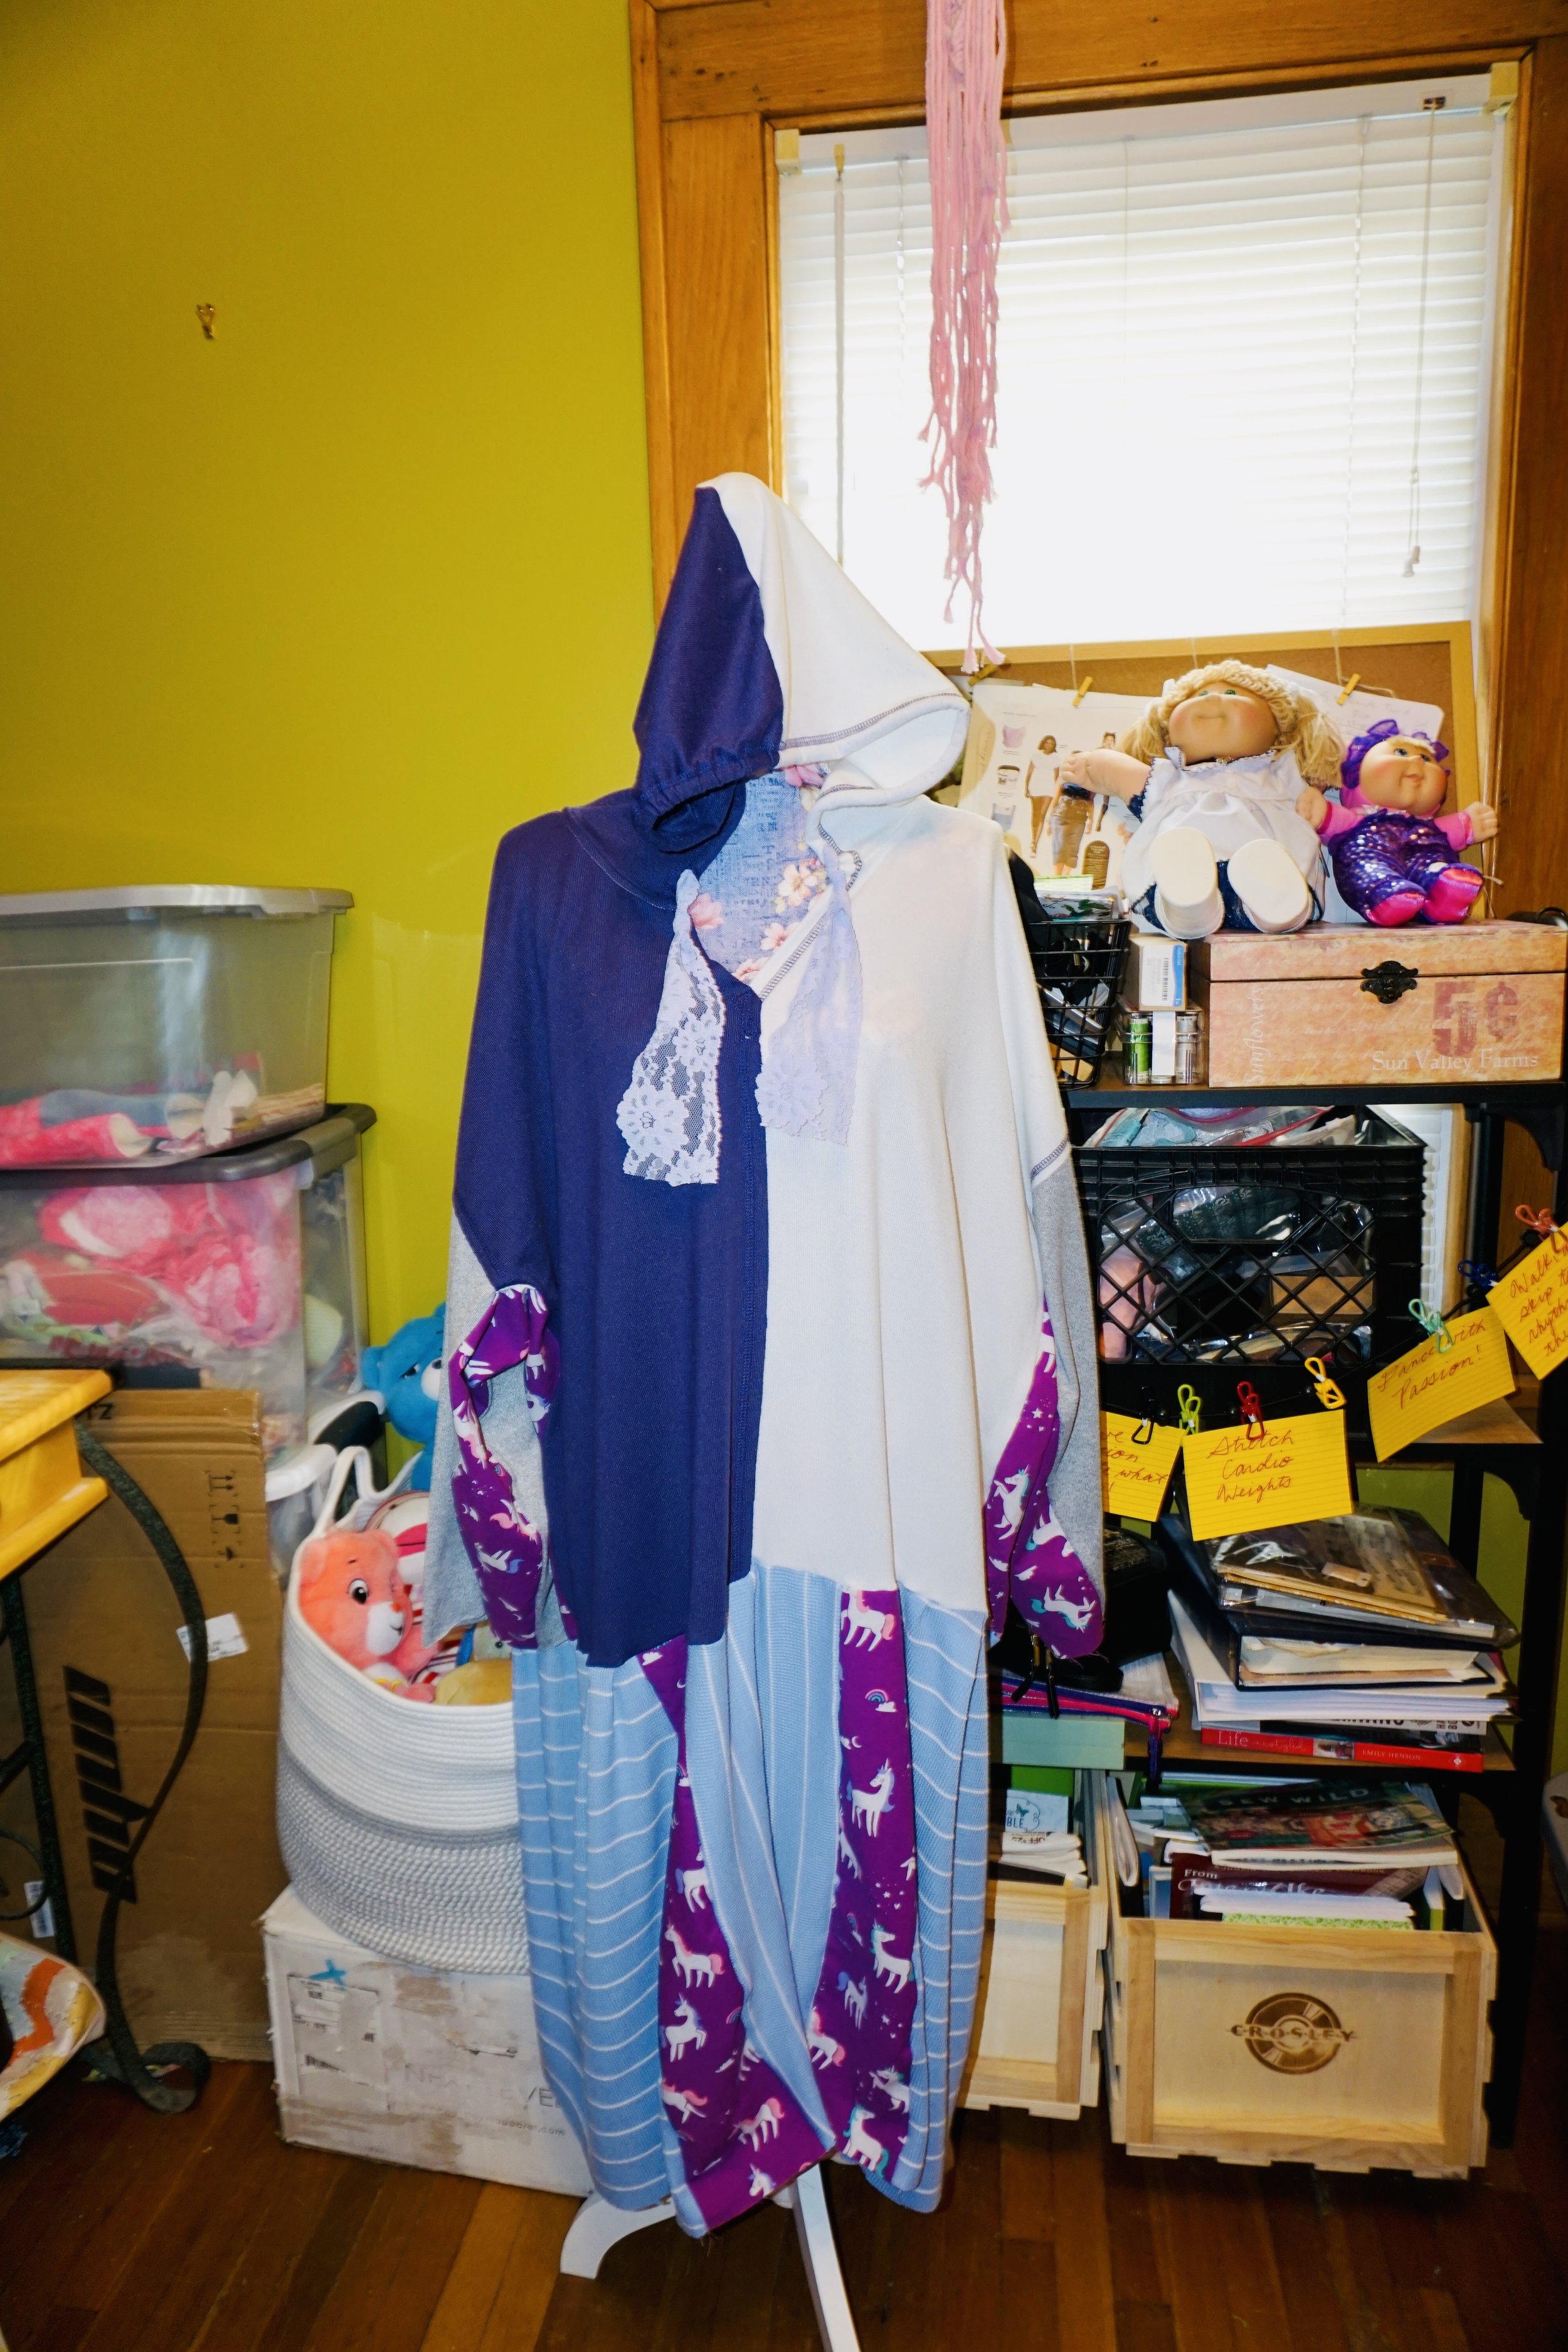
Kawaii Sweatshirt Dress Phase One: by Kathryn Sturges
I went for an analogous color palette on this one, with different shade of purple with white accents. You choose whatever colors you love, or that match your base sweatshirt. Always shop your own materials first. And audition fabrics by laying them against the sweatshirt till you love what you see. Go goth with black and shades of grey, or choose tones that match the sweatshirt. Or shoot for the rainbow and do an assortment of colors! You could also add appliques on the sweatshirt, for a super cute look! I added a pocket, and love how it looks.
If you want this to be Kawaii, think mega cute. Heart prints, stars, etc. I went with a Lisa Frank inspired unicorn print that I got in an epic destash from Etsy. Both fabrics and trim I used for this project were bought second hand.
Materials:
An old sweatshirt (or two)
A yard or two of stretch knit fabric
One yard of coordinating quilting cotton fabric with cute prints
lace
basic sewing kit

Choose an old sweatshirt to start with! If you have a sweatshirt that is slightly too small, this is the perfect project. If you love the look of my shirt, where each half is a different color, you can achieve the same effect by cutting two similar sized sweatshirts in half and then sewing them together! If you do decide to sew two sweatshirts together, you can have double fun and make two different upcycles!
Remove the band from the bottom of the shirt and the cuffs on the sleeves. Save those for a different project! Sweatshirt bands are great to use as headbands, for cuffs on other projects. Or even turn them into cuff bracelets!
Measure the side seam, from the bottom edge all the way to the end of the sleeve. Write the measurement down on a scrap of paper.

Cut out two strips of fabric to insert along the side seams. Mine were five inches wide, but you could go bigger if you want the top to be baggy. Make the length slightly longer than the measurement you wrote down. I love leaving just a little extra when I add inserts because it helps prevent mistakes.

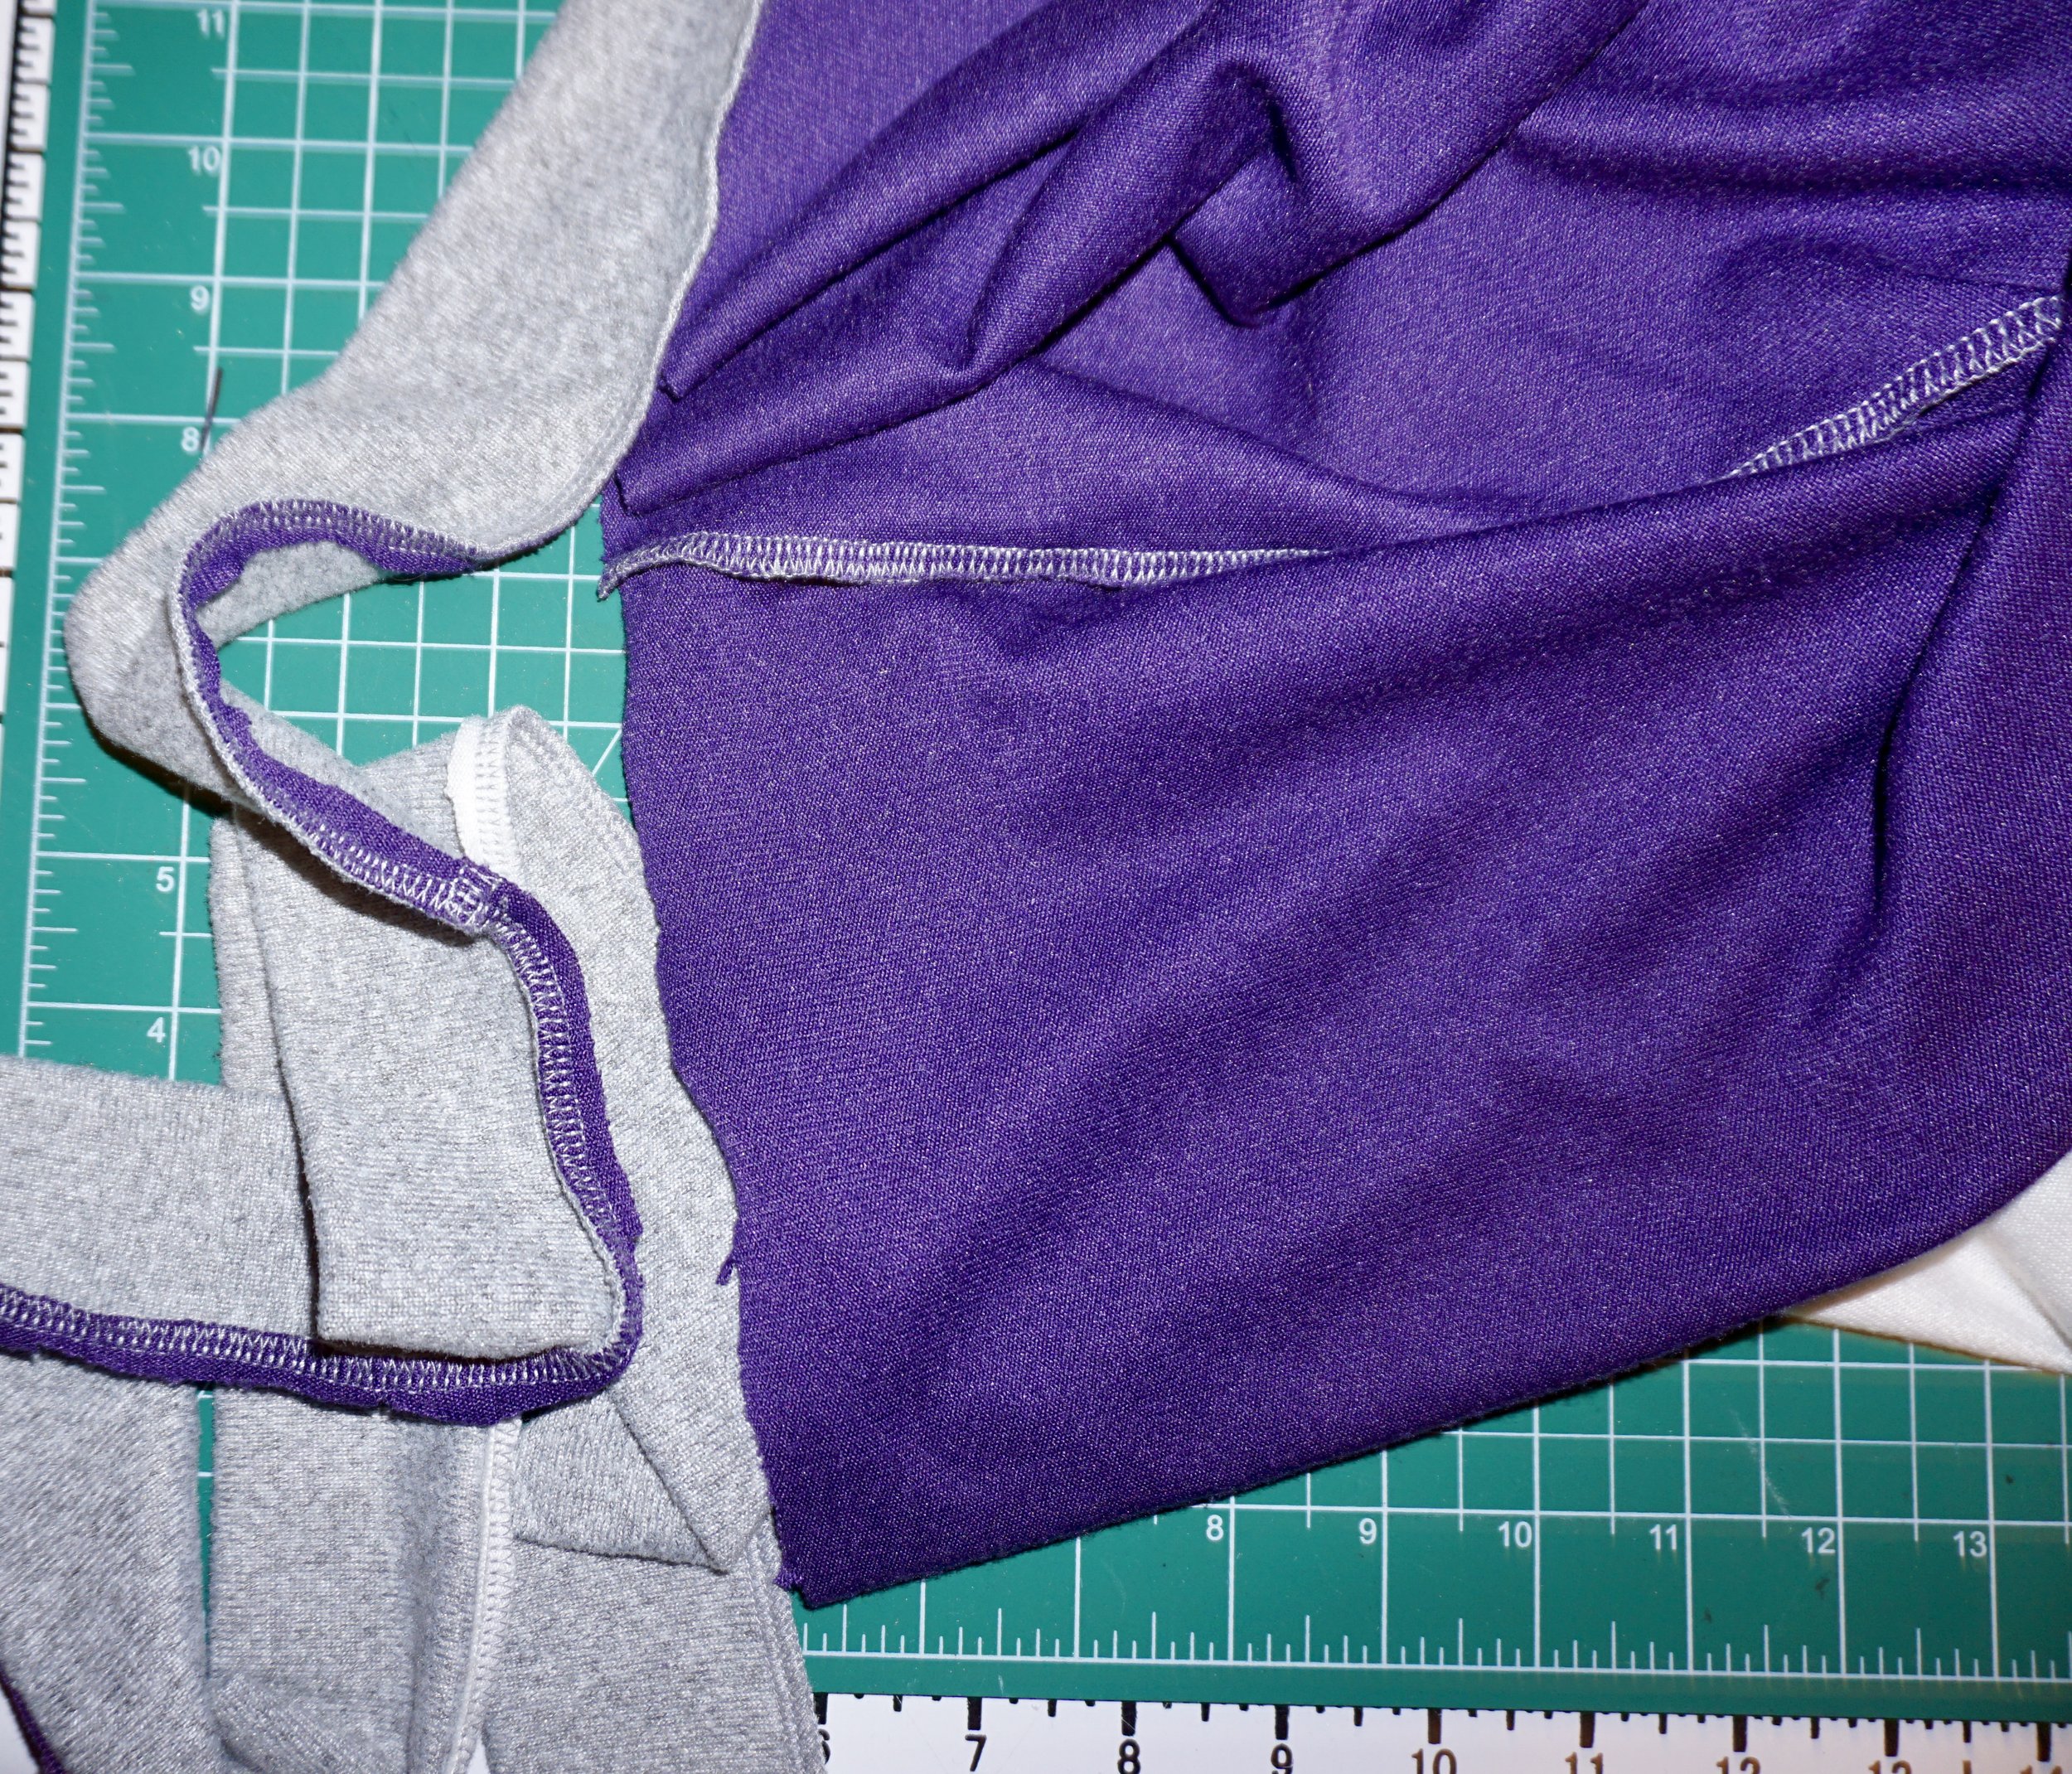
Using fabric scissors, cut along the side seam all the way from the bottom edge to to the end of the sleeve. Do one side first, and sew in the side panel. Then cut along the other side and sew in that panel. Once everything is sewn, it should look like the next photo.

Using a rotary cutter, trim the excess fabric at the cuffs and bottom edges.


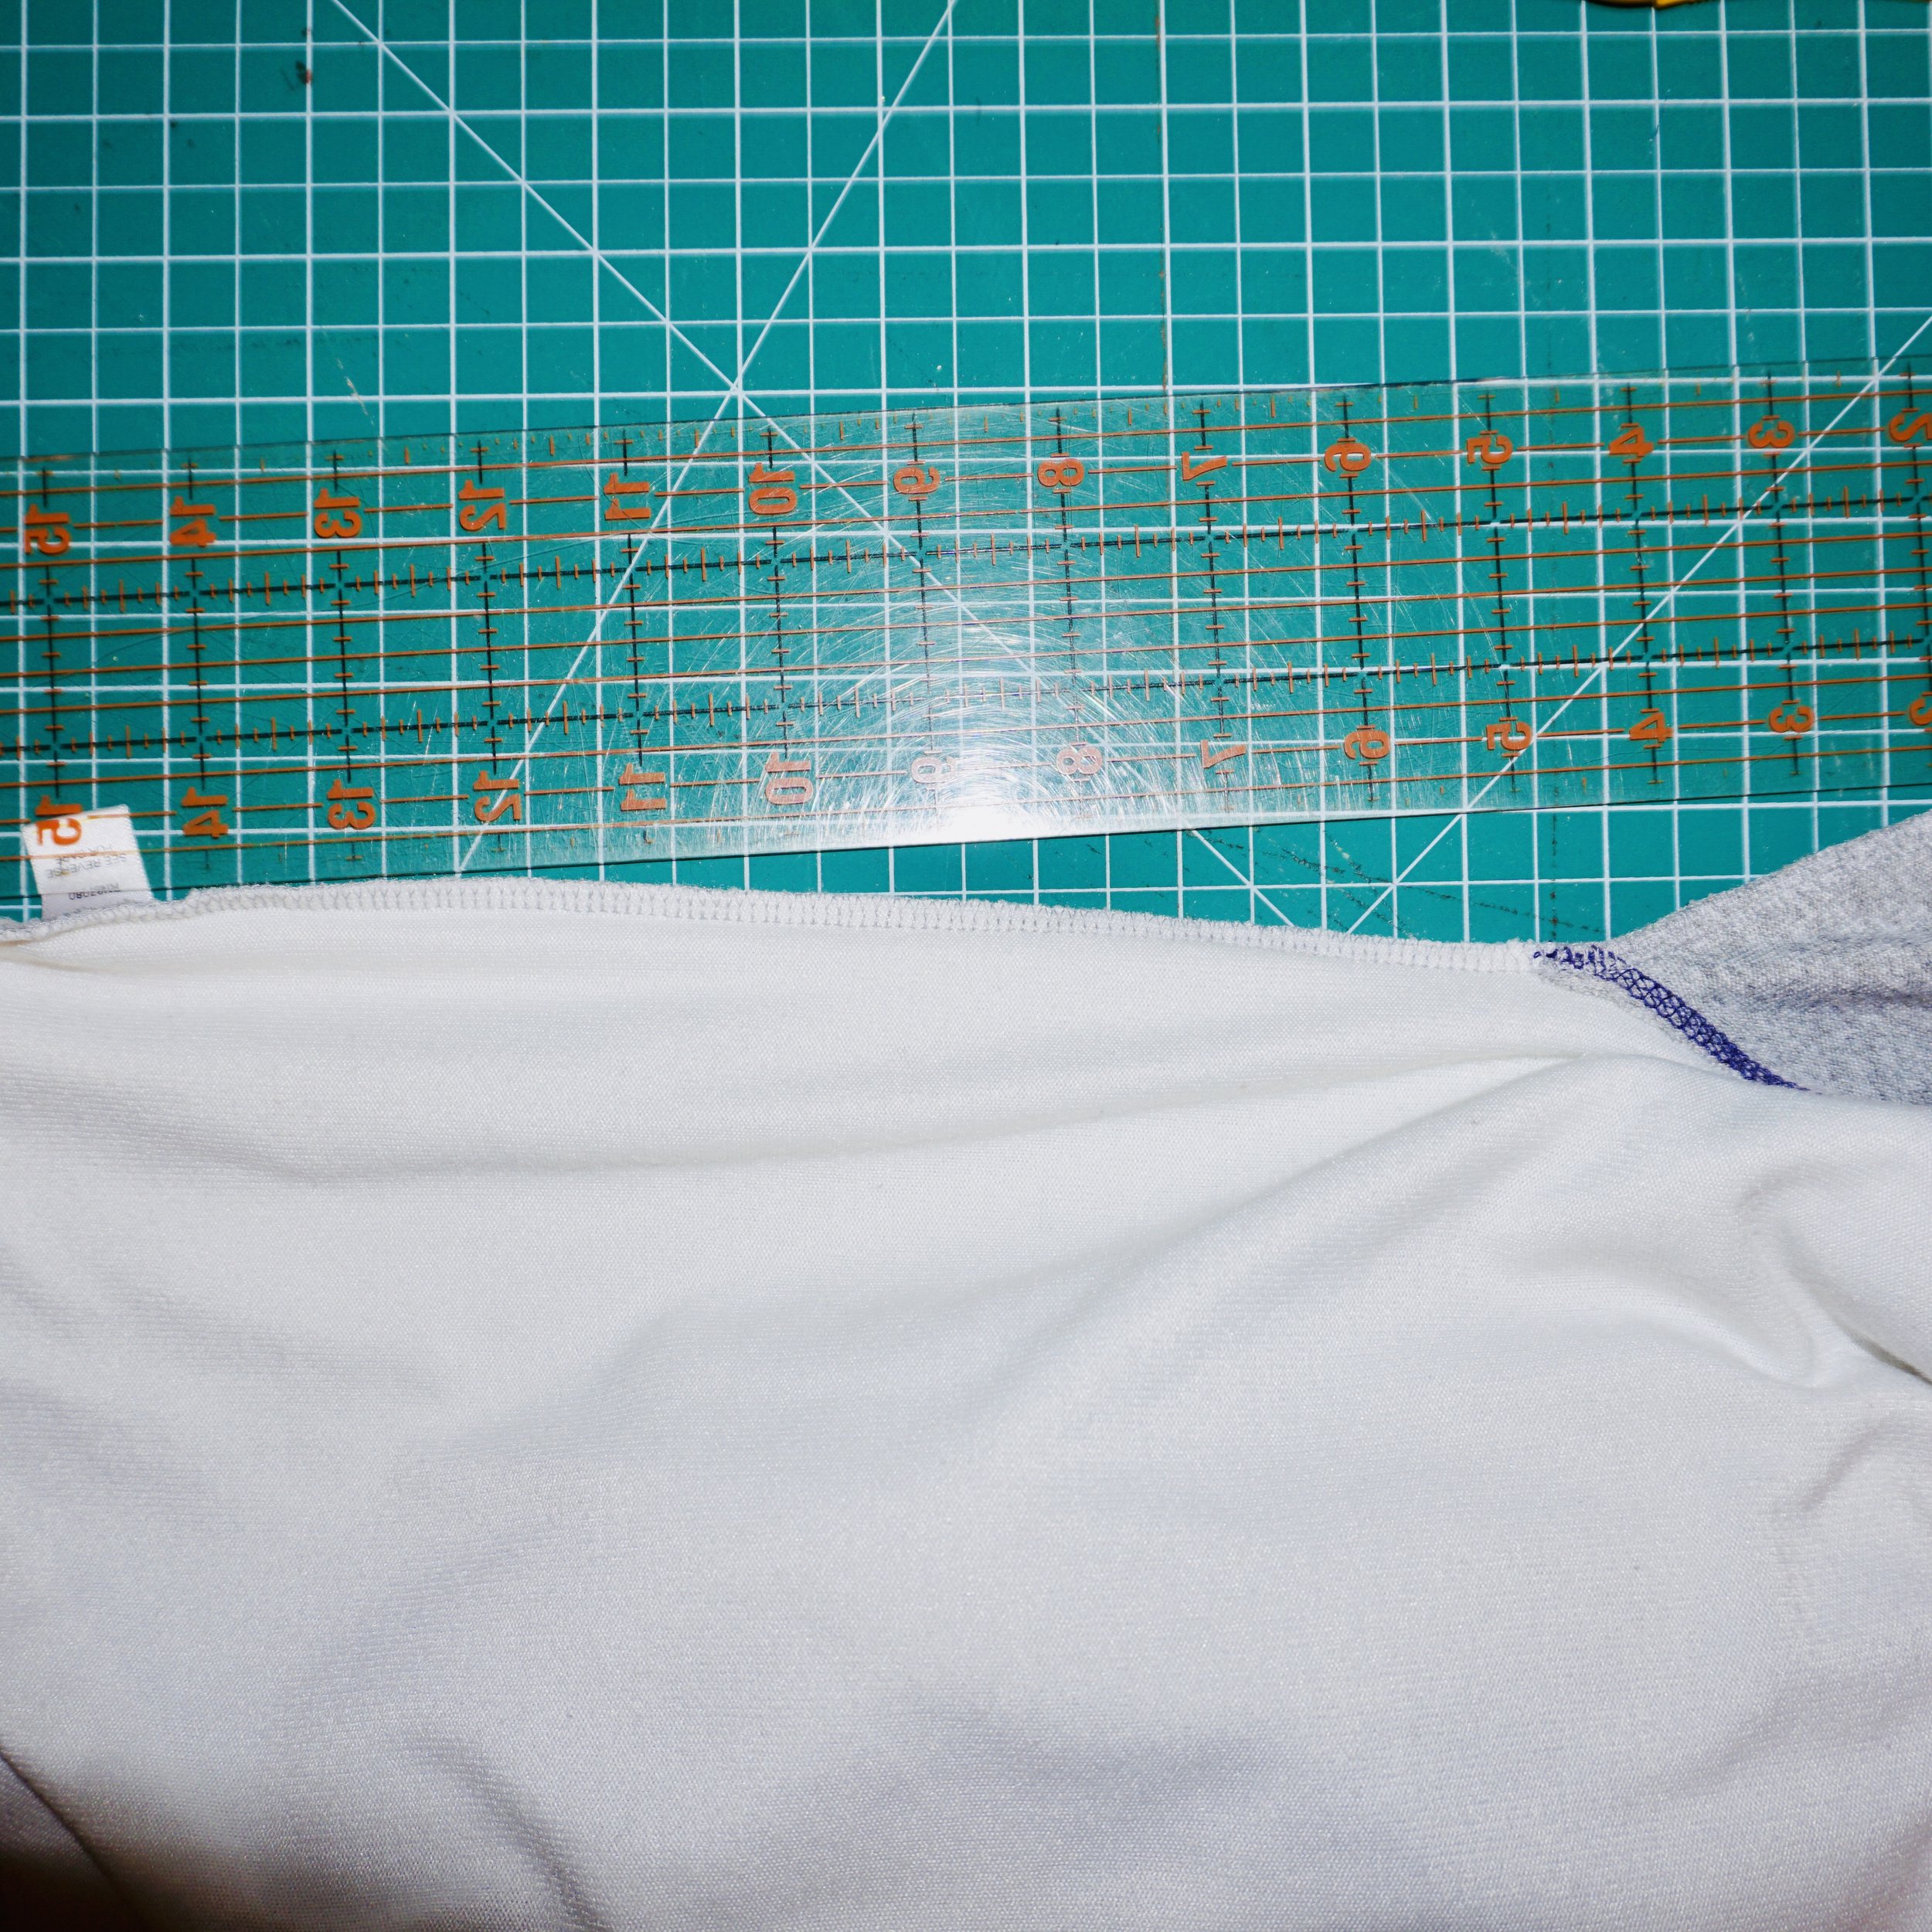
Cut a piece of stretchy knit fabric that is larger than the bottom measurement of the sweatshirt. Mine was about eight inches bigger. You can simply fold the fabric in half, line it up with the sweatshirt and place a dot where you want to cut the fabric. Then use the rotary cutter to cut in a straight line. You are making a long rectangle for the skirt portion of the dress. Mine was 20 inches long x the width of the bottom edge of the sweatshirt plus about eight inches.

Cut out another piece of stretch knit fabric, this time make it the same length as the skirt. But make it narrow. Mine was nine inches wide by 20 inches long. This will be for the middle front of the skirt part of the dress.

Cut out two more strips of the quilting cotton fabric, only this time make them 5 inches wide by 20 inches long. I made mine slightly longer than the finished measurement to allow for ease of sewing. These will go on the left and right sides of the middle panel you just cut out.

Sew the quilting cotton strips to the middle panel. Then using a rotary cutter and ruler, even out the edges. Then sew the middle panel onto the rest of the skirting.

Fold the skirting so that the two quilting cotton strips are lined up, and place a pin at the fold on the right and left sides of the skirting. Next, fold the skirting again with the two pins lined up in the middle, and place a pin on each end of the skirting again. You are dividing the skirting into four equal parts. Do the same thing on the sweatshirt. Place a pin in the middle of each side, then place pins in the middle of the front and back. This is to help you line up the skirting with the top when you attach the sweatshirt with the skirt.

Let’s attach the top to the skirt! Starting in the middle front, line up the two center pins of the sweatshirt and skirt with right sides together. Then start sewing slowly. Remember, the skirt is larger than the sweatshirt. So I created irregular pleats. You do this by folding the fabric and sewing down the folds as you go along. You can put the irregular pleats at any point on the skirting. If you place the irregular pleats along the area by the sides, it will create fullness around the hip area. I chose to place the pleats on the left and right sides of the middle panel, then also on the left and right sides of the center back of the sweatshirt. Mine are somewhat evenly spaced out, although not perfect!

Here is what the irregular pleats look like once sewn. You can fold them in the same direction, or in opposite directions as you go along.

This is what the dress looks like at this stage! I could have stopped here. I love how the dress looks here, it is edgy and fun! If you plan on wearing your dress every day, this might be where you want to stop. I’m loving a more fantasy vibe for my upcycles though, so I kept going. Use your own judgement. If you sell clothes, it is important to create a cohesive collection to set yourself apart. So if you love an edgy everyday look, stop here!

I went ahead and finished the raw edges with a zig zag stitch at this point. I see so many upcyclers not finishing edges. It is a mistake! Take the time to finish the edges so your pieces hold up in the wash!
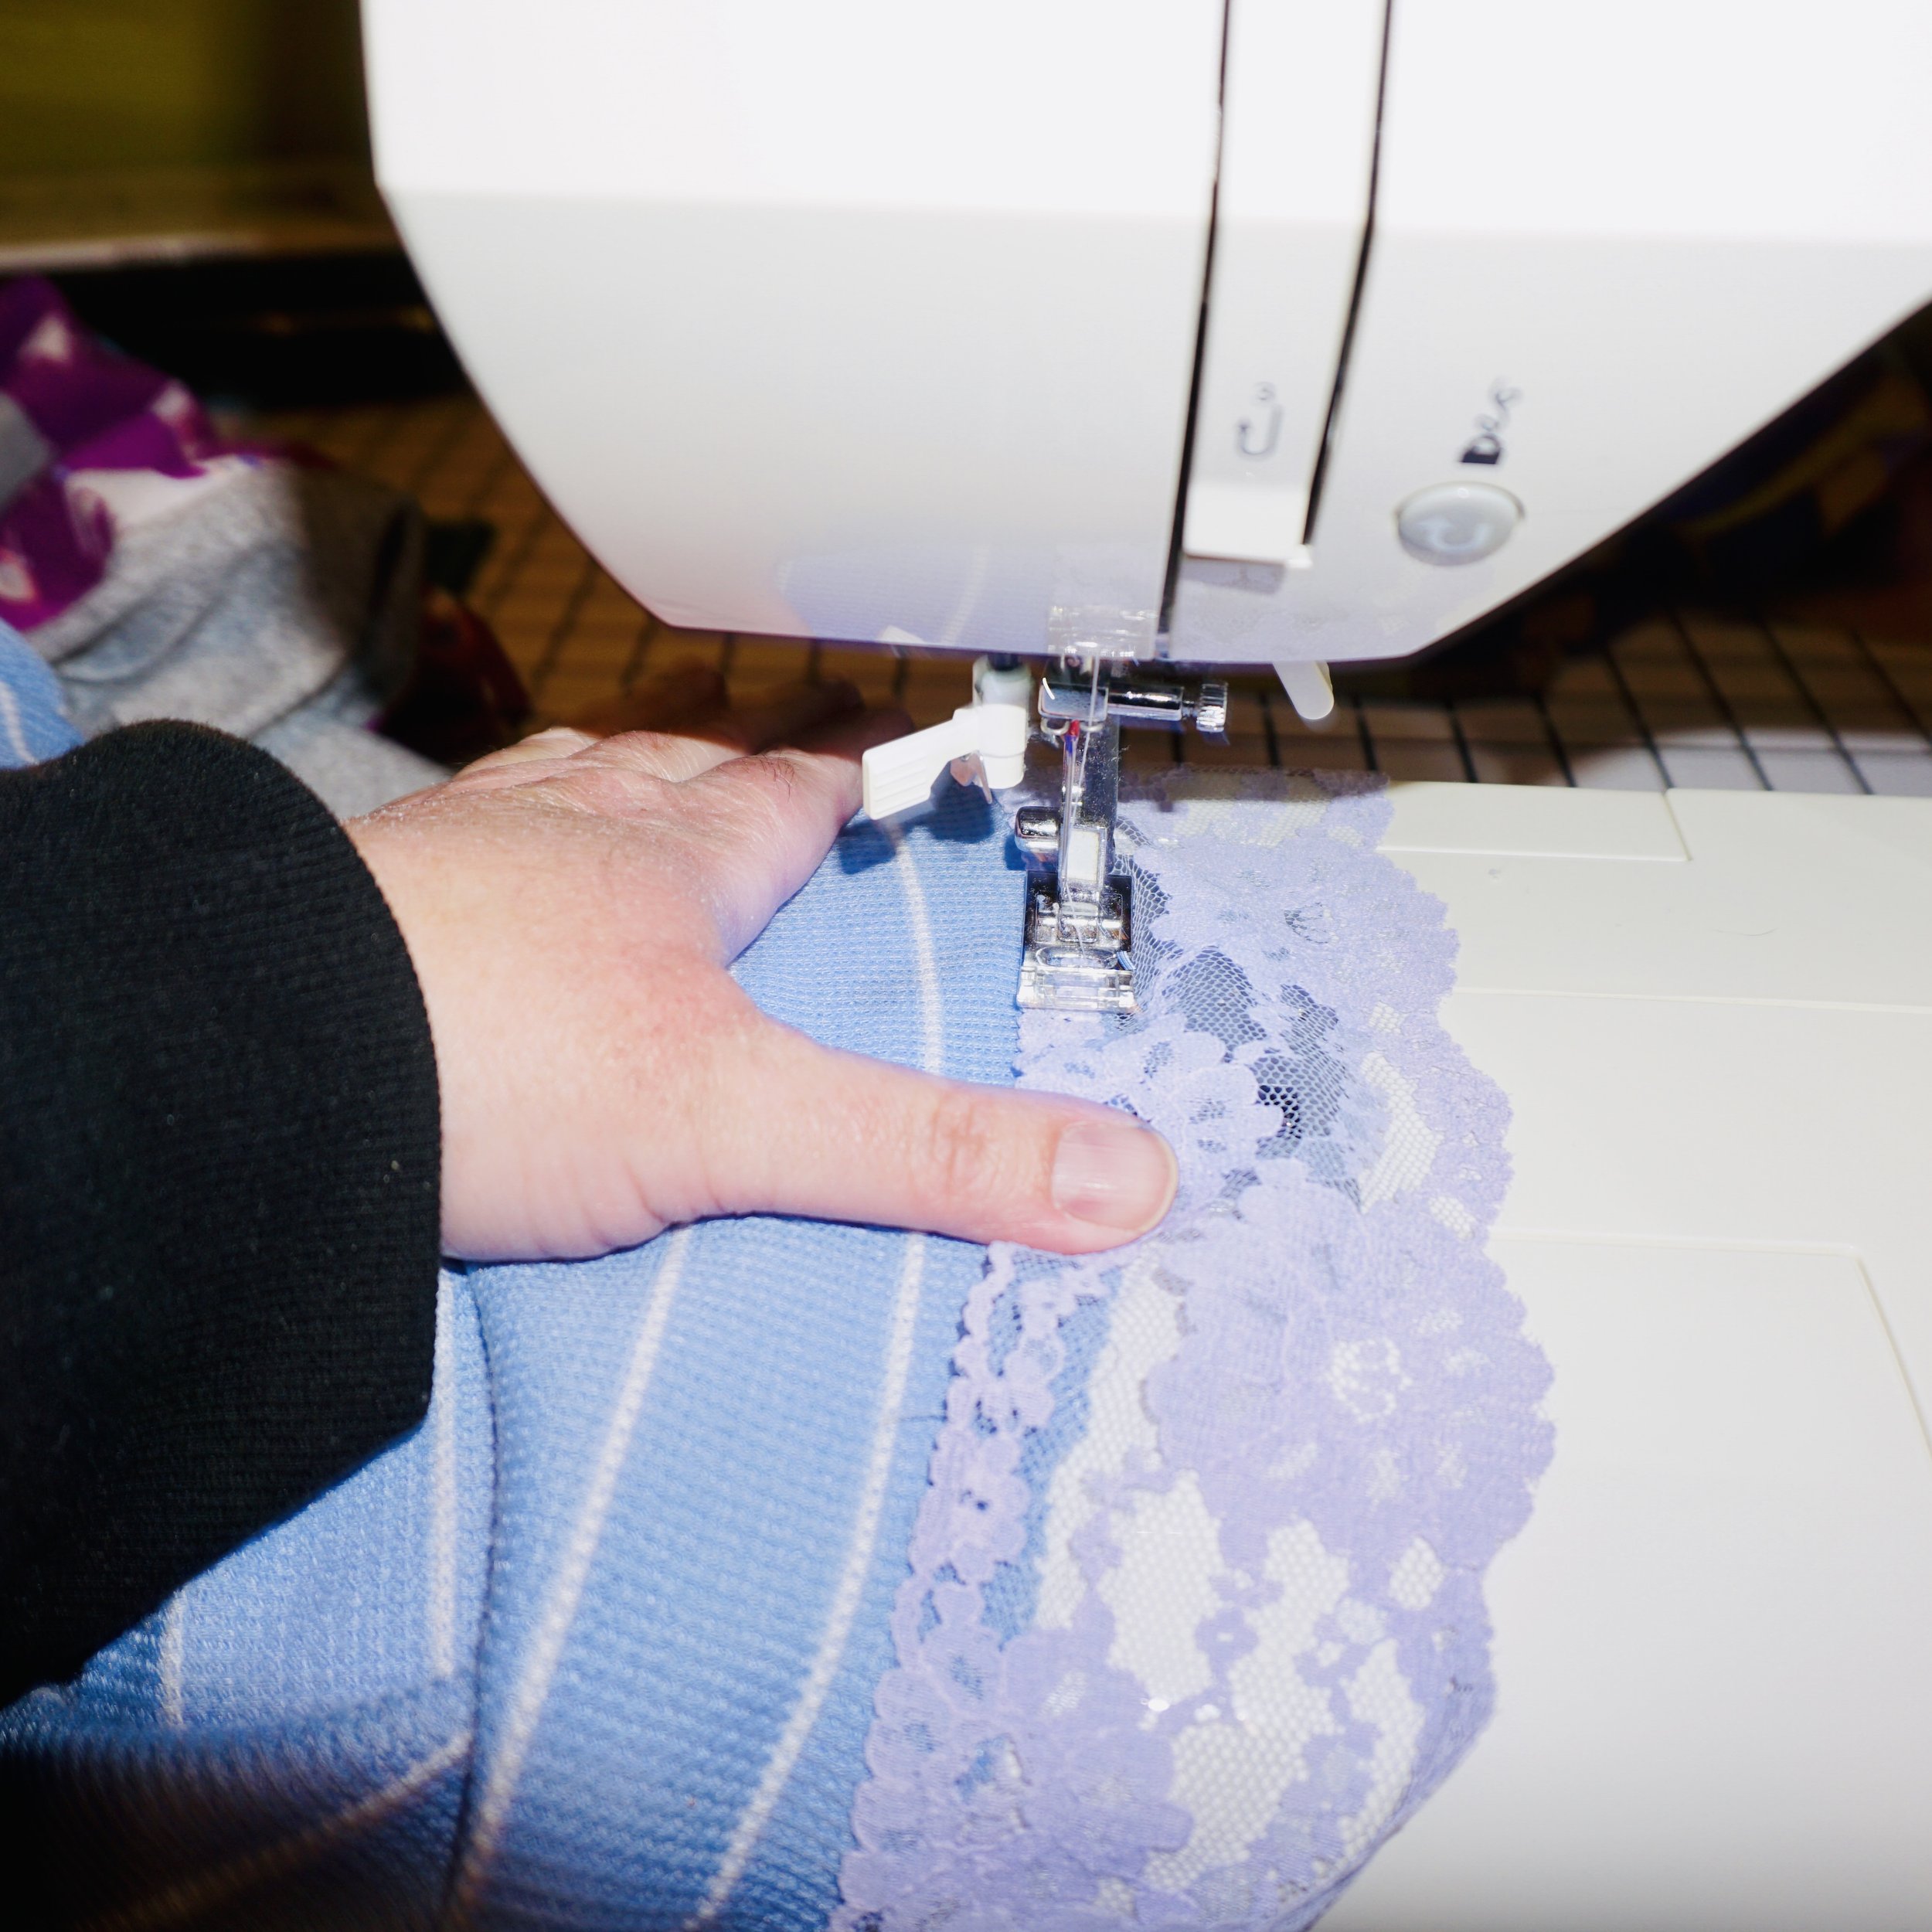
Next I added a wide lavender purple lace to the bottom hem of the skirt. I could have also added it to the sleeve cuffs, or on other parts of the shirt like around the neckline or waist. I got this lace in a destash off Etsy! It came in a huge bundle of vintage lace for only $30!

Ok, so I don’t know the technical term for this step. I made it up! It is similar to the way people sew curtains. In the middle of the front quilting cotton strips on the skirt, I sewed up the middle of each panel and bunched up the fabric as I went. I made super tiny folds in groups of five or six. This will create a hi-lo hem on the dress!

Here’s how the skirting looked after that step. I wanted the front to go shorter, so I went ahead and did that last step again, making sure to bunch up the entire strip. Sewing the zig zag stitching a second time secured the bunched up fabric really well. This effect is what you see often in steampunk inspired dresses! Experiment with adding this effect to skirts and dresses for a cool steampunk vibe!

My finished Upcycle by Kathryn Sturges

Peace Out! Upcycle with Kat Sturges!
Woah! I think this blog post took longer to write than it actually took to sew the dress! Hahahahaha! J/K!
Have fun with the techniques in this project, and experiment with coming up with a look you love! Also, Halloween is right around the corner and this project would be a really cool Halloween costume in the right prints and colors! As for me, I’m going back into my head, back into my world of fantasy to conjure up my next project! Peace OUT!

Six Tips for Pricing Upcycled Clothing and Sewing
Lately I’ve been sewing again! Finally, sitting in front of my sewing machine feels similar to driving in my convertible with the top down. It is incredible to have my machine humming away on projects again! It is a great workout to sew, not to mention feels incredible to be using up some of my yardage and scraps again.
I am gearing up to roll out a small selection of upcycles next year. I’m getting so excited planning and creating and just really having a blast sewing. It’s got me pondering a lot of elements of business, so I want to share something I’ve been thinking about with you.
Let’s talk pricing for your upcycles! I’ve been researching a lot of shops on Etsy! While I sew upcycled clothes, I also buy them sometimes. Reality is though, many of them are so overpriced. Even if I wanted to buy those clothes I couldn’t afford it right now. Cuz truth is EVERYTHING is overpriced right now! And my budget doesn’t go a long ways like it used to.
Here are Five Tips for Pricing Upcycled Clothes and Sewing Projects when the economy is bad!
First off, add up the cost of the materials you are working with. And be fair! Let’s say you are upcycling one of your old t shirts, along with some fabric and trims that only cost like $15 total. How are people turning around and expecting to get $80-$100 for a piece like that? I know personally as a consumer, I won’t pay that much for someone else’s work. I have in the past and then I felt completely taken advantage of. So be honest about the starting point. That old t shirt in your closet, after being worn and then washed 100 times, is probably only really worth about $5 now. Which means the total cost of materials is only $20.
Next, factor in the amount of time it took to make the item. If you worked for ten hours on an item, it makes sense to factor in the amount of effort that went in! You might want to charge minimum wage per hour, and sometimes when you do that math the item becomes super expensive and out of your customer’s price point. If you want to get serious about charging a fair price, set a timer when you work on the project. It all depends on how fast you want to sell the items vs. how much money you want to make. Items that are cheaper sell faster, but if you aren’t in a rush to make money then you can charge a bit more and wait for your customers to find you. Use your best judgement!
When I first joined Etsy, they used to have seller forums and a seller handbook! They may or may not still have that. So much has changed on the platform, it’s hard to say if anything remains the same. But the old seller handbook said to price things at a 2.5 ratio. So take the cost of materials plus time spent, then multiply that by 2.5. That will make you enough money to create another item, and then you will make slightly more than that to put in your bank account. I feel like that is a fair price to start at. You might want to run sales periodically and discount things at times. So this is a good starting point. It is always better to start slightly higher so you can work your way a little lower once you figure out where production meets demand. Using this ratio is also great because it will cover overages in shipping. Another tip is to do the math and figure out how much Etsy is going to take from the sale. Currently that is 6.5%, I’m fairly certain. Add that into the price at the start so you won’t lose money.
Which brings me to the third thing I wanted to point out! Every. Single. Time. I have sold handmade goods, I’ve lost a lot of proceeds on shipping. Etsy often encourages makers to ship for free. But then you lose your earnings! USPS has flat rate boxes which you can order for free. Then look up the shipping rate of the box, and charge that for your items. Or, get a scale and measure the cost on your own. Also, don’t ship UPS like I did. I only recommend shipping UPS if you are shipping a high cost good, like a quilt. I would go with USPS for pretty much everything else because it is more cost effective.
Don’t rip people off! It can be tempting to charge $100 for your handmade dress, but then very few people will be able to buy it. I can’t tell you how many times I’ve discovered upcycled clothes that I desperately wanted to buy. But they were too expensive, so I couldn’t afford it. As a seamstress, I can look at something and tell approximately what went into making the item. Typically upcycles are way overpriced on Etsy. If you want to be making sales every single week, then lower your prices to make sense. People just don’t have much money right now, and buying upcycled clothes is kind of a splurge item, especially when fast fashion is so cheap. Make your upcycles and sewn goods incredible, and then price them so people can actually afford to buy them. You will sell a lot more stuff that way.
My last bit of advice, is don’t feel pressured to drop your prices so low that you don’t make money. Let’s say you are working toward making a specific amount of money. Like if you are trying to pay off a debt, save up a down payment for a car or vacation, or just trying to make a set amount each month. You can price your goods to total the amount you are trying to make! So if your goal is to make an extra $5K, you would have to sell 100 items at a price point of $50. Ideally though, you will want some less expensive items and some more expensive items in your shop. That gives the consumer a choice. They might only have $30, and really want some of your sewing. Give them something to choose from!
I hope these tips give you an idea on pricing for your upcycling and sewing business. If you aren’t selling many items, try out some of these ideas and see if it makes a difference!

Explore Japanese Style: Harajuku and Kawaii
Ok, so I have to admit I’ve been dazzled with Harajuku style for a while! Some of my previous makes slightly give a nod to that style. (I have a small cabbage patch and care bear collection…what can I say! I love anything that reminds me of growing up in the eighties!)
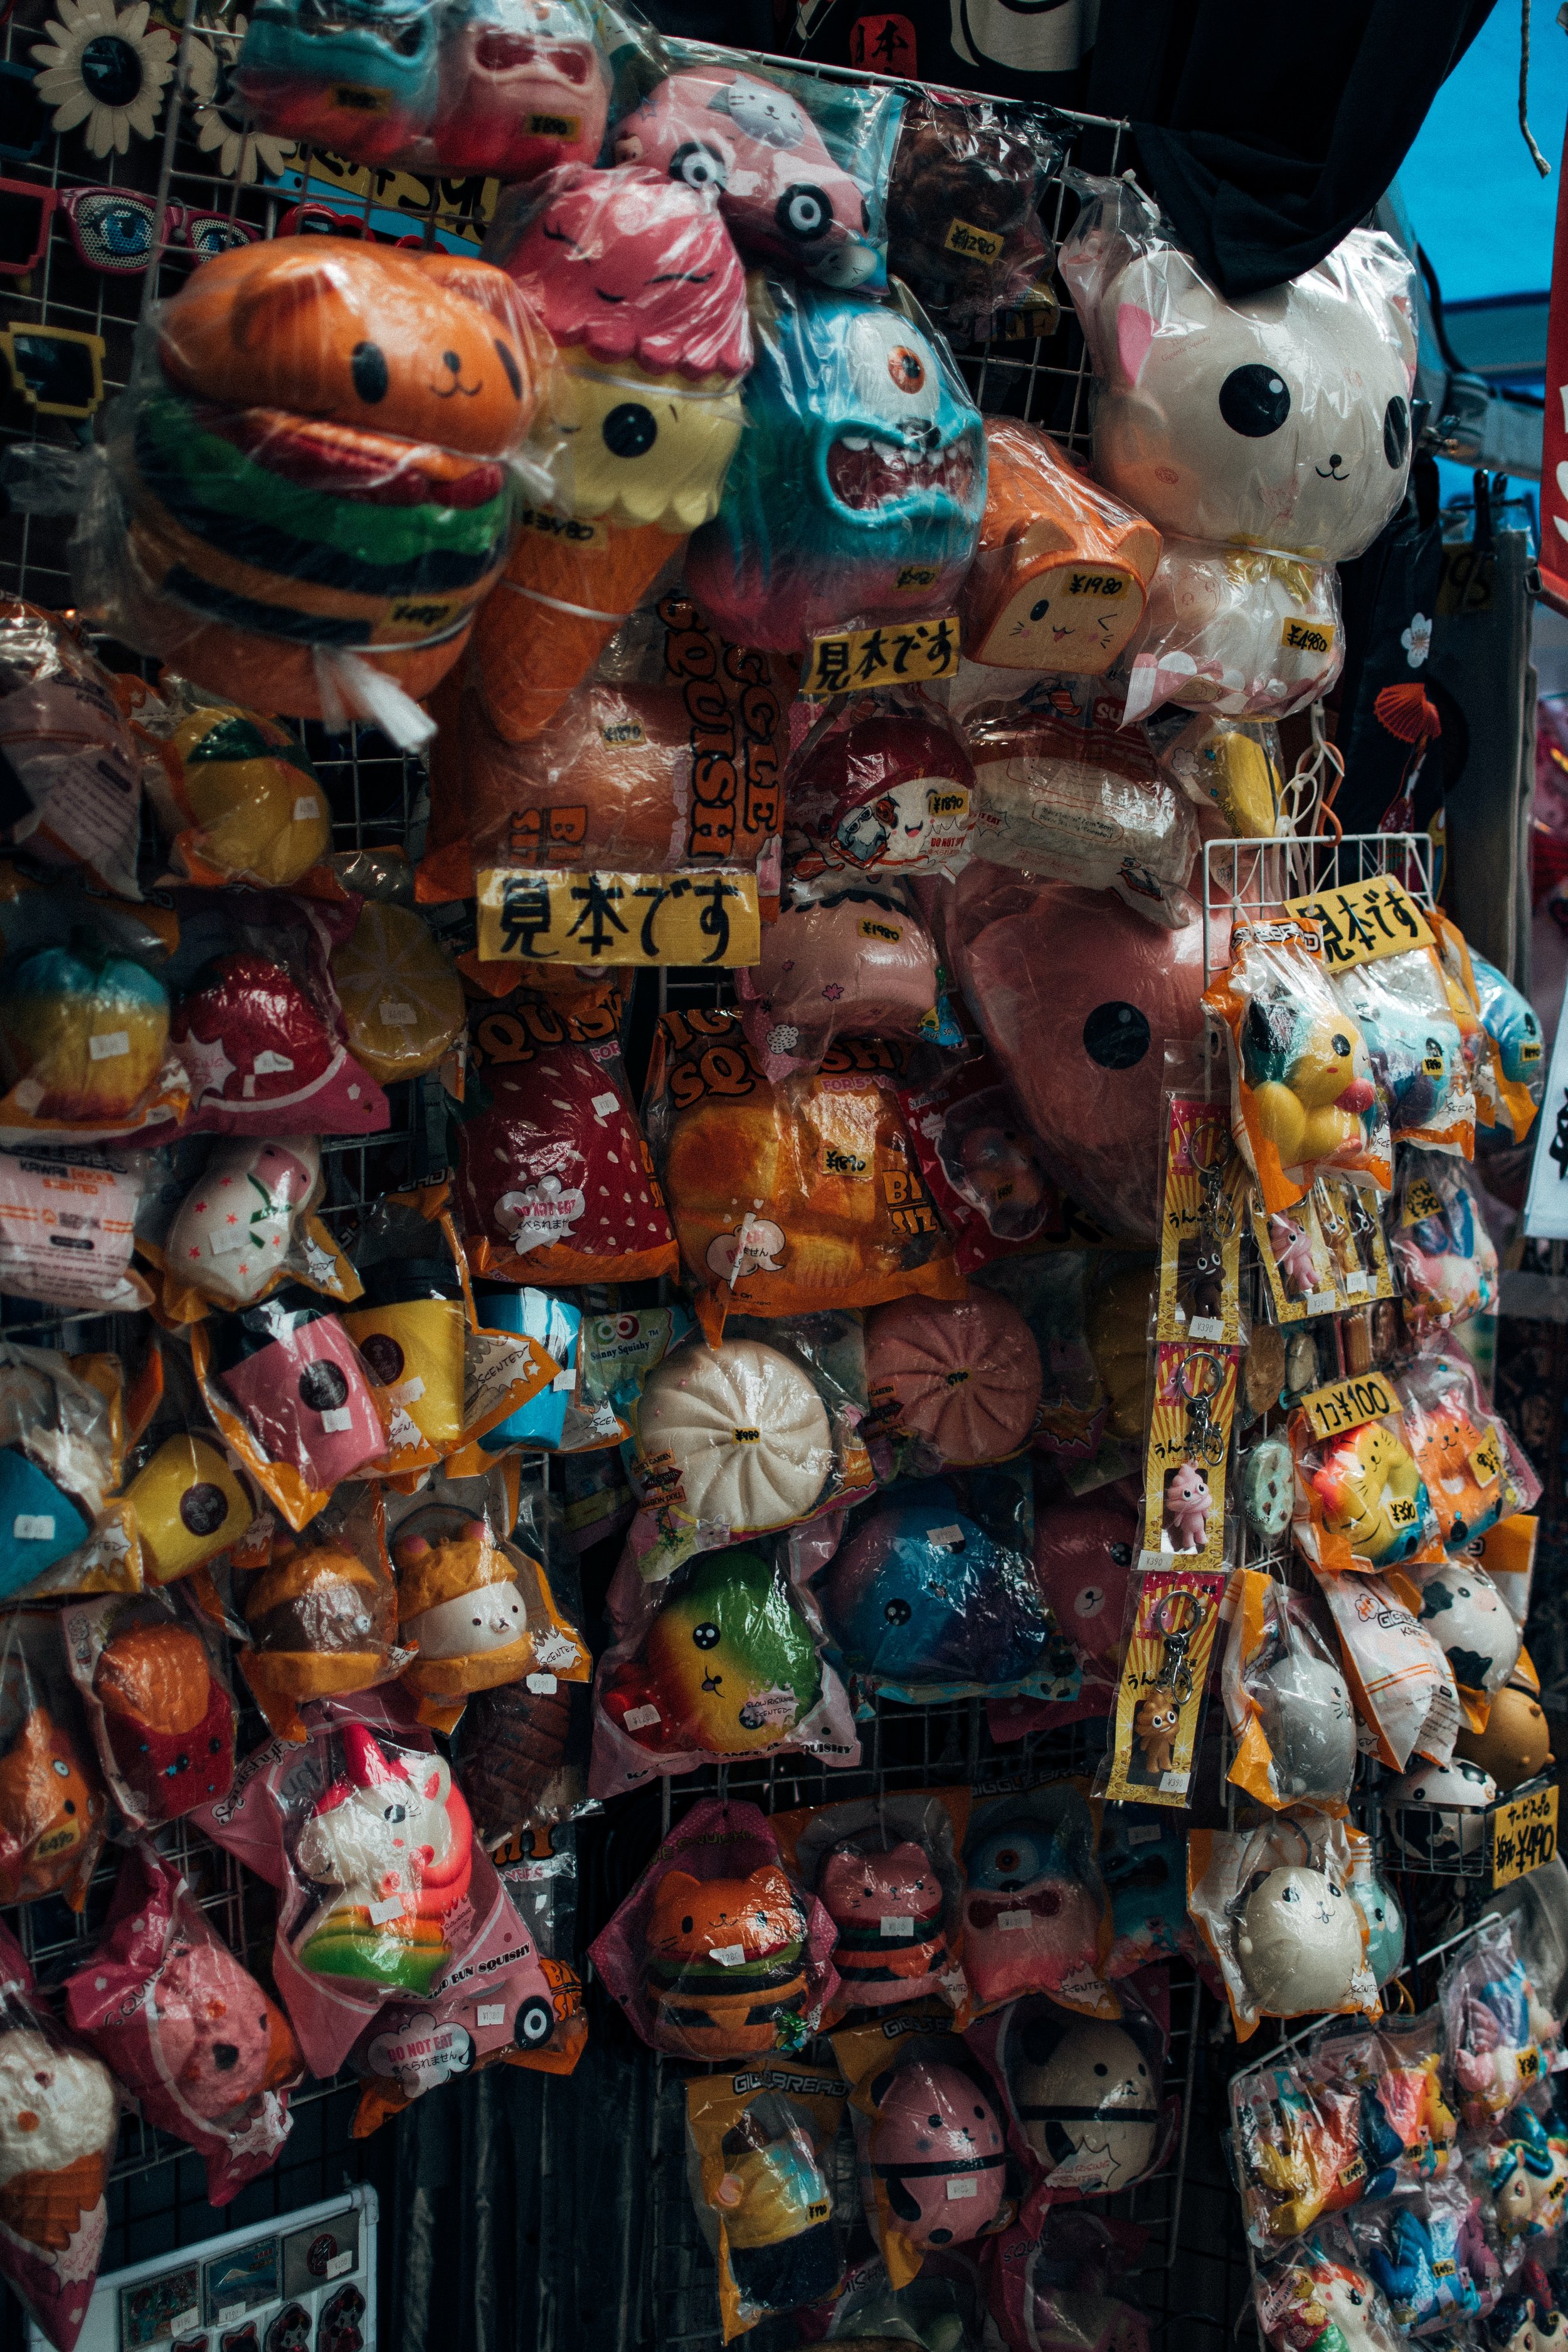
Harajuku and kawaii styles originated in Japan! If you search the terms on google, you will see endless photos of teen girls and guys in Tokyo donning the most colorful, inventive frocks imaginable! Harajuku is a shopping and dining destination for teens in Tokyo however the style craze has become more mainstream. Amazon even has harajuku and kawaii clothes, dolls, home decor and more! It is fun to be a maker though because you can infuse your own projects with elements of different styles you love, without having to spend money on each style trend.
Gwen Stefani took on the harajuku craze with her branding of perfumes, and some of her rockin’ styles in videos and performance. She performed at the Grammy’s in the early 2000’s from her album “Love Angel Music Baby”, and the fashion styles in that performance were so memorable to the young impressionable party girl that I was back then!
Kawaii style is a new fashion subculture sweeping Japan! Kawaii is more cutesy with small details like animals, hearts, and stars. Kawaii is typically softer colors like pastel pinks and white. If you research the two styles, there is some overlap. Harajuku has louder rainbow colors, while kawaii is more like doll clothes with lots of lace detail. Kawaii styles will almost always have a stuffed animal theme. Dark kawaii style is a bit more grown up gothic, with lots of black and grey tones and an edgier aesthetic.
Every now and then I see glimpses of harajuku and kawaii style here…in the heart of the Midwest! I live in a sleepy little city in the heart of Iowa. And if you can find harajuku and kawaii styles here, surely they are everywhere by now! The other day I saw a man riding a motorcycle wearing a panda helmet. And every now and then I spot girls and guys wearing incredible colorful looks downtown.
The secret to wearing these styles in the states…especially if you are in your forties…is to tone down a piece with solid colors. Think vivacious tops with solid pants or skirts, or a wild skirt with a black t shirt! You can even get a harajuku or kawaii look by wearing a plaid or fluffy skirt with a colorful top or t shirt.
I mean, if you have play doh colors in your hair or don’t give a shit what people think…then I say rock whatever you feel most confident in! Word of caution though…if you are in your forties or older….you might want to steer slightly clear of some of the more youthful aesthetics of kawaii.
If you are going for sex appeal, lean more toward harajuku styles with white lace accessories, mini skirts or fluffy minis and lace tops or t shirts. Baggy pants in bold colors also look great with a lace top, or puffy top. Deck out an old blazer or jacket with lace and crochet doilies. Florals work for harajuku too…it’s all in how they are used! You can go ultra femme with these looks or tone them down to suit your style. Rainbow colors are also very harajuku, and some of the looks give a nod to Rainbow Brite. If you want to have a colorful look that works, include elements of the color throughout your entire look. That will make it look more cohesive.
If you are going more toward a cute look, go kawaii with purples or pink, sea foam green, sky blue, buttercup yellow and white. Add appliques or use accents of a cute print fabric with animals or cute shapes. You could also get some patches from Amazon or destash patches from Etsy. You can make your own patches too! Use fusible adhesive, and iron it on the back of fabric and then cut shapes out of the fabric. These work great ironed onto jackets or fabric bags. Plaid skirts are always welcome, and take the styles toward a more punk aesthetic…if that is your thing! Add an animal hat or headband with animal ears will level up your look for a party night.
My next project will give a nod to these Japanese styles! I’m going all out to bring you some of my coolest upcycles to date!

Book Review: Sketch Your Style
in Book Club
There has never been a better time to sew your own clothes! With the price of clothing absolutely through the roof right now, why not start sewing clothes that truly express the real you?!
If you do sew clothes, I have discovered an incredible book for planning your dream wardrobe! This book would also be great to plan a line of clothing to sell! I discovered this book while browsing on Amazon, and I had to have it!
The book goes through a run down of body shapes to help you figure out style that enhance your shape. I typically don’t worry about that so much anymore though…because I just love the freedom to dress how I want! Then the book goes through fashion eras and iconic fashion designers, and shows you what those eras and designers were most known for. There are pages to try drawing similar styles for each section.
Finally, the section I’m most looking forward to…designing your dream wardrobe! Truthfully, I can rarely if ever find clothes that suit my sensibilities. I’m plus size and I love totally unique exotic looks…things you can’t find in stores. I feel like this book is great because it gives ideas which can be applied to upcycle clothes as well as tips for designing unique looks. I can see lots of ideas I could apply to existing patterns in my collection to give them that edgy, expensive designer look.
I highly recommend this book, both for people interested in drawing figurative art and those designing and upcycling clothing. I can’t wait to dive in and dabble and play!

Tips for Shopping and Selling Destash Fabric
in Sewing
Ok, so I’m going out on a limb here to say that it is more environmentally friendly to buy second hand than brand new. I mean, that is just obvious because buying new propagates the cycle of the production cycle. While buying second hand at least minimizes the impact a bit. What’s not to love about finding fabric someone else doesn’t have a use for and giving it a go in your own projects?
I finally did another round of destash. Last year I bought a “mystery box” of fabric on Etsy, and that practice is one I do not recommend. Mystery boxes are more like bits of walmart fabric that the other person buys from the store and then cuts into smaller pieces. My mystery box experience was absolutely horrific! I have yet to find a good use for any of the fabric I got in that stash!
Destash, on the other hand is different! About six years back I scored a huge back of odds and ends lace, bits of crochet and trims and have turned to that bag over and over for all kinds of projects. And one time I scored a bunch of yardage of knit fabric for like $20 plus shipping! Sure, not all the fabric was exactly what I was after, but I have used up the majority of that fabric by now.
I recently got a big lot of cotton fabrics, mostly pieces of around fat quarter to half yard sizes. The bundle was only $20, and that fabric is going to work so well mixed with my other scraps! And I got another bundle from the same seller for $18 of tons of yardage of knits. She must have really needed to make room in her sewing room, because the fabric is all spectacular!
Here are a few tips to score a destash for your own sewing.
Don’t be afraid to ask for what you want. If you are looking for yardage, and the bundle has lots of smaller pieces mixed in, message the seller and see if you can just get the bigger pieces. I did that, because I needed pieces over 2 yards big. It turned out she actually had additional yardage that had not previously been listed. And was willing to create a custom bundle just for me!
Before you shop destash, get really specific about how you will use the fabric. There is no sense in buying bulk thrifted fabric if you don’t plan on using it. I swear, the amount of times I have purchased sewing materials only for those materials to sit on shelves and in bins for years is mind boggling. Have a use in mind, and then get right on putting that fabric to use before you continue shopping for more.
Be sure you avoid a “mystery box” and only buy destash where you are very clear what you are getting. I recently found a bundle of vintage laces and trims, and it was such an incredible deal! The seller had great photos, and the bundle was beyond even what I expected. It was only around $20 too, so I saved a ton of money! Buyer beware if you don’t get to see the fabric before you buy it. I mean, you are just throwing your money away if you do that!
If you have fabric of your own to destash, Etsy is a great place to do it! If you have a ton of fabric and want to get rid of it quickly, an EBay auction might be a better option. Sell what you don’t plan on using, and thrift fabrics that get you excited to sew! Price points that stood out to me were about $15-$20 per bundle, with about $14-$20 shipping cost per bundle. If it is lighter, obviously ship for less money. If the fabric is junk fabric or has an odor, it might be best to donate that fabric to a thrift store, or just be super clear in the listing what your customer will be receiving. Most thrift shops like Goodwill to name one, will recycle the fabrics that are junk!
If you are trying to thrift some vintage sheets, just be conscious of what you are planning to do with the fabric. A lot of sellers are cutting up old sheets, lace and fabric and selling small bundles. If you want more yardage, go for the sheets intact, and be sure to browse a while until you find something that is suitable for your project.
Thrifting fabrics and trims is a lot of fun! It is a great way to score big on fabric, and find unique vintage fabrics and sheets to work with as well.

The Lil’ Daisies from my first book…”The Faeries of Octo Bay”!
Meet the Faeries of Octo Bay!
in Book Club
Sit for a spell as I introduce you to the main characters in “The Faeries of Octo Bay”!
The faeries of Octo Bay are slightly different than your run of the mill faerie clan. My faeries represent the best of human nature! My joyous faeries love God, and know their place in the Great Web of Life. They have existed since the Earth was created! And yet they are humble enough to know that they need to rely on each other and nature to thrive.
The Lil’ Daisies met in Botany School as young fae! Evie is their ringleader! She is empowered, strong and resilient. Her friends Jessay, Indigo, and Trixie stick together as a trio! They tend to the trees together and keep the woods pristine! Airy and Zooey tend to the birds and animals in the forest. Airy loves to fly high with the hawks, to get a greater perspective.

The Dreamers Crew in “The Faeries of Octo Bay”
Wachym is the leader of the Dreamers Crew! His entire job is just to dream a vision for Octo Bay. Wouldn’t that be an amazing job! Wachym has a pet dog named Spirit Dog. He goes everywhere with Wachym. Jackson is an Irish fae. He flew all the way from Ireland to help the faeries on Octo Bay! Patchett and Splashes are good at planning. Splashes also tends to the rivers and streams, to make sure the water is safe for all the creatures and humans too! Dansforth is the deep thinker of the Dreamers. He can come up with solutions where no solution can be found.

Make It! The Patchwork Top

Ok, so I’ve long pondered what it would be like if clothes could fit even if you gain or lose some weight. Years ago, I had a friend who also loved that concept. And we came up with this idea for a shirt! It is open in the back and has a piece of elastic in back along the bustline, for stretch. What is it about knit tops that make them so comfortable? I mean, I seriously just touch the tops in my closet each morning and always gravitate to stretchy tops. Well, this shirt combines the beauty of flannel and denim with a bit of stretch, to make it gorgeous as well as cozy!
Materials:
About 1/2 yard to a yard of flannel in one or two prints
An old pair of jeans
Muslin for lining
A bit of elastic banding
Basic sewing kit and sewing machine
Wide lace for straps

Step One: Sew some patchwork! You can get super creative, using traditional patchwork or improv. I used squares here, but I plan on sewing some scrappy tops too.

Step Two: Cut out pockets from an old pair of jeans. Try to get them centered, leaving enough room to stitch onto your top. Add patchwork pieces to make the panels long enough for the top. What I did was stack both pieces together for the final cutting…just to be sure they were the same size. It is tricky cutting ‘round the pockets. Just press your ruler firmly along the cutting line and go slow with the rotary cutter.

Step Three: Here are the patchwork pocket panels, sewn onto the checkerboard pieces. I created two…and reversed the sides I sewed the pocket panels on so that they both were placed toward the middle…with patchwork panels to go around the back of the top.
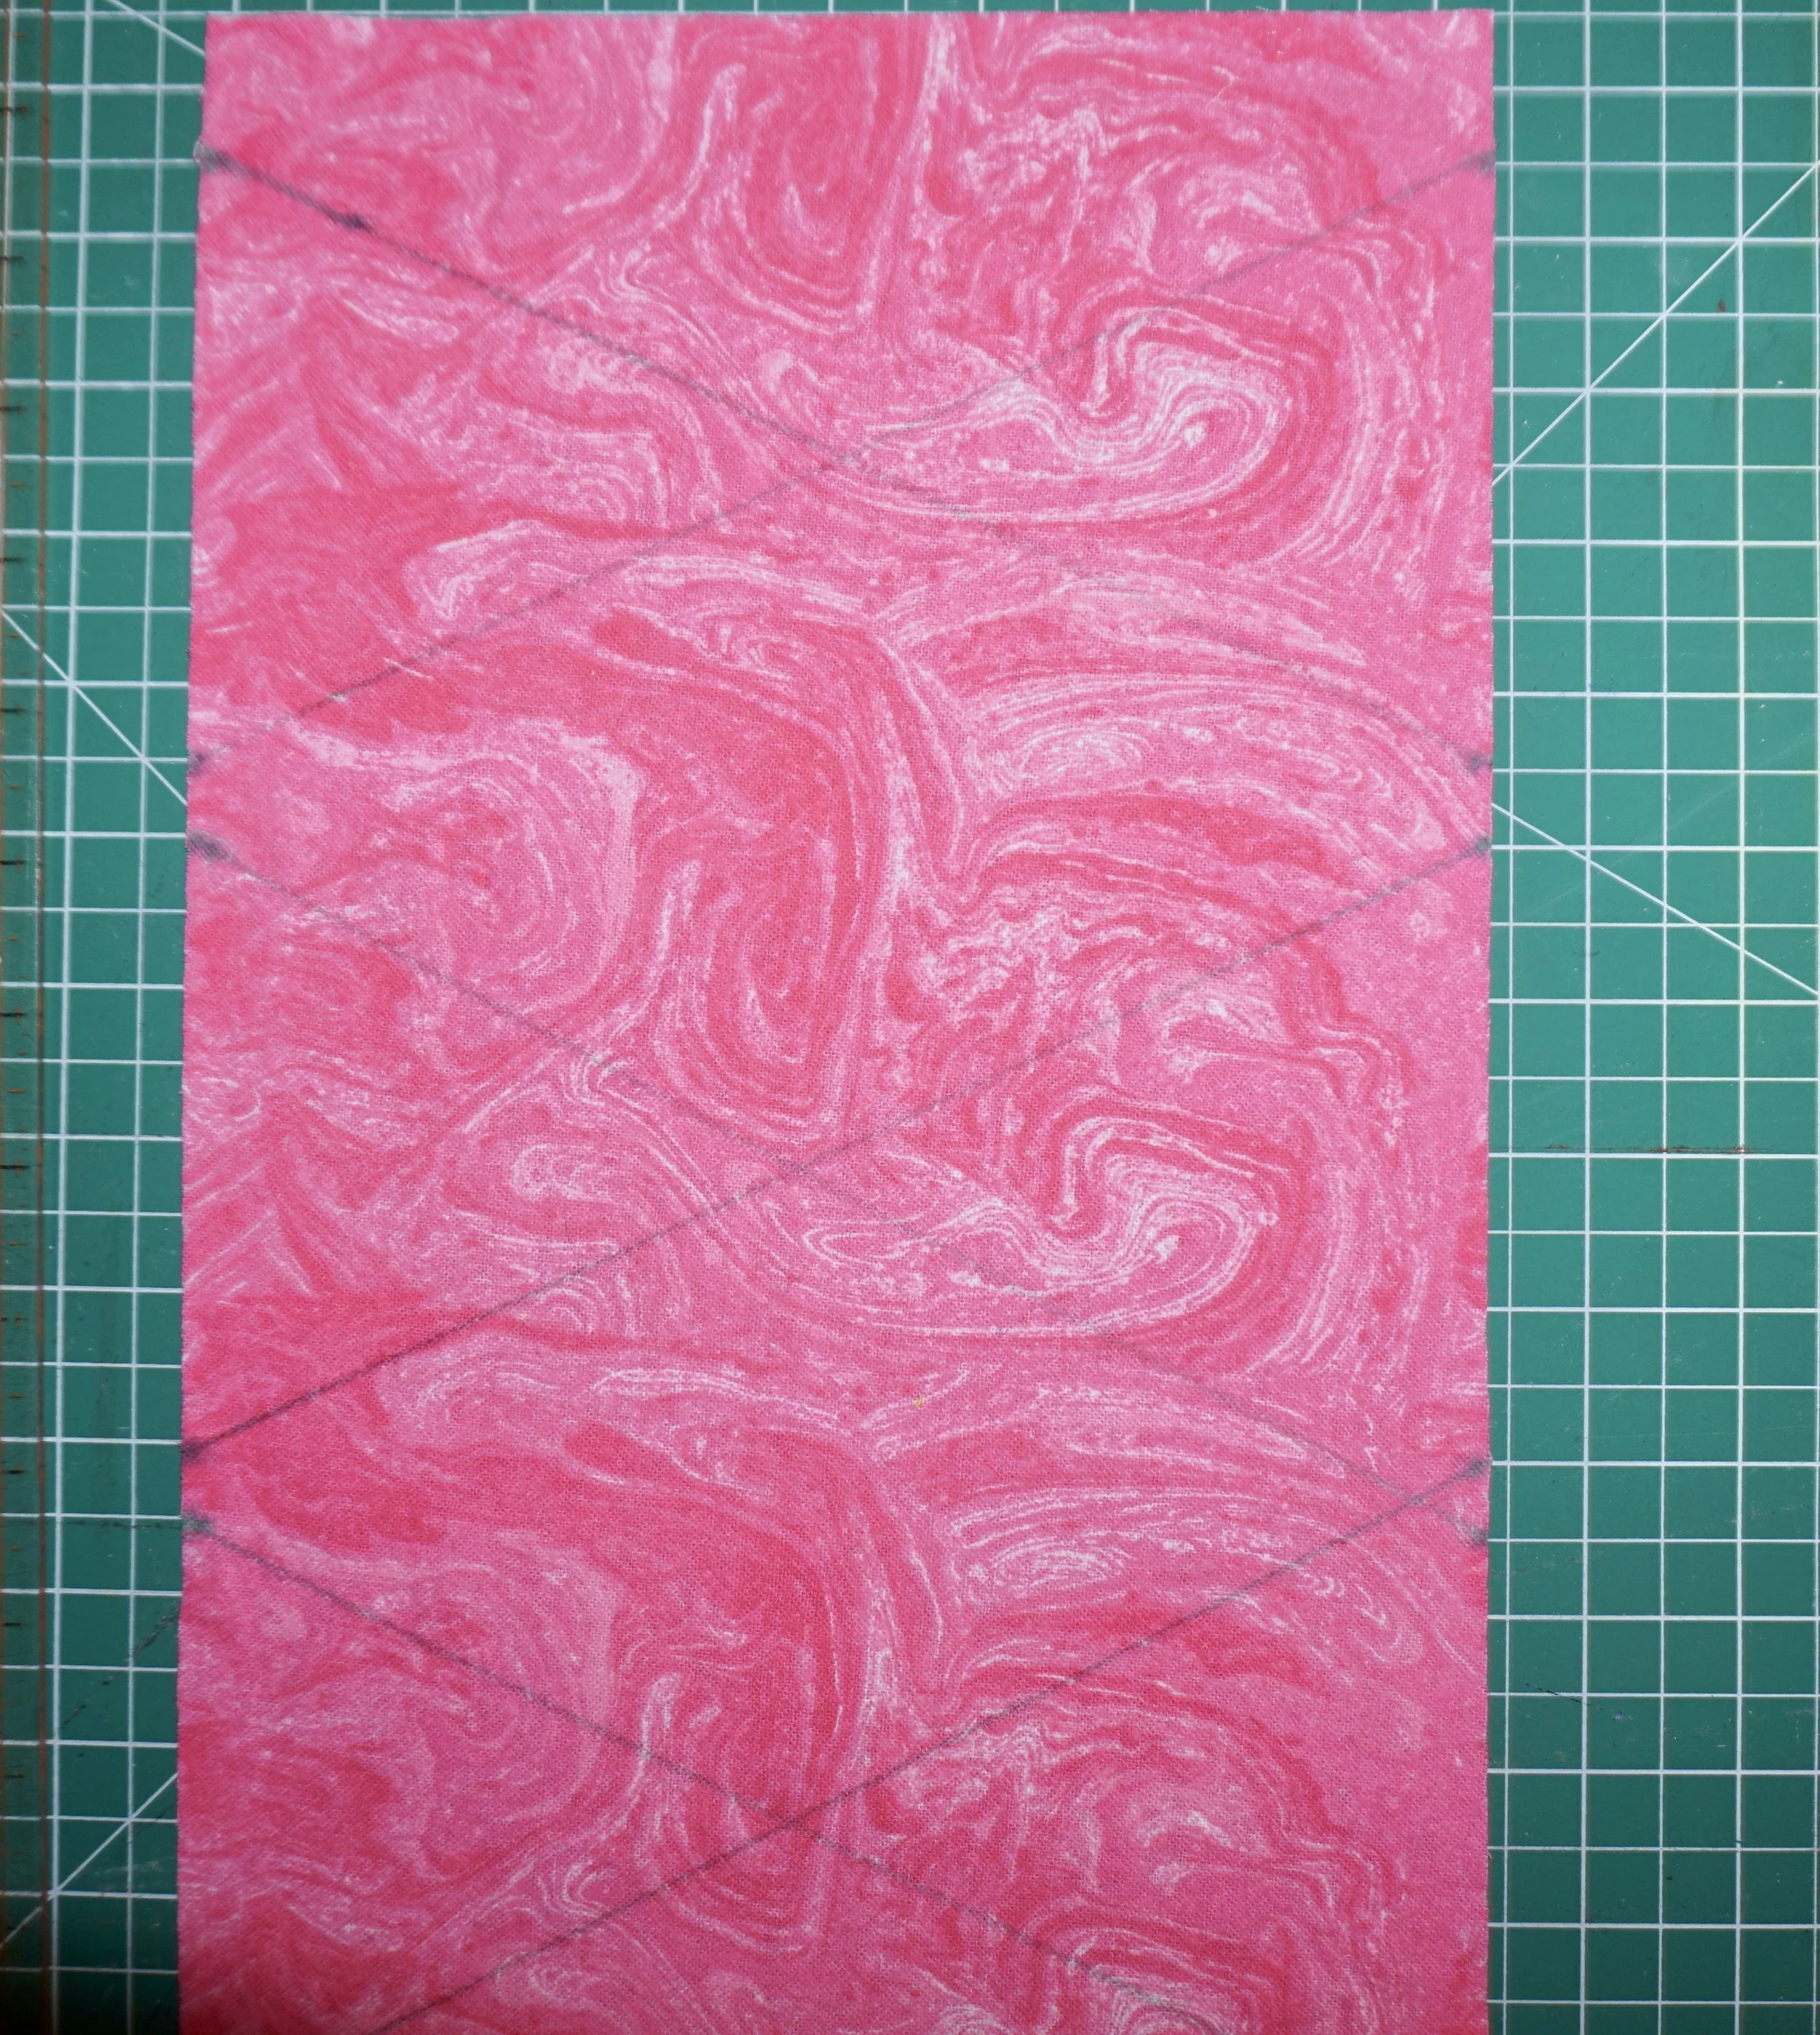
Step Four: Get out a sharpie and draw some lines. I first measured an inch down from the top and made dots along the sides, then made another dot on each side a half inch down from those markings. Then create dots all along the sides where you want the lace to go. I messed up and accidentally drew my lines a little off, but as you can tell it isn’t all too obvious!

Step Five: Sew lace or ribbon in a corset style manner onto the front middle panel. Then attach that panel to the other two, with pocket panels on left and right of the middle panel.

Step Six: Add wide lace or ribbon for straps. I did a halter top strap, however regular straps would be excellent for this too!

Step Seven…be sure to leave an opening to be able to flip the top right side out after adding lining! Also leave an opening at either side of the back near the top for a piece of elastic. Flip right side out, then add the elastic and stitch the openings shut.
Play with this idea! The thing with a top like this is you can be super creative with the patchwork…from colors to layout of pieces. And the top itself is really simplistic in design. Never be afraid to experiment with your fabrics. What do you think of making clothes that fit at various sizes?

“The Faeries of Octo Bay” by Kathryn Sturges
"The Faeries of Octo Bay" is now available on Amazon!
in Book Club
My book is now live on Amazon!! Here’s a link so you can grab a copy! After you read the book, please leave a review. Reviews really help bring visibility to books and authors!
“The Faeries of Octo Bay” tells the story of a group of lovable faeries who are restoring an island and tending to the environment. Humans had to leave the island because it became uninhabitable for them. A sorceress and her daughter stayed on the island when the rest of the humans left, and she is out to stop the faeries! Will the faeries restore the island in time for humans return? Pick up a copy of the book to follow the story and to read the incredible conclusion! The ending might surprise you!
I painted over 80 watercolor illustrations for the book! The art has been called “classical fairy style art” and “similar to Dr. Seuss”. I used Angora Opaque paints for the entire book, along with some alcohol marker and paint pens. It was so much fun to make this book, and another book is already in the works!
Grab a copy of “The Faeries of Octo Bay” and see what the fuss is about!

5 Steps to Start Your Upcycling Adventure
My sewing room is still not fully unpacked, but I am gearing up to begin sewing! I made some fabric napkins last week and it felt really good to be at the machine. I’ve only lived at my new place for two months, and already I’m feeling completely drawn to get back to sewing. Sewing is the kind of hobby that can carry you through a life time of crafty adventures! Upcycling clothes is a huge win for the environment, and is such a fun way to spend your time.
As I finish getting settled in my new space, I’m pondering my first upcycles. It has been a long time since I sewed clothes, and for you it may be something you have rarely or never even done! Upcycling clothes is so satisfying, and the pieces you make become true treasures in your closet. Even novice seamstresses can upcycle clothing. In fact, that is how I first got my start sewing. I used to buy all my clothes at the thrift shop, and one day I saw someone wearing awesome patchwork bell bottoms. Everyone starts somewhere, and if you have not sewn clothes yet I promise you that upcycling is far easier and more approachable than you may think.
Here are five steps to begin your upcycling adventure!
The first step starts with gathering supplies to sew. If you don’t already have a sewing machine and basic sewing kit, I suggest starting with a sewing machine that can at minimum do straight and zig zag stitches. There are industrial machines for fairly cheap that will do clothing with ease! You may want a machine that does buttonholes as well. Beyond that you will need a pair of fabric scissors, a ruler and cutting mat, rotary cutter, sharpie markers or fabric marking pen and thread. Also, that old ironing board and iron you bought that is now collecting dust…yup! You will need that too! LOL!
Step two brings you face to face with the clothes in your closet. Wash everything, and once you get it all hung up start to go through and turn all the hangers backwards. After a few weeks, you will see what you actually wear, and what items are not in your regular rotation. Those pieces that are barely worn are perfect for upcycling! Also if there are things with stains, tears or that need mended set those aside as well.
Upcycling clothes is so eco friendly, because you can probably just use what you already have on hand instead of buying stuff. When I do upcycles on t shirts, I tend to combine two shirts into one dress, and then save the leftover material to use in other projects. Once you get upcycling you will begin to collect cast off bits of fabric to use, so there is typically not a need to run out and collect tons of fabric to get started.
If you do need fabric for your projects, search at a local thrift, antique shop or go on Etsy and find some fabric. Lots of sellers on Etsy sell destash fabric, which is fabric they bought or inherited but do not plan to use. You don’t have to buy brand new fabric because there is so much destash out there to work with! I already have cotton fabrics from quilting, a few fashion fabrics and I destashed a huge box of stretch fabrics on Etsy…so I am good to go! An alternative to destash fabric is to thrift. Gather up and find some used bed sheets and used clothing items with lots of fabric to work with. Long dresses are great to cut up and use as fabric, so are old curtains and table cloths. When you are thrifting you may also find some pieces you want to alter.
Also look for thrifted items that have lace, trims or fancy buttons that you could use in your projects. People destash those items as well on Etsy, which is so cool! One time I was able to score a bag of cast off bits of lace and scrap material that I get into whenever a project needs a little something extra. Once you begin looking at materials in a new way, you will come to realize that there is actually very little need to buy brand new fabric or notions. Zippers can be salvaged off of pants and jackets, and if you keep buttons from clothes you upcycle you will quickly have a collection to choose from.
I’m getting my sewing room finished today, and starting to go through my closet! If all these ideas seem overwhelming, know that just starting with one project can truly get your creativity going. Take it one project at a time, and pretty soon you will have a wardrobe of pieces that are totally original and one of a kind…like you!
It's Tunic Time! Crop Top to Empire Tunic
This stretchy tunic is perfect for Plus Sizes! The gathers make it super comfortable, and the form fitting top accentuates curves. The style of this dress is perfect for women with bellies and hips, as the skirting is oversized to float away from curves you don’t want to show. My motto for plus size dressing is to show off my favorite attributes and play down the aspects of my body that make me self-conscious.
*Scroll down to see the step by step in pics!
Crop Top to Tunic
Materials:
Basic sewing kit and sewing machine
Rotary cutter and mat
Two t shirts and a crop top, ideally stretch velvet
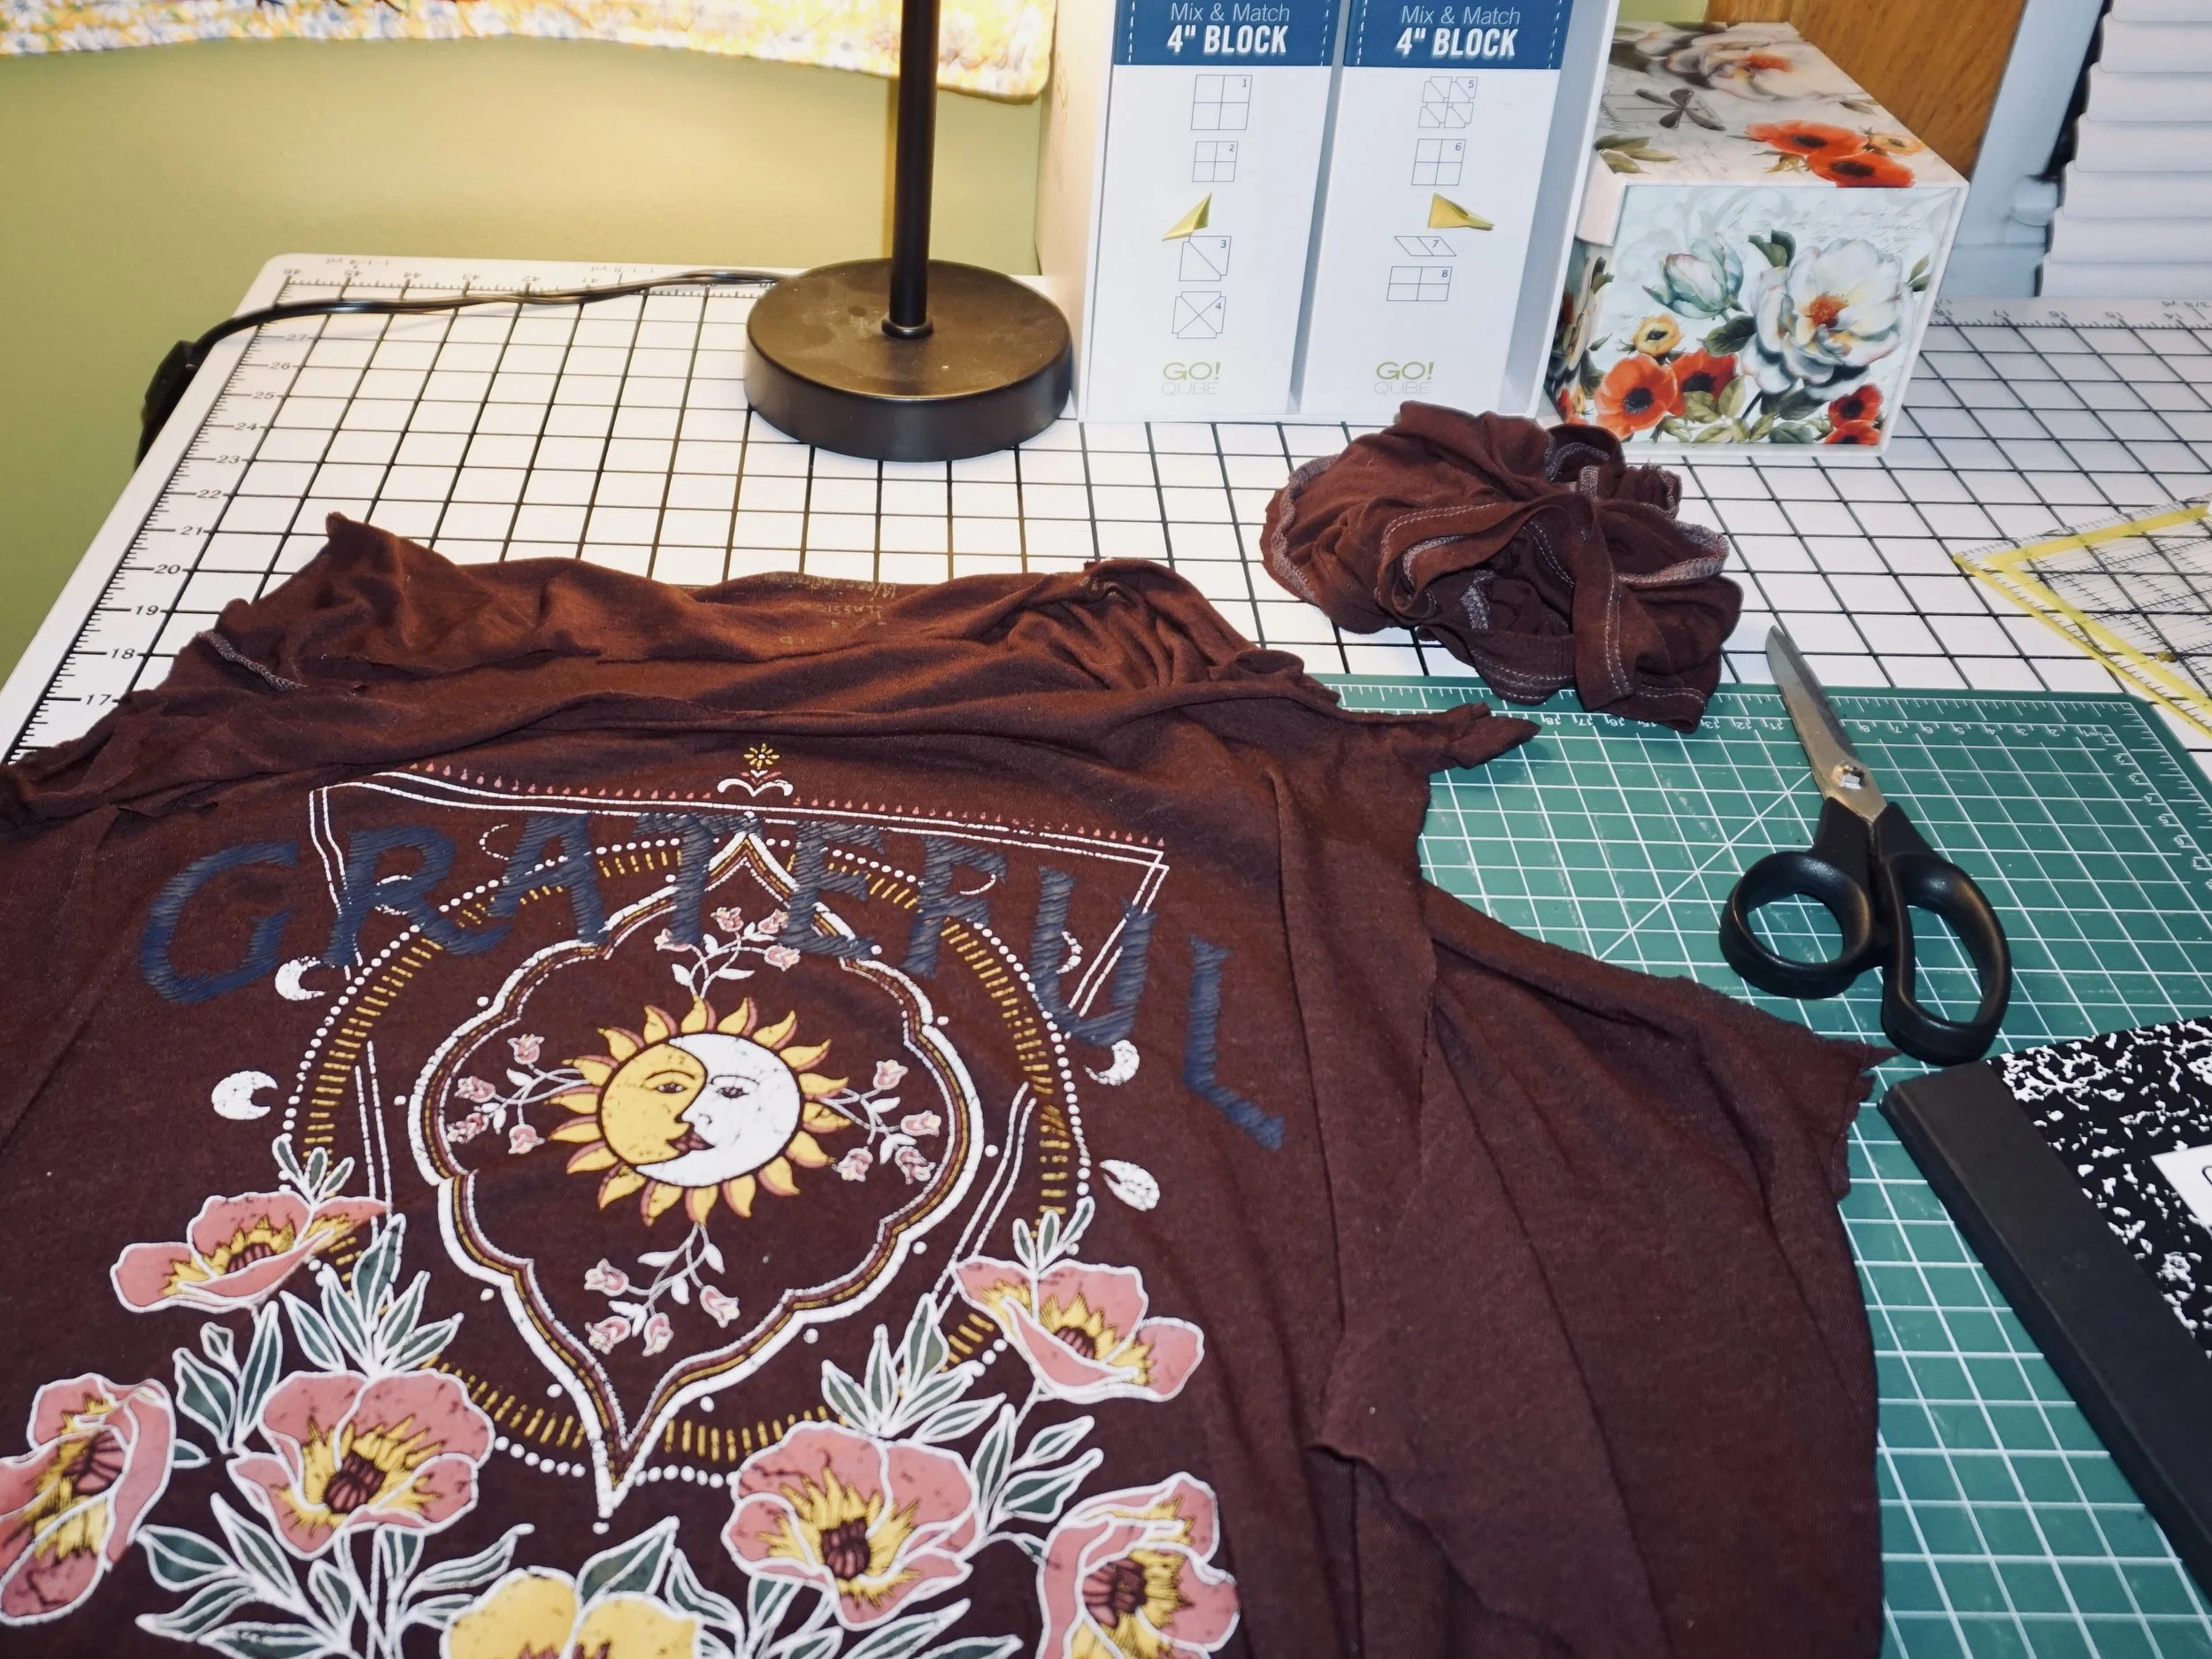
My crop top is made of stretch velvet, so I’m using two t shirts for the bottom part of the tunic. One has a decorative logo on the front and the other one has logos all over.
Using a pair of scissors, cut along the seams of the t shirt with the logo. Then create a rectangle panel, so the logo will be front and center of the tunic.
Grab the second t shirt, and using a ruler and rotary cutter, cut just below the armpits in a straight line. I folded mine seam to seam first and smoothed out wrinkles, then cut. Next, fold the front of the shirt in half so that the side seams are together with the front middle of the t shirt to the right. Using the ruler and rotary cutter, cut along the middle of the front. This will create an opening for the panel insert. Sew the panel into the second t shirt.
Next, grab the crop top and put safety pins on each side seam and in the middle front and back. Do the same thing with the t shirt tube you created in step 3. The pins are to help you line everything up when sewing.
Set your sewing machine to a narrow zig zag stitch, my machine is set to 4 for the length and 4 for the width. Start at a side seam and sew, while lining up the middle point pins. If you need to stretch one of the pieces to make the pins line up, do it as you sew. This will create gentle gathers in the tunic. Do the same for the back. If there is extra slack, try to get the extra material gathered evenly along the middle back.
Hem if desired by either cutting off the bottom edge or with a double fold and zig zag stitch. And you are done!


The Smash Together Dress
I’m going to let you in on a secret…smashing together dresses is so easy anyone can do it! Above and beyond, of all the upcycles I have done I love the smash together dresses the most!
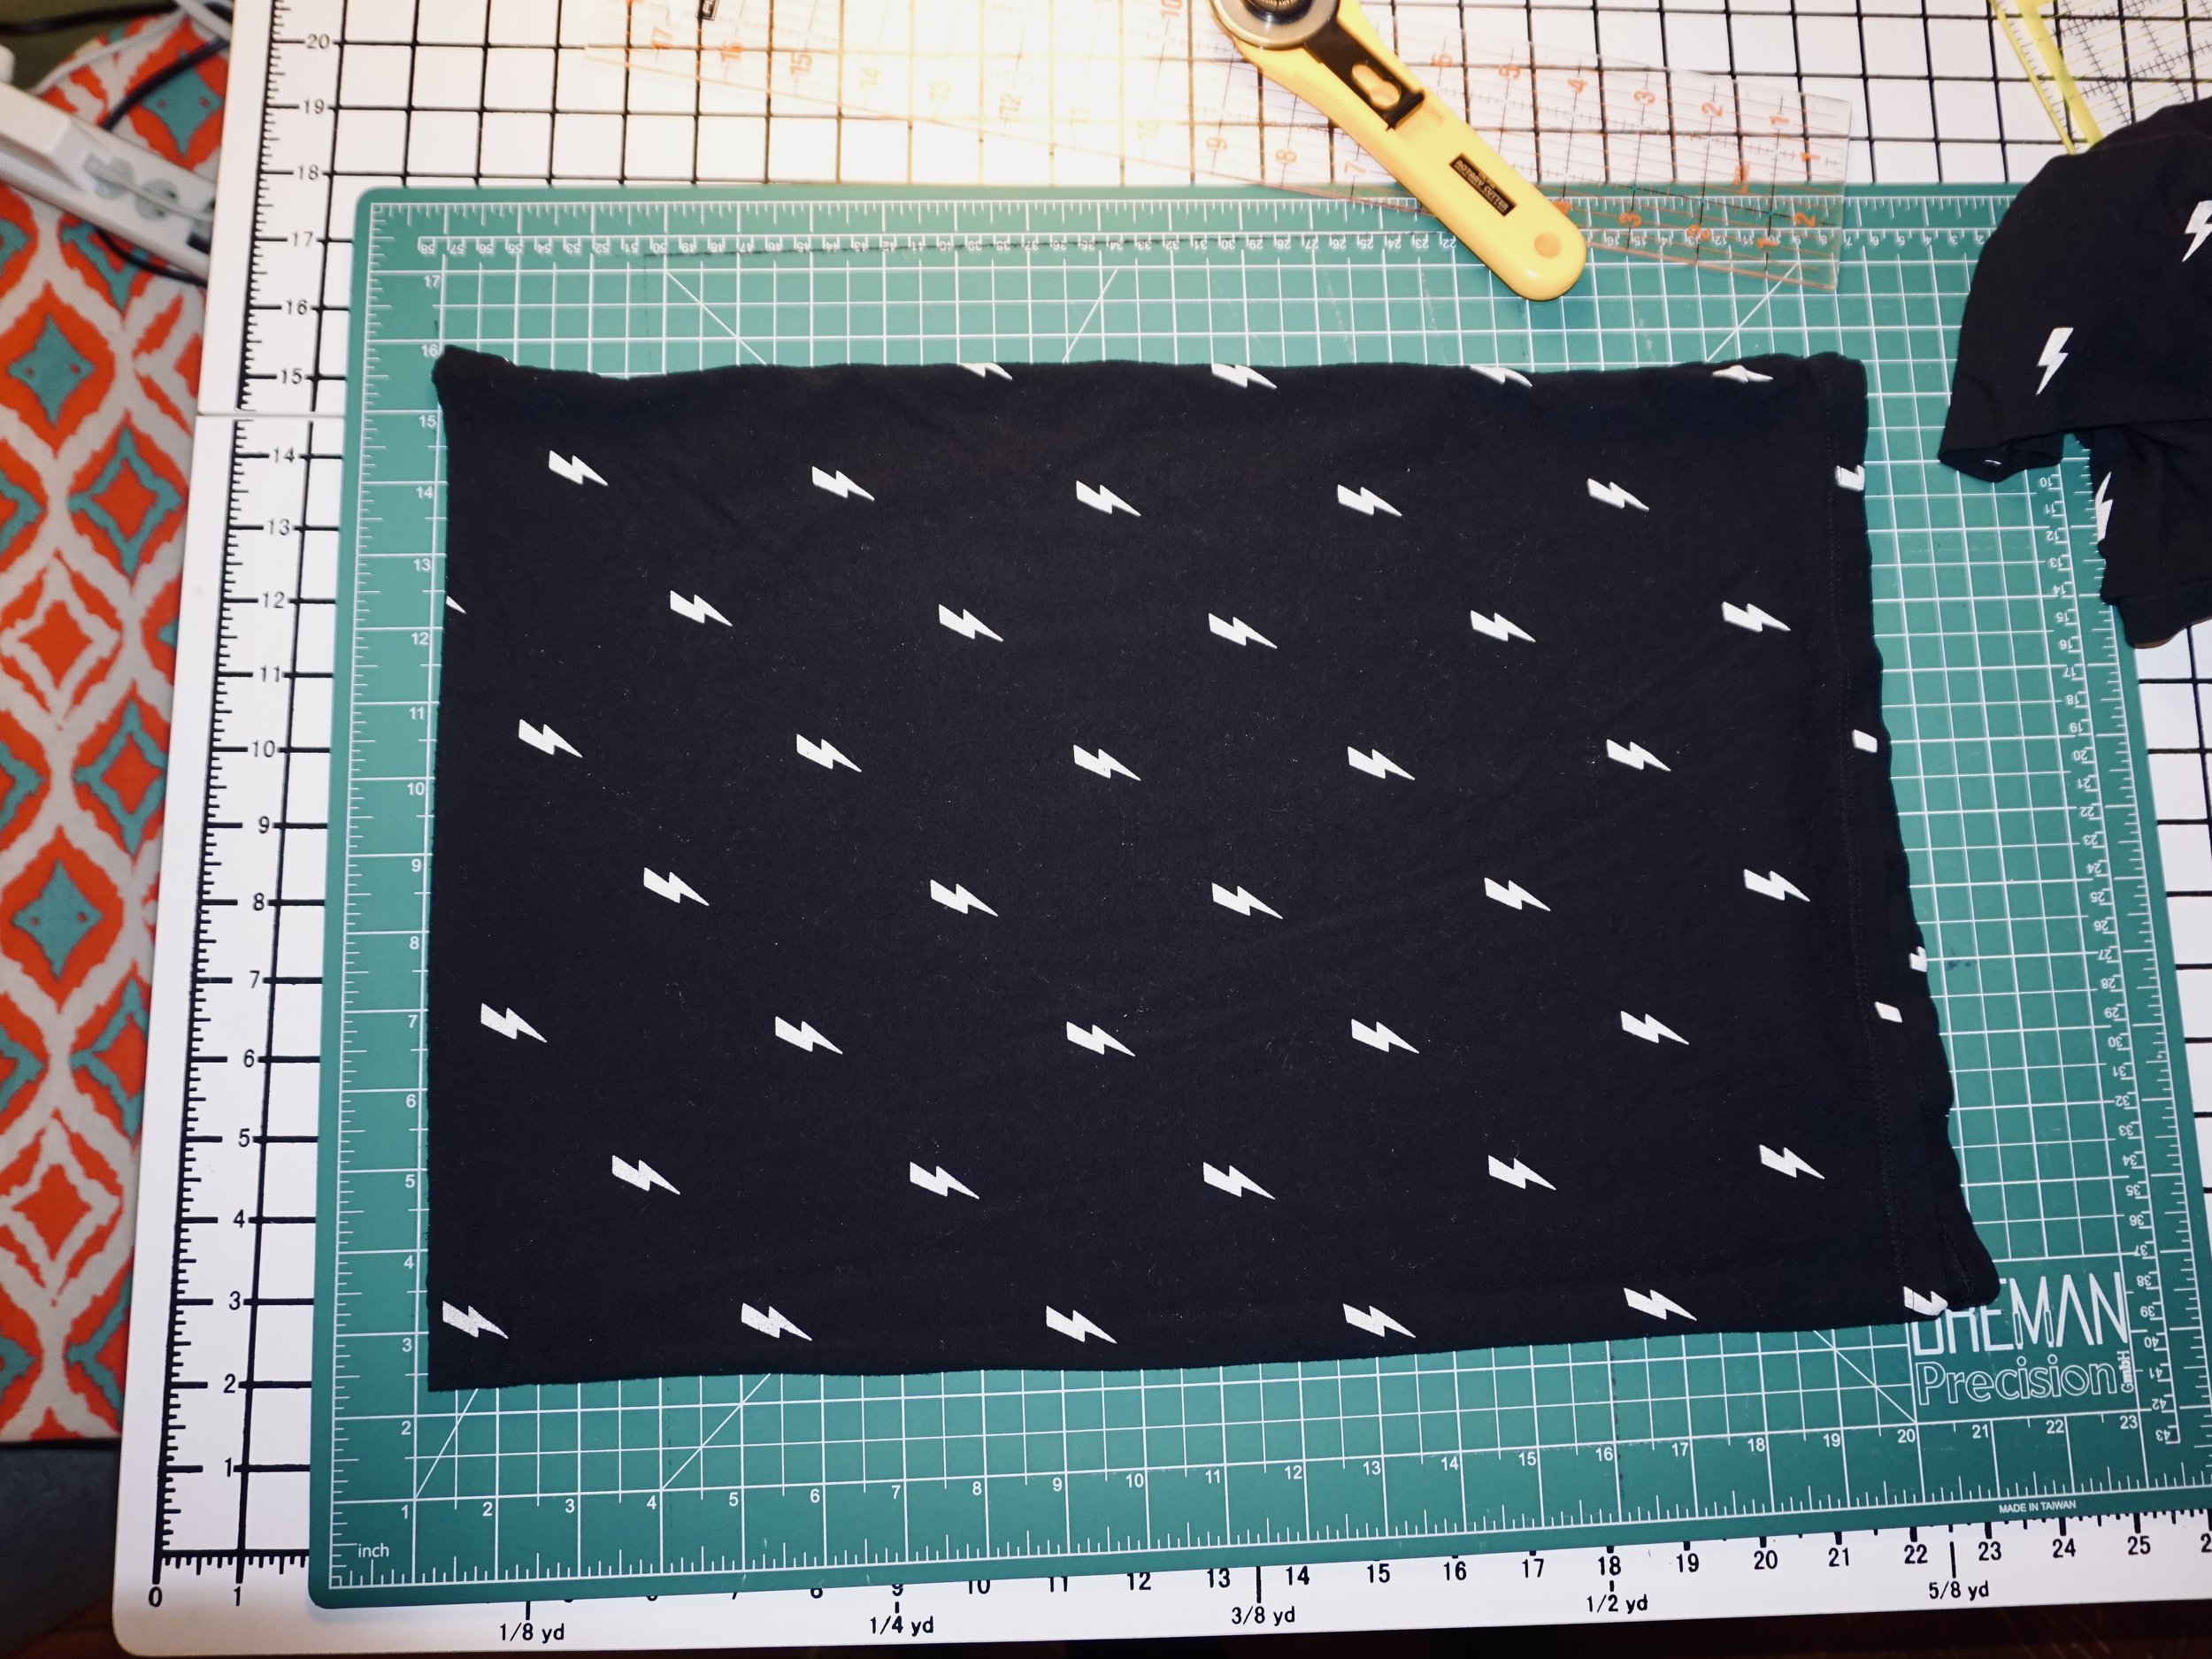
Go through your closet and find three tops with similar prints. For my smash together dress, I’m going with a star theme. I have two pajama tops with star designs and a tarot t shirt based on “The Star” tarot card. If you look in your closet it should be very simple to find three shirts with similar themed prints or colors. One thing I know for sure is that people are creatures of habit! But people also go through phases when they are buying clothes. I know in my own case I gravitate toward certain prints and colors at different times of my life, depending on my interests and the look I’m going for.

Once you have your three shirts, figure out which shirt will form the basis of the dress. I love to choose one for the top, the one with the best neckline and sleeves. In my case I really love the super soft thermal pajama top with the constellation print, it has a button placket and long sleeves that I like. So that will be the top of my dress.

After you have chosen the top portion, set it aside. Cut down the other two shirts into workable pieces of fabric. I typically cut along the seams so that the shirts have as much available fabric as possible. You can set aside the sleeves, just in case you want to make pockets for the dress.

If your shirts have decorative slogans or panels on them that you want to work into the design, use a rotary cutter and ruler to cut those out to create panels for the front and back of the dress. Measure along the top of the decorative front and back panels. Then cut off the hem of the shirt that you set aside for the top of the dress, and measure along the bottom edge of the top. Subtract the measurement of the panels being sure to include seam allowances. Divide that number by either two or four. Divide by two if you want two side panels that will connect the decorative panels, or four if you want each panel to have its own borders.
I wanted my dress to have patchwork, instead of just straight panels. When I measured the top I figured out that I would need 16 inch patchwork panels to go on either side of the decorative prints. That’s where shit got cray cray! I have a new cutting mat, and didn’t cut out the pieces right. This might happen to you if you sew on a wing and a prayer, like I do. So now I have odd sized pieces to fit together. The great thing about patchwork is there really is not a wrong way! If need be, you can always add another old t shirt to the mix for more fabric.
Start piecing together the side panels and make more pieces as you need them. My back panel was shorter than the front, so I added a lower trim to the back. Patchy makes perfect! If a piece isn’t long enough, work in another piece.
Once the front and back are sewed together, attach them to the top. You can choose to hem the bottom edge of the dress, use pinking shears or leave it raw edge. I kind of love a raw edge on the dresses! It lends to the handmade look of the dress. You can add a pocket or two if you want, or an applique for a really sweet look.
Here’s my finished smash together dress! It is perfect for the colder temps of Winter! I can’t wait to wear this!

The Star Dress by Kathryn Sturges

The Star Dress Back by Kathryn Sturges