This dress is a perfect way to refashion some old t shirts! Try it with shirts that have logos on the front for an alternative look. This pattern was part of my Craftsy collection last year!
Read MoreStencil Some Weekend Jeans
I think a lot of women have that one pair of super baggy jeans…or at least one! I got these jeans but then felt really uncomfortable wearing them. I usually wear skinny jeans that are more fitted through the legs so these baggy jeans made me worry that the look wasn’t right. I was going to cut them up and turn them into scrap fabric, but then I realized that maybe they would work with a little love!
First, I grabbed a letter stencil and wrote a quote I love from a song by Shannon and the Clams. I had bought a bunch of strawberry patches and was waiting for the right project. Well lo and behold, the back pockets were the perfect spot! So I stitched them on with a needle and thread. I accidentally pricked my finger like a million times, but no worries! I’m ok! (I suck at sewing by hand and don’t have the patience to practice.). After that was done, I folded up the cuffs. It is so annoying when the cuffs roll down when I’m wearing them, so I tried a patch of fusible web. It would not stick the cuffs in place, so I sewed them down with my sewing machine and a wide zig zag stitch. Here’s a walkthrough in pics!


Exploring Patchwork Clothes
It just hit me like lightening! Patchwork and upcycling go so well together, they are like peanut butter to jam. A lot of my upcycling journey has focused around patchwork. I’ve worked patchwork into handbags, bell bottoms, tops and dresses. I’ve even gone as far as to turn some of my quilt tops into patchwork skirts! The truth is, if you love an alternative look in your clothes patchwork can be a strong design element. Check out some recent makes I have done with patchwork in the last couple of years, and scroll down for more ideas!

The Star dress by Kathryn Sturges

Checker board dress by Kathryn Sturges

Patchwork skirt made from a quilt top by Kathryn Sturges
Here are some ideas and tips for working patchwork into upcycles!
If you are upcycling a bunch of t shirts, try cutting them into squares or rectangles and create patchwork first. These can be worked into tops, jackets and dresses with sweet success. Another idea I love is to get a pattern for wide leg pants or yoga pants, and then use large t shirt squares to create the pants.
Try sewing panels of patchwork to create bell bottoms or to add into the side seams of pants. Additionally, panels of patchwork can work well in the side seams of jackets or on denim skirts. Panels of patchwork are also a great way to create the skirt portion of a dress, or skirts in general. Panels in dresses and skirts are so simple to make, especially if you create a template to work with.
When sewing with patterns, create a patchwork first and then use the pattern as you normally would. Be sure to use the proper weight of fabric for the pattern for best results, and if it is a skirt or dress you may want to line the piece with muslin.
Handbags are an awesome way to use some patchwork! Quilt the bags with a lot of stitching using thread that pops for a chic look.
If you have a stack of old quilt tops lying around and you know you will not finish them, turn them into skirts or jackets. Jackets look especially good when made with quilted fabric or even vintage quilts. One time I sewed a small quilt, but once it got quilted I just didn’t love the result. So I turned it into a large zipper bag and now use that to store my lingerie.
If you have a lot of scrap material, sew yardage of patchwork to have some ready for different projects. You can also do this with old clothes! Break them down into smaller pieces and whip them into patchwork by the yard so that you have patchwork ready when you want a new dress or skirt.
Corduroy is incredible for patchwork bags and bell bottoms! Go to the thrift store and gather up old corduroy pants and jackets to use in projects. Corduroy blends well with denim because it has a similar weight, and it is easy to cut down with just scissors because of the lines in the weave.

First Draft of Garden Delights Dress
The Garden Delights Dress
I SOOOOOO wanted this dress to turn out! It is so beautiful! I love the color because it is chic and close to my skin tone. This started as a bodycon dress and the fabric is super clingy. When I first tried it on the spaces in between the buttons gaped in certain spots. So I sewed down the placket starting just above the bustline and stopping one button up from the bottom hem. I cut off the sides starting four inches down from the underarm area and added the gorgeous green floral. Then I rooted around in my stash of scrap materials and found a velvety floral patch to add as an embellishment.

I loved the first upcycle…so simple yet pretty. But the dress was still to tight. It was too form fitting in the bodice. So the dress sat in the back of my closet for a couple days, and I kept thinking that if I had just removed the sleeves altogether I could probably make it work! So I went to work this afternoon. First I cut off the sleeves with a pair of scissors. Then I cut a straight line down on either side of the placket, about six inches away from the placket on either side.

I cut out two huge pieces of knit fabric that measured 22 inches wide by the width of the fabric. I did not measure the width, instead I started at the front of the dress and sewed the piece on either side. It was the weirdest thing, because even though the length of each piece should have been the same measurement when sewn, they in fact were not! So once I got the two side pieces attached, they were not long enough to go all the way down the back of the dress and one side piece was shorter than the other!
So I got out my cutting mat and rotary cutter again, and sliced off the back of the dress to even everything out. I added a panel in the back, it goes horizontally across the mid back to the bottom hem. At this point the dress looked kind of like a poncho.

I pulled it on over my head so that I could estimate the sleeves. I was originally thinking I would do a wide sleeve, but because the finished dress was going to be so roomy I thought a form fitting sleeve would look best. (Look up basic caftan pattern instructions online if you want to try this yourself. The sleeves I did are basically the same only more form fitting.) I wound up measuring my just above my wrist, then at the widest part of my arm right before the elbow. I added an inch to each measurement. Then I folded the dress in half, with the raw edges of the fabric at the outer edge. I started at the sleeves and simply cut them out, with the starting measurement matching my wrist measurement plus one inch angled out to the measurement from the widest part in front of my elbow plus one inch, then went from the armpit area down to the lower hem of the dress at an angle. It finally started to have the shape of a dress again!
I flipped it right side out and, starting at the sleeves I sewed the side seams. Because the fabric doesn’t fray, I left the edges raw and just trimmed everything off.
I love the way this dress turned out, and cannot wait to wear it everywhere!

Sew Some Hawaiian Style Bell Bottoms
Summer will be here in 2 weeks in the USA, and I’m already starting to gear up with some upcycles! I’ve had this pair of pants for a few months now, but they were a little to snug across the belly and hips, so I decided to turn them into disco gold…Hawaiian style!
Bell bottoms are so much fun to make, and they are super easy. I got my start sewing bell bottoms back in 1999, at that time I was sewing them for people in my college town. Today I make them when pants are too tight or don’t fit how I want them to. If your pants are too small around the waist, you can add panels that go all the way up to the waist band. If you want more width through the hip and leg then start four to five inches down from the top.

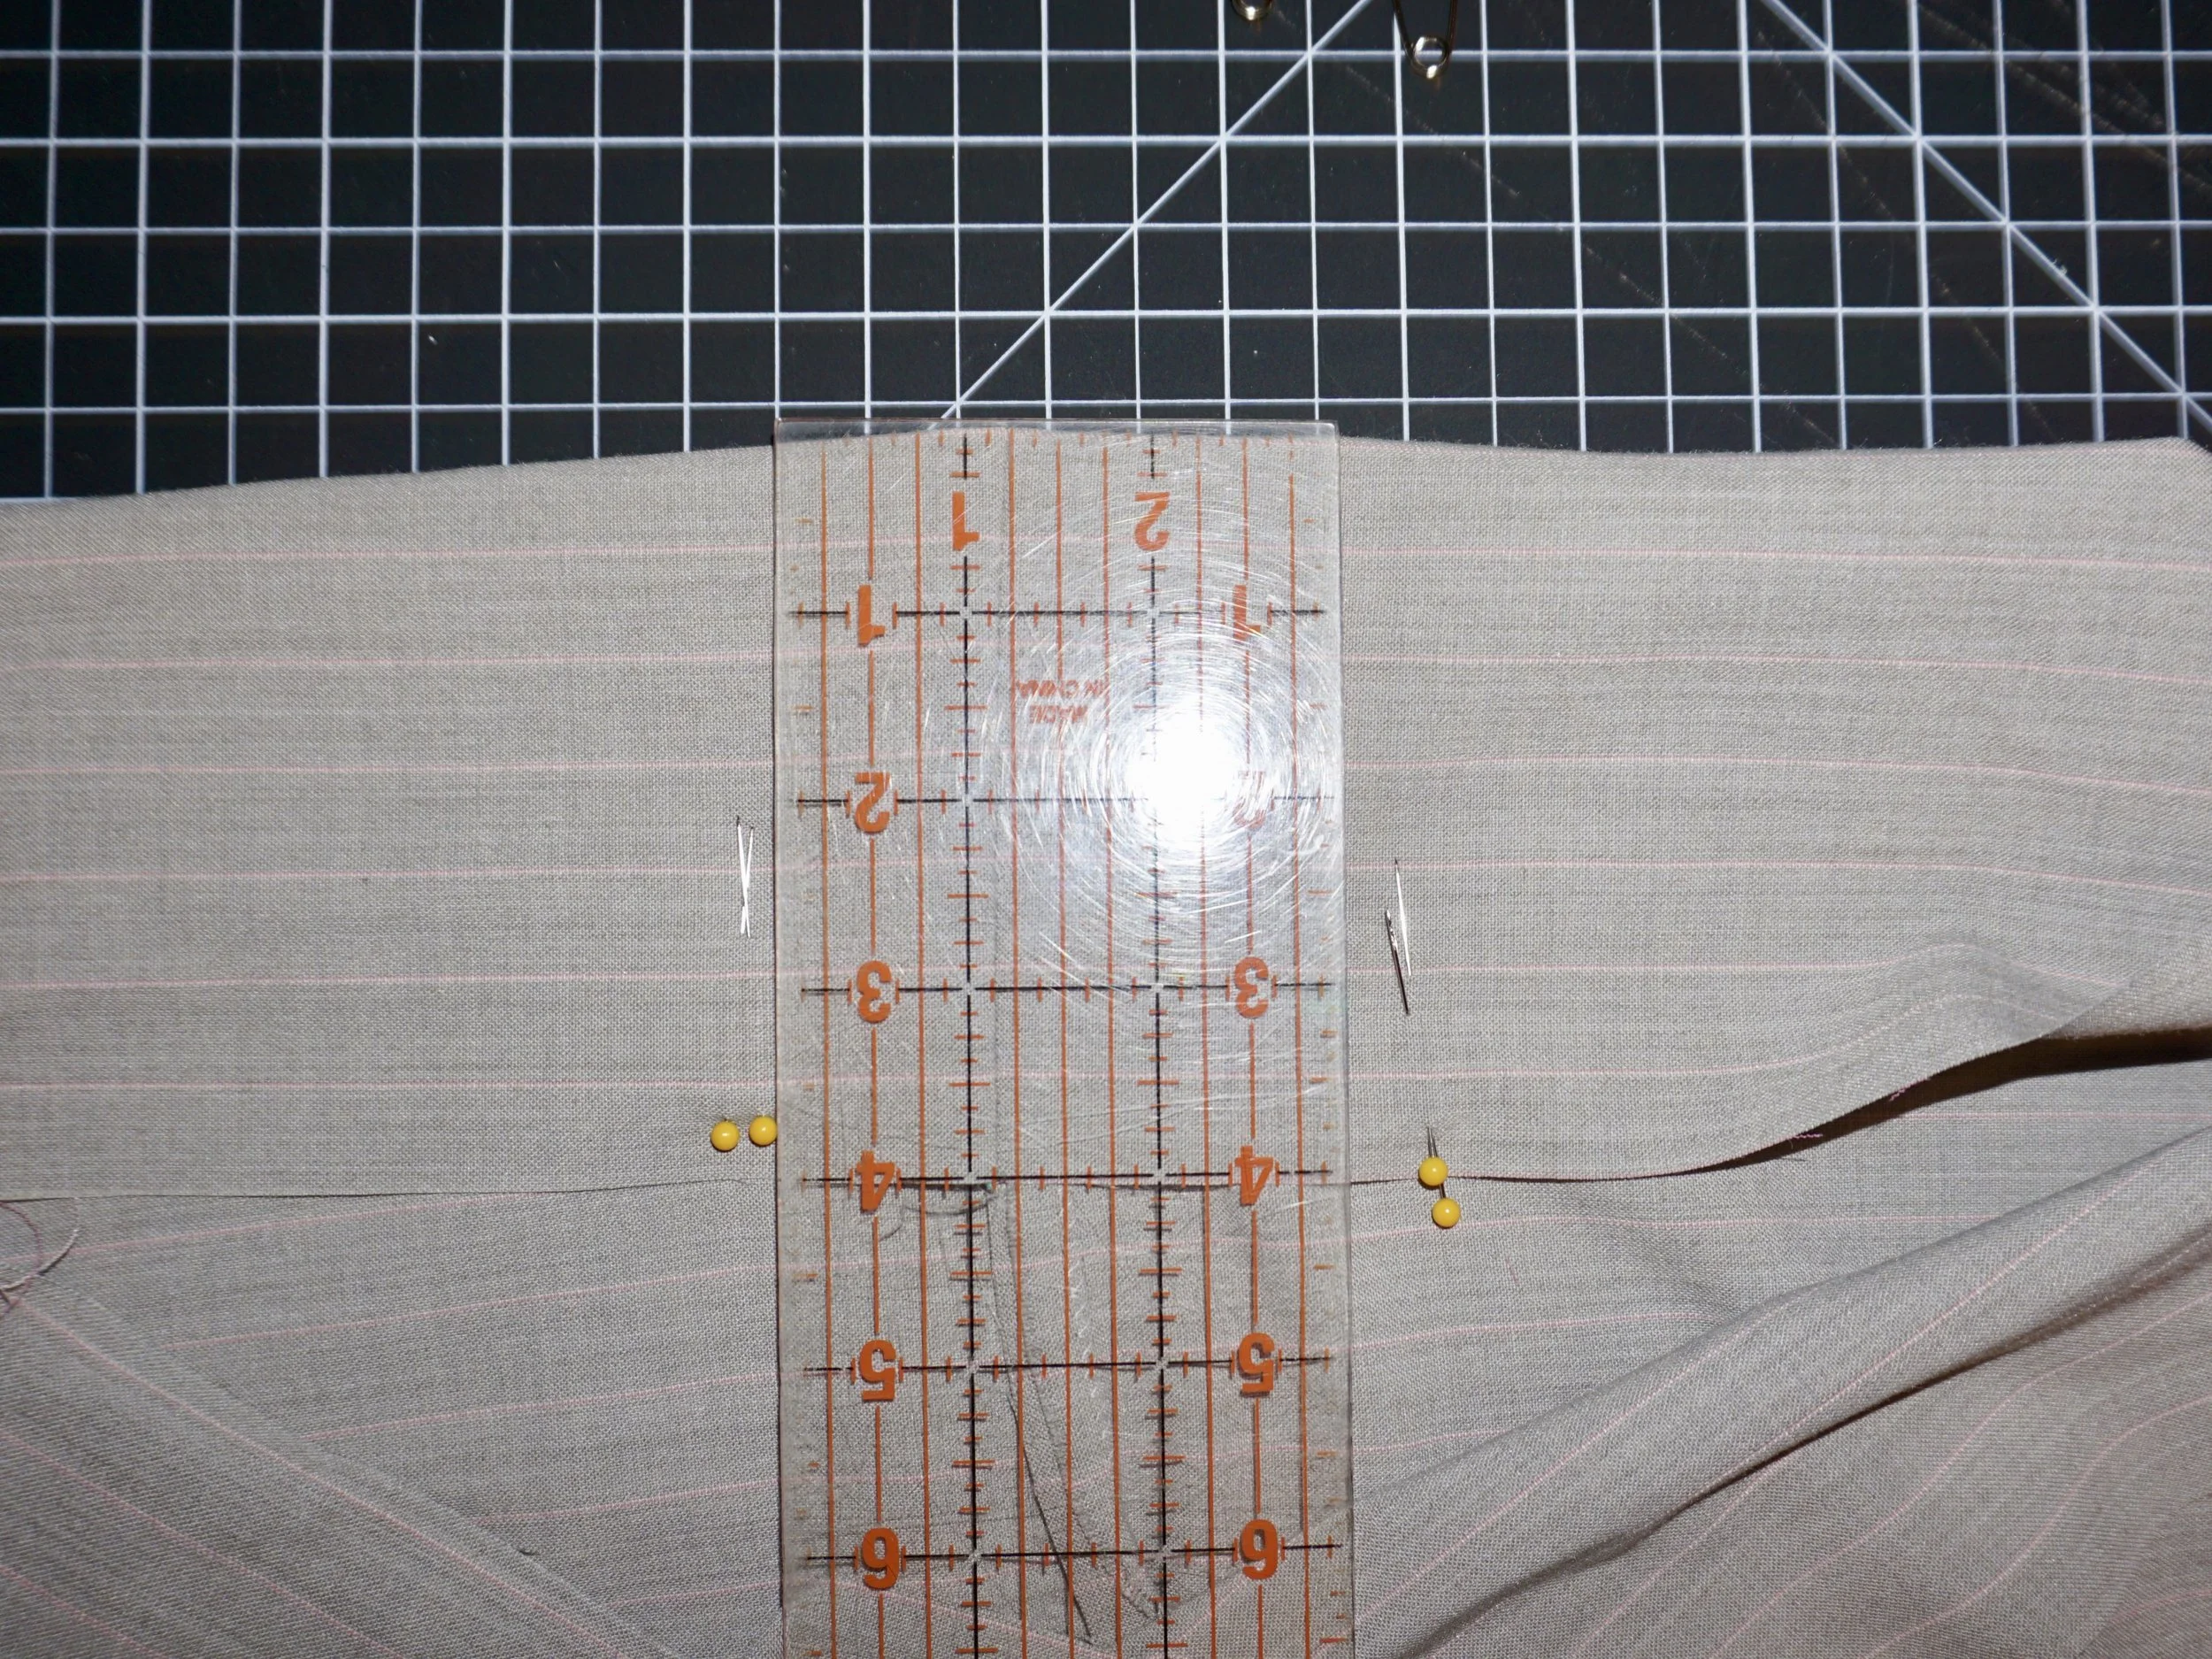
I started the cut just to the right of the side seam, on the back panel of the pants. That way I could leave the pockets in place. I used my ruler and rotary cutter to cut the fabric.

Next I created panels of fabric that were 9 inches wide by the length of the pants, with an additional few inches at the bottom for hems.
Next I found the middle of the first panel, and starting pinning at the top of the opening. As I worked my way down to the bottom hem I angled the pant leg out towards the side of the fabric panel. That way I could get the full width of the fabric into the bell bottom shape at the hem.

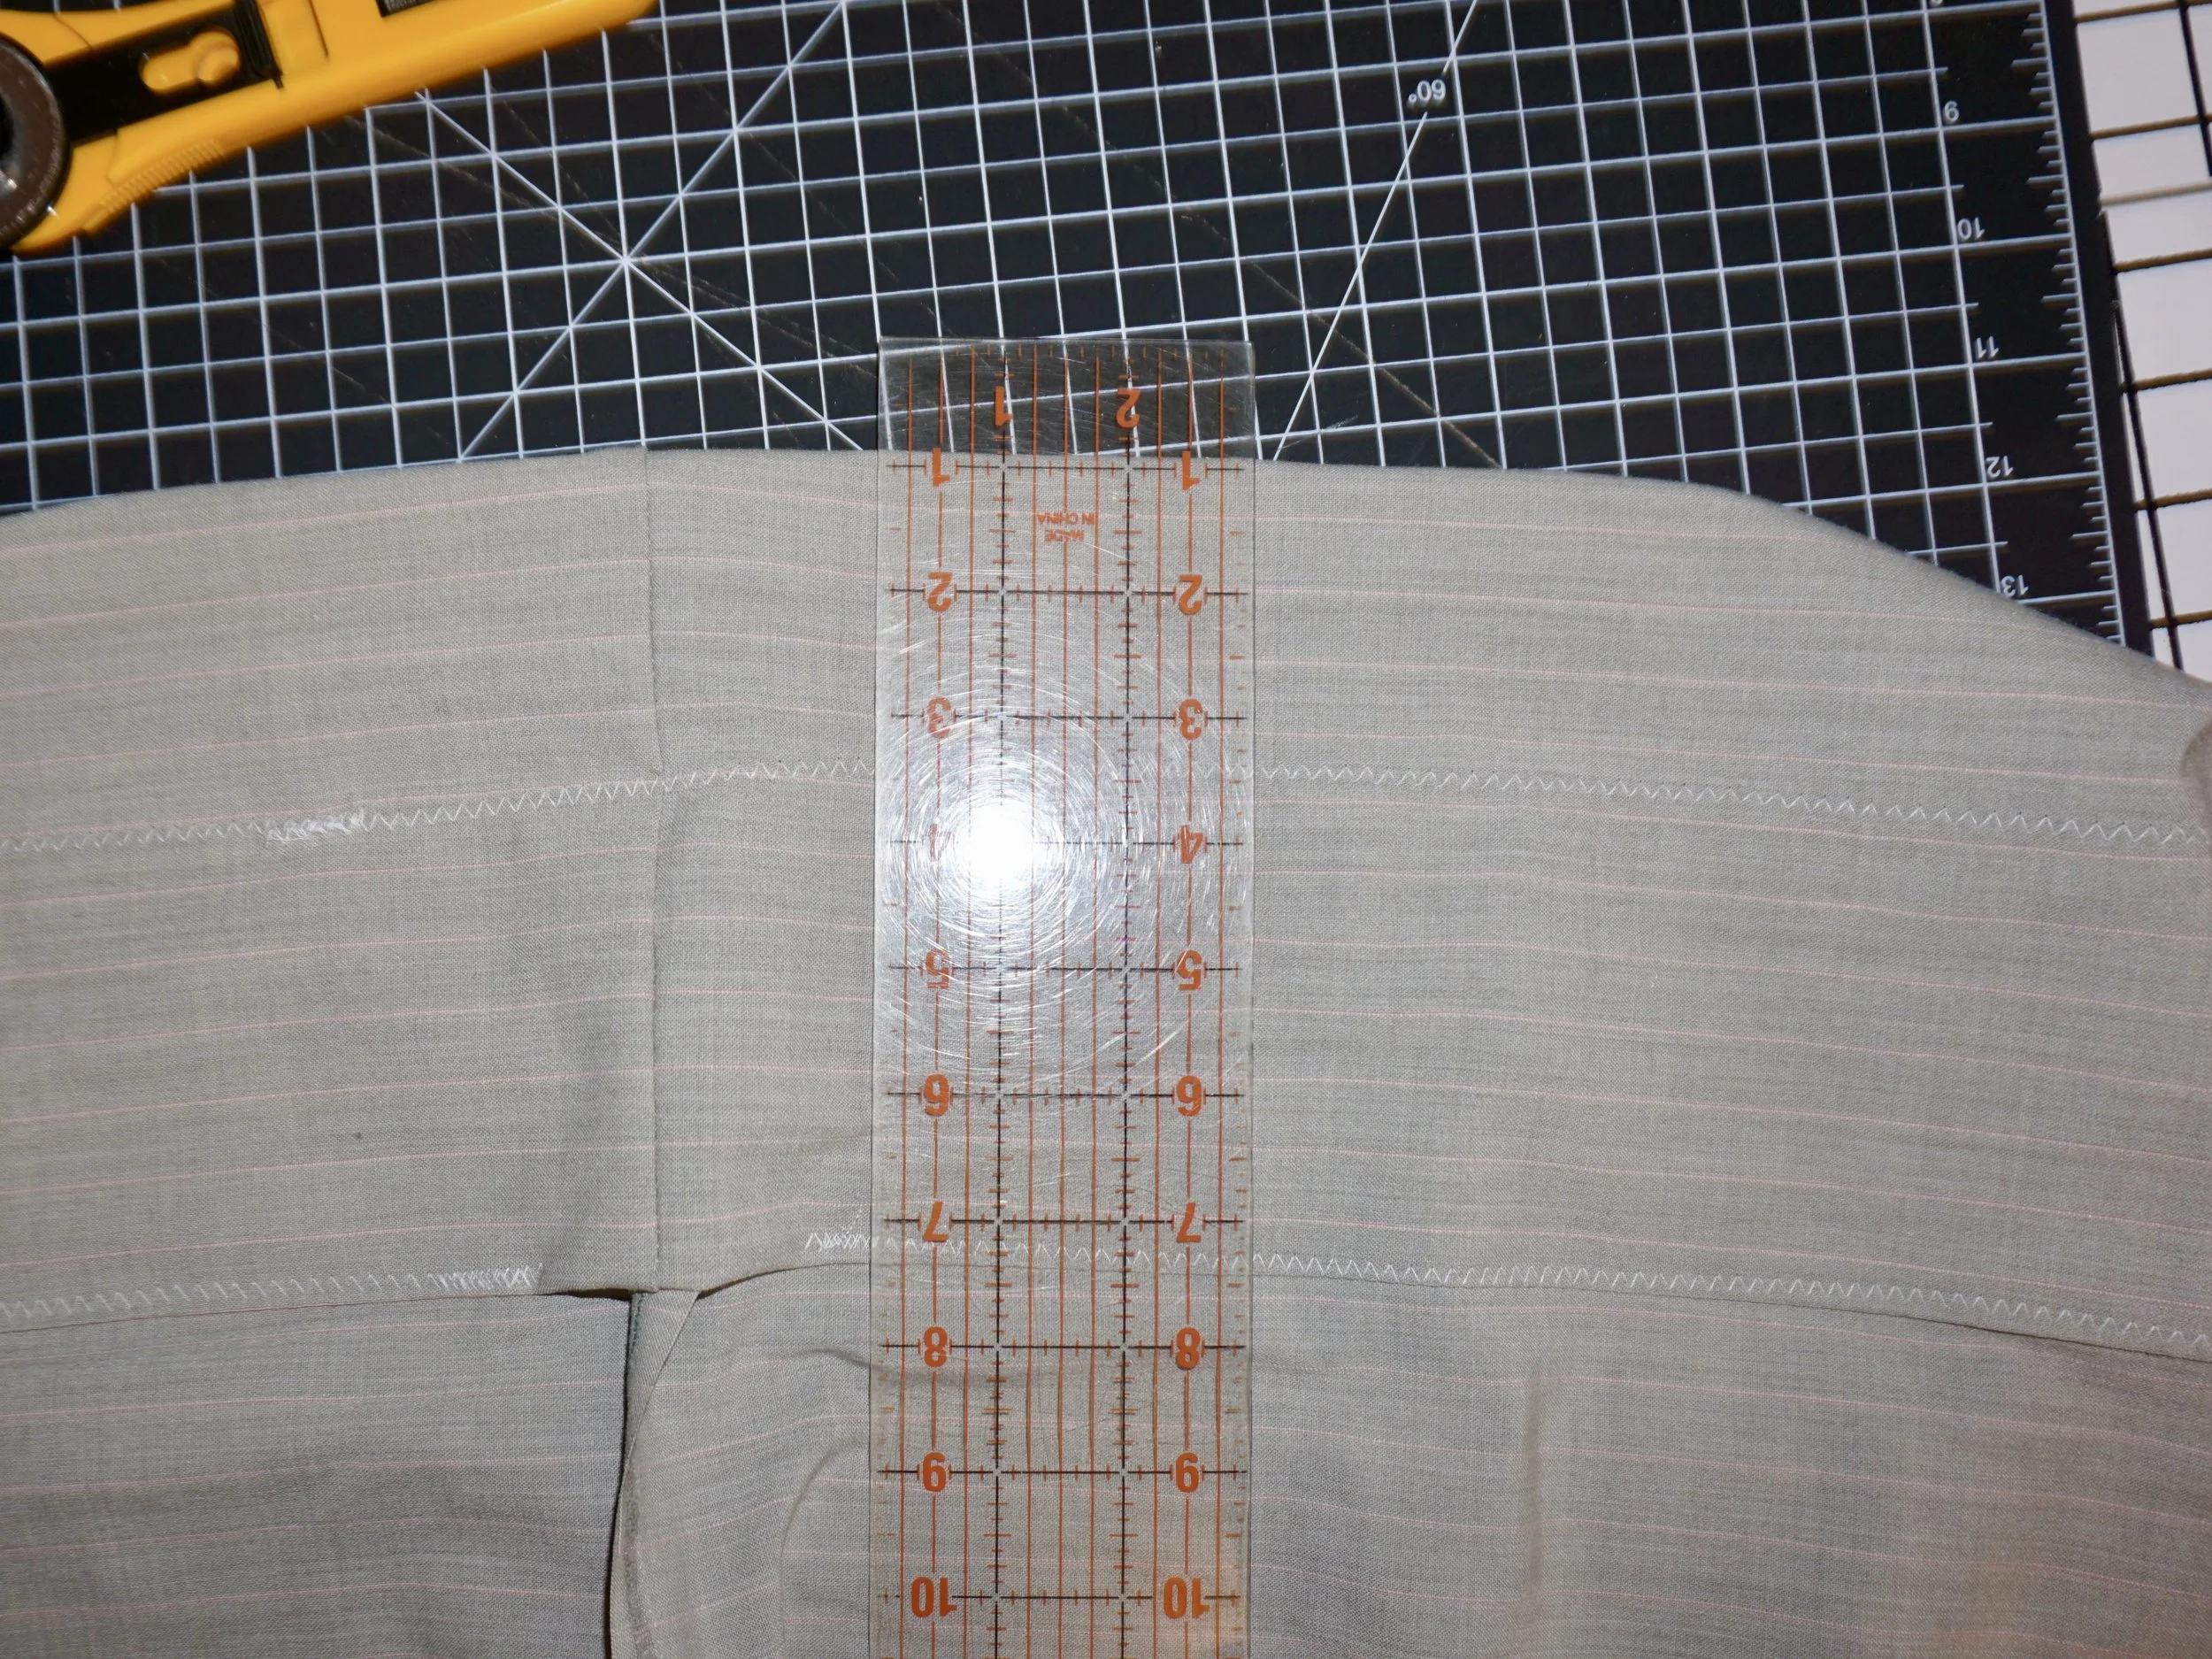
I sewed the first seam, with a quarter inch seam allowance. Then I trimmed off the excess fabric along the seam and finished the raw edge with a zig zag stitch. I did the same thing for the other seams.
Here’s how the panel looked inside out, after being sewn.
Smocked Top to Dress Walkthrough
I wanted to create a mushroom dress to wear for the back cover of my book! I already had this smocked top in my closet and was not in love with the way it fit. Often times smocked tops are more of a crop fit and I prefer a bit more length to my tops. I don’t know why crop tops are all the rage right now…and if you love wearing them then you are probably loving the way brands are cropping tops at the moment. But I keep buying tops thinking they are of normal length, only to find out later that they have a cropped shape. Fortunately as a seamstress I can use those tops as a basis for tunics and dresses!
This project took 1 yard of cotton fabric with mushrooms on it, sewing machine and basic sewing supplies. The patch is completely optional!
For the skirt, I ironed the fabric then cut the yard in half. I squared off the edges with my ruler and rotary cutter. Then sewed the pieces together at the sides to create the skirting. Next, I used safety pins to mark the side and mid points on the lower hem of the top. I did the same thing on the skirting, only this time it was on the top edge. Next, put the top into the skirting, right sides together with the bottom seam of the top in line with the top seam of the skirting. Line up the pins, and attach the skirting and top together, again at those four points.
Start sewing, and stretch the smocking as you go so that each section of the skirting lines up with the top. If there is additional fabric than there is smocked area for each section, simply stretch the smocking most of the way and then sew the rest of the way without stretching. The key here is to make each quarter section of skirting line up with each quarter section of smocking.
I decided not to hem my skirt, because I wanted to keep the length. I zig zag stitched the hem, but you could use pinking shears for a cute look too! The mushroom patch was just what I needed to finish the look for my faerie book! You can use another style of patch or applique for a cute look, or even some lace detail on the color or hem of the skirt.
You can use this same technique for t shirt dresses and other upcycles too! This method is a great way to pair up a top and bottom that aren’t the same size, but still retain some stretch in the waistline.
Play around with this technique and see what tops you can restyle to make them fit more comfortably and get more life out of the clothes in your closet!

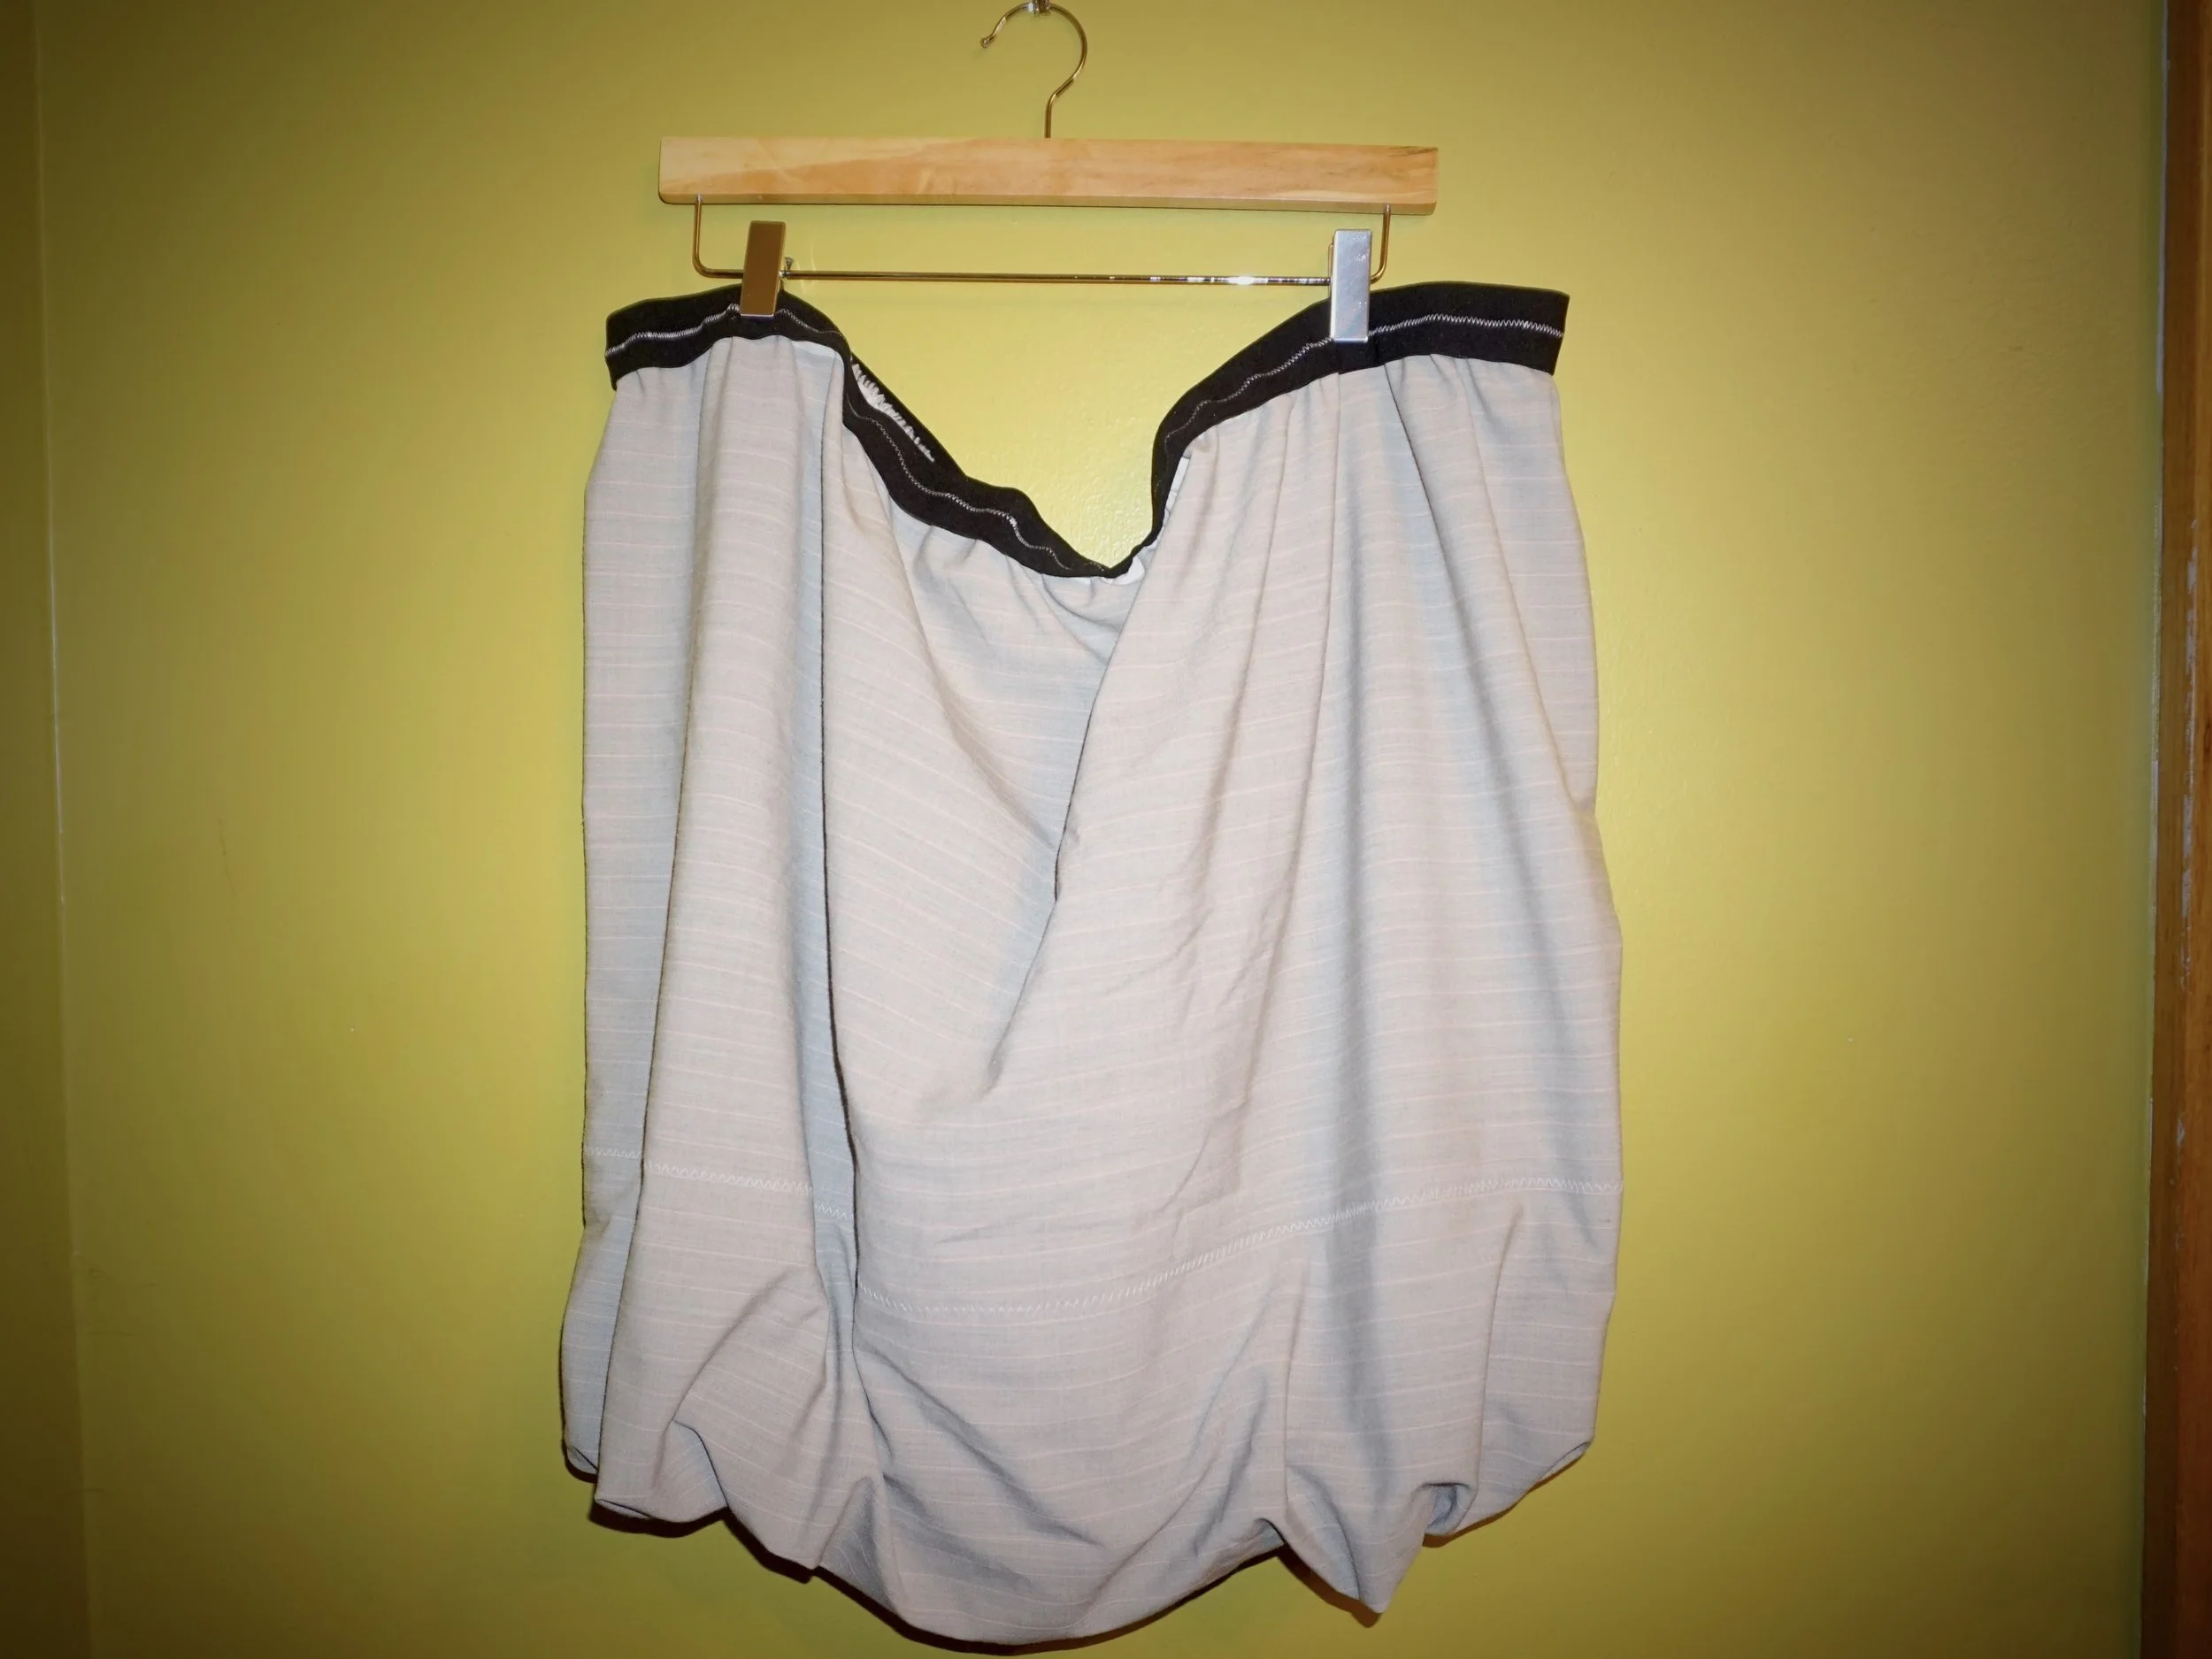
Sew a Quick Maxi Skirt
It is holiday season, and you might not have your holiday look together just yet! If you have a yard and a half to two yards of fabric and some elastic, why not sew a quick maxi skirt to wear to those holiday gatherings! Better yet, do some patchwork and make the skirt even more fabulous!
The length of the skirt is up to you! You do not need a pattern! All you really need is the waist measurement and length measurement for the finished skirt.
I made the above skirt in a few hours! It would have taken a lot quicker, but when I put the elastic into the waistband, the elastic rolled up and twisted on me. So I had to remove it and put it back in. In a few easy steps, you can make an elastic waist skirt! These are great for a holiday look, or even as a gift!
Grab a yard or two of fabric. Depending on the waist measurement, use a piece of fabric that is one and a half to two times bigger around the waistline. That way the skirt will fit well and gather nicely when you add the elastic.
Decide which side of fabric will be at the waistline, and then sew the perpendicular edges together. This will form a huge tube of fabric.
Fold over the waistband with enough width to feed the elastic through, then sew down. Be sure to leave an opening for the elastic. I used a knit fabric, and used a zig zag stitch for this part. That way it would still retain some stretch. If you are using a woven fabric you would want to use a straight stitch.
Pull some elastic around your waist, and then go about five inches smaller beyond that and cut a piece of elastic for the waist. This way the elastic is tight enough so your skirt will stay on but still comfortable to wear.
My elastic banding was two inches wide. Whatever the width of your elastic, attach a safety pin to one side, then feed it through the waistband. Now this is the important part! Straighten out the elastic as you go around, so it isn’t twisting. Then sew the ends together with a zig zag stitch, going back and forth over the ends to really lock them together. Next, add four rows of stitching approximately equal distance around the waistband. Be sure to gather the fabric along the elastic evenly so the gathers are even along the waistline. This will prevent the elastic from twisting in the future.
Last, hem the skirt. If you are using a stretch knit, you should just be able to trim the bottom hem and leave it because stretch knits usually don’t unravel. For a woven skirt, you would want to iron the hem and then sew.

The Colorblock Dress
This upcycle is so easy, and I have to warn you! Once you get the hang of this you will want to upcycle all of your tops! One issue with Plus Size tops is that they often are not long enough. For some reason a lot of brands seem to keep the length of plus size the same as they do for regular sizes…which is just a shame! Plus size bodies have different requirements, and if you have a longer torso then sometimes you just have to improvise. If you order clothing online like I do, then you probably have some tops that just aren’t quite long enough. Try this upcycle and those tops will become your favorite things to wear!
Materials:
Two stretchy tops that are the same width across
Rotary cutter and mat
Sewing machine
Step One: First, chose one of the tops to be the top and bottom portion of the dress. You can use a plain top, sure, but if you have something with a fancy neckline or back details, all the better!
Step Two: Hold the first top up to your body, and figure out where your bustline is. Then, cut off the top in a straight line just below the bustline. I folded my top in half, lined up the edges and used the rotary cutter and mat to cut straight across. If you don’t have that set up, draw a line with a marker and ruler, then cut with scissors. Set the bottom portion of the top aside.
Step Three: Now cut off the second top, just below the armpits. You will want to check to make sure that the tops are about the same width across. This will be the middle panel of the dress, so make it as wide or narrow as you want. I removed about five inches from the bottom portion, which removed the lower hem.
Step Four: Sew the pieces together! I used a narrow zig zag stitch, which was set to about 4 in width and length. This will allow the fabrics to retain their stretchiness, and makes it so you don’t have to do any fancy stitches for stretch. First sew the middle portion to the top, then attach the bottom of the first top to the bottom of the middle portion.
This is such an easy upcycle! I’ve done this a couple of times now, and it literally creates something that I can’t wait to wear. Colorblocking is very body friendly, and looks great if you have some curves. This project probably only took me about twenty minutes in total, so you could easily do this in as an evening or weekend project. Happy sewing!
Rock this Bubble Hem Skirt In Two Hours!
Almost fifteen years ago I had a bubble hem top. It was pink and white striped, and I loved it so! I wound up donating it, I threw it in the donation bag because I thought someone shopping second hand needed something super fashionable to buy. And I totally regretted donating that top!
Lately the bubble hem kept nagging at me, taunting me. So I started researching how to sew a bubble hem skirt. A lot of the directions call for some wacky kind of lining, or to tweak an existing skirt with fabric glue. And I wanted to sew mine from scratch, but in a simple way. I did some experimenting, watched some Youtubes, and lo and behond…I discovered a way to make a chic bubble hem skirt in a couple of hours! This is a perfect evening or weekend project, when you feel like whipping up something quick.
Materials:
Wide elastic, approx. 3 yards for Plus Sizes
2 1/2 yards lightweight fabric, preferably with some stretch
sewing machine, rotary cutter and mat or scissors
safety pins
Ready…Set…Sew!
Step One: wrap a piece of elastic around your waistline at the spot you normally wear skirts at, and then pull the elastic taught so that it is a bit smaller than that measurement. When I did this I didn’t pull the elastic enough, so my skirt just fits but is slightly too big. A good rule of thumb is four to six inches smaller than your waist measurement, depending on how stretchy the elastic is.

Step Two: Bubble Hem Skirt
Step Two: Overlap the raw ends of the elastic and sew to create a loop. I like to use a narrow zig zag stitch and sew an x through a rectangle to reinforce the seam. If you want to be sure the skirt will fit, try on the elastic by pulling it around your waistband, and adjust the measurement before you do the next step.
Step Three: Bubble Hem Skirt
Step Three: Next up is measuring and cutting out the skirt fabric. If you are using stretchy fabric, you may want the stretch to go horizontally along the width of the skirt. First, stretch the elastic loop as far as it will go and then double the measurement. This will be the width of the skirting piece. I folded my fabric and stretched the elastic from the folded edge to the middle and approximated the width. The length of the fabric will be from your waistline to your ankle. So you will have a rectangle…mine was approx. 33 inches long. Wrap the piece of fabric around your hips to be sure it is big enough if you are in doubt. Be sure the width measurement is big enough to easily go around your widest point.

Step Four: Bubble Hem Skirt
Step Four: With right sides together, stitch along the seam that goes down the length of the fabric. My fabric was stretchy so I did a small zig zag stitch. (You don’t have to use stretchy fabric, any lightweight fabric will work.)

Step Five: Bubble Hem Skirt
Step Five: Divide the elastic into four equal sections, then do the same for the waistline of the skirt. Place a pin at each point. Next, line up the pins on the elastic and the waistline hem and attach. The fabric will be loose in between the pins. Sew the elastic onto the waistline hem, being sure to pull the elastic tight as you go so that the fabric and elastic line up and lay flat when sewing. It helps to hold on to the elastic behind the sewing needle and in front of it.
Step Six: Bubble Hem Skirt
Step Six: Using a ruler to measure the hemline, fold the hem under three to four inches and pin as you go. I left an opening to thread my elastic through, but wound up closing the opening and hemming the skirt again. If you want a longer skirt, you can skip the next step and go ahead with the elastic after you sew the first hem. Stitch the first hem, I used a zig zag stitch set to five.
Step Seven: Bubble Hem Skirt
Step Seven: Try on the skirt at this point. When I did, I realized I wanted the hem to be much shorter. If you like where the hemline hits at this stage, skip to the next step. I folded my hem up another six inches and sewed it down with another zig zag stitch, leaving an opening about three inches wide at the middle back. The extra fabric bulkiness adds to the overall effect. Be sure you fold the hem further than where the bottom of the original hem hit, so that the bottom of the hemline is just two layers of fabric. This will add to the light fluffy look of the bubble hem.

Step Eight: Bubble Hem Skirt
Step Eight: Cut a piece of elastic about 25 to 30 inches long. Pin one end to the opening in the hemline, then place a pin in the other end. Feed the elastic through the hem, like you would if you were making a drawstring bag. Once you go all the way around and have both ends of elastic through the hemline, pull on the elastic. Adjust the fabric along the elastic until you get the bubble hem look. You can pin together the elastic at this point to try on the skirt again before the final step if you want to. Next, sew the elastic together and cut off the remainder and close the opening.
Rock this Bubble Hem Skirt by Kathryn Sturges
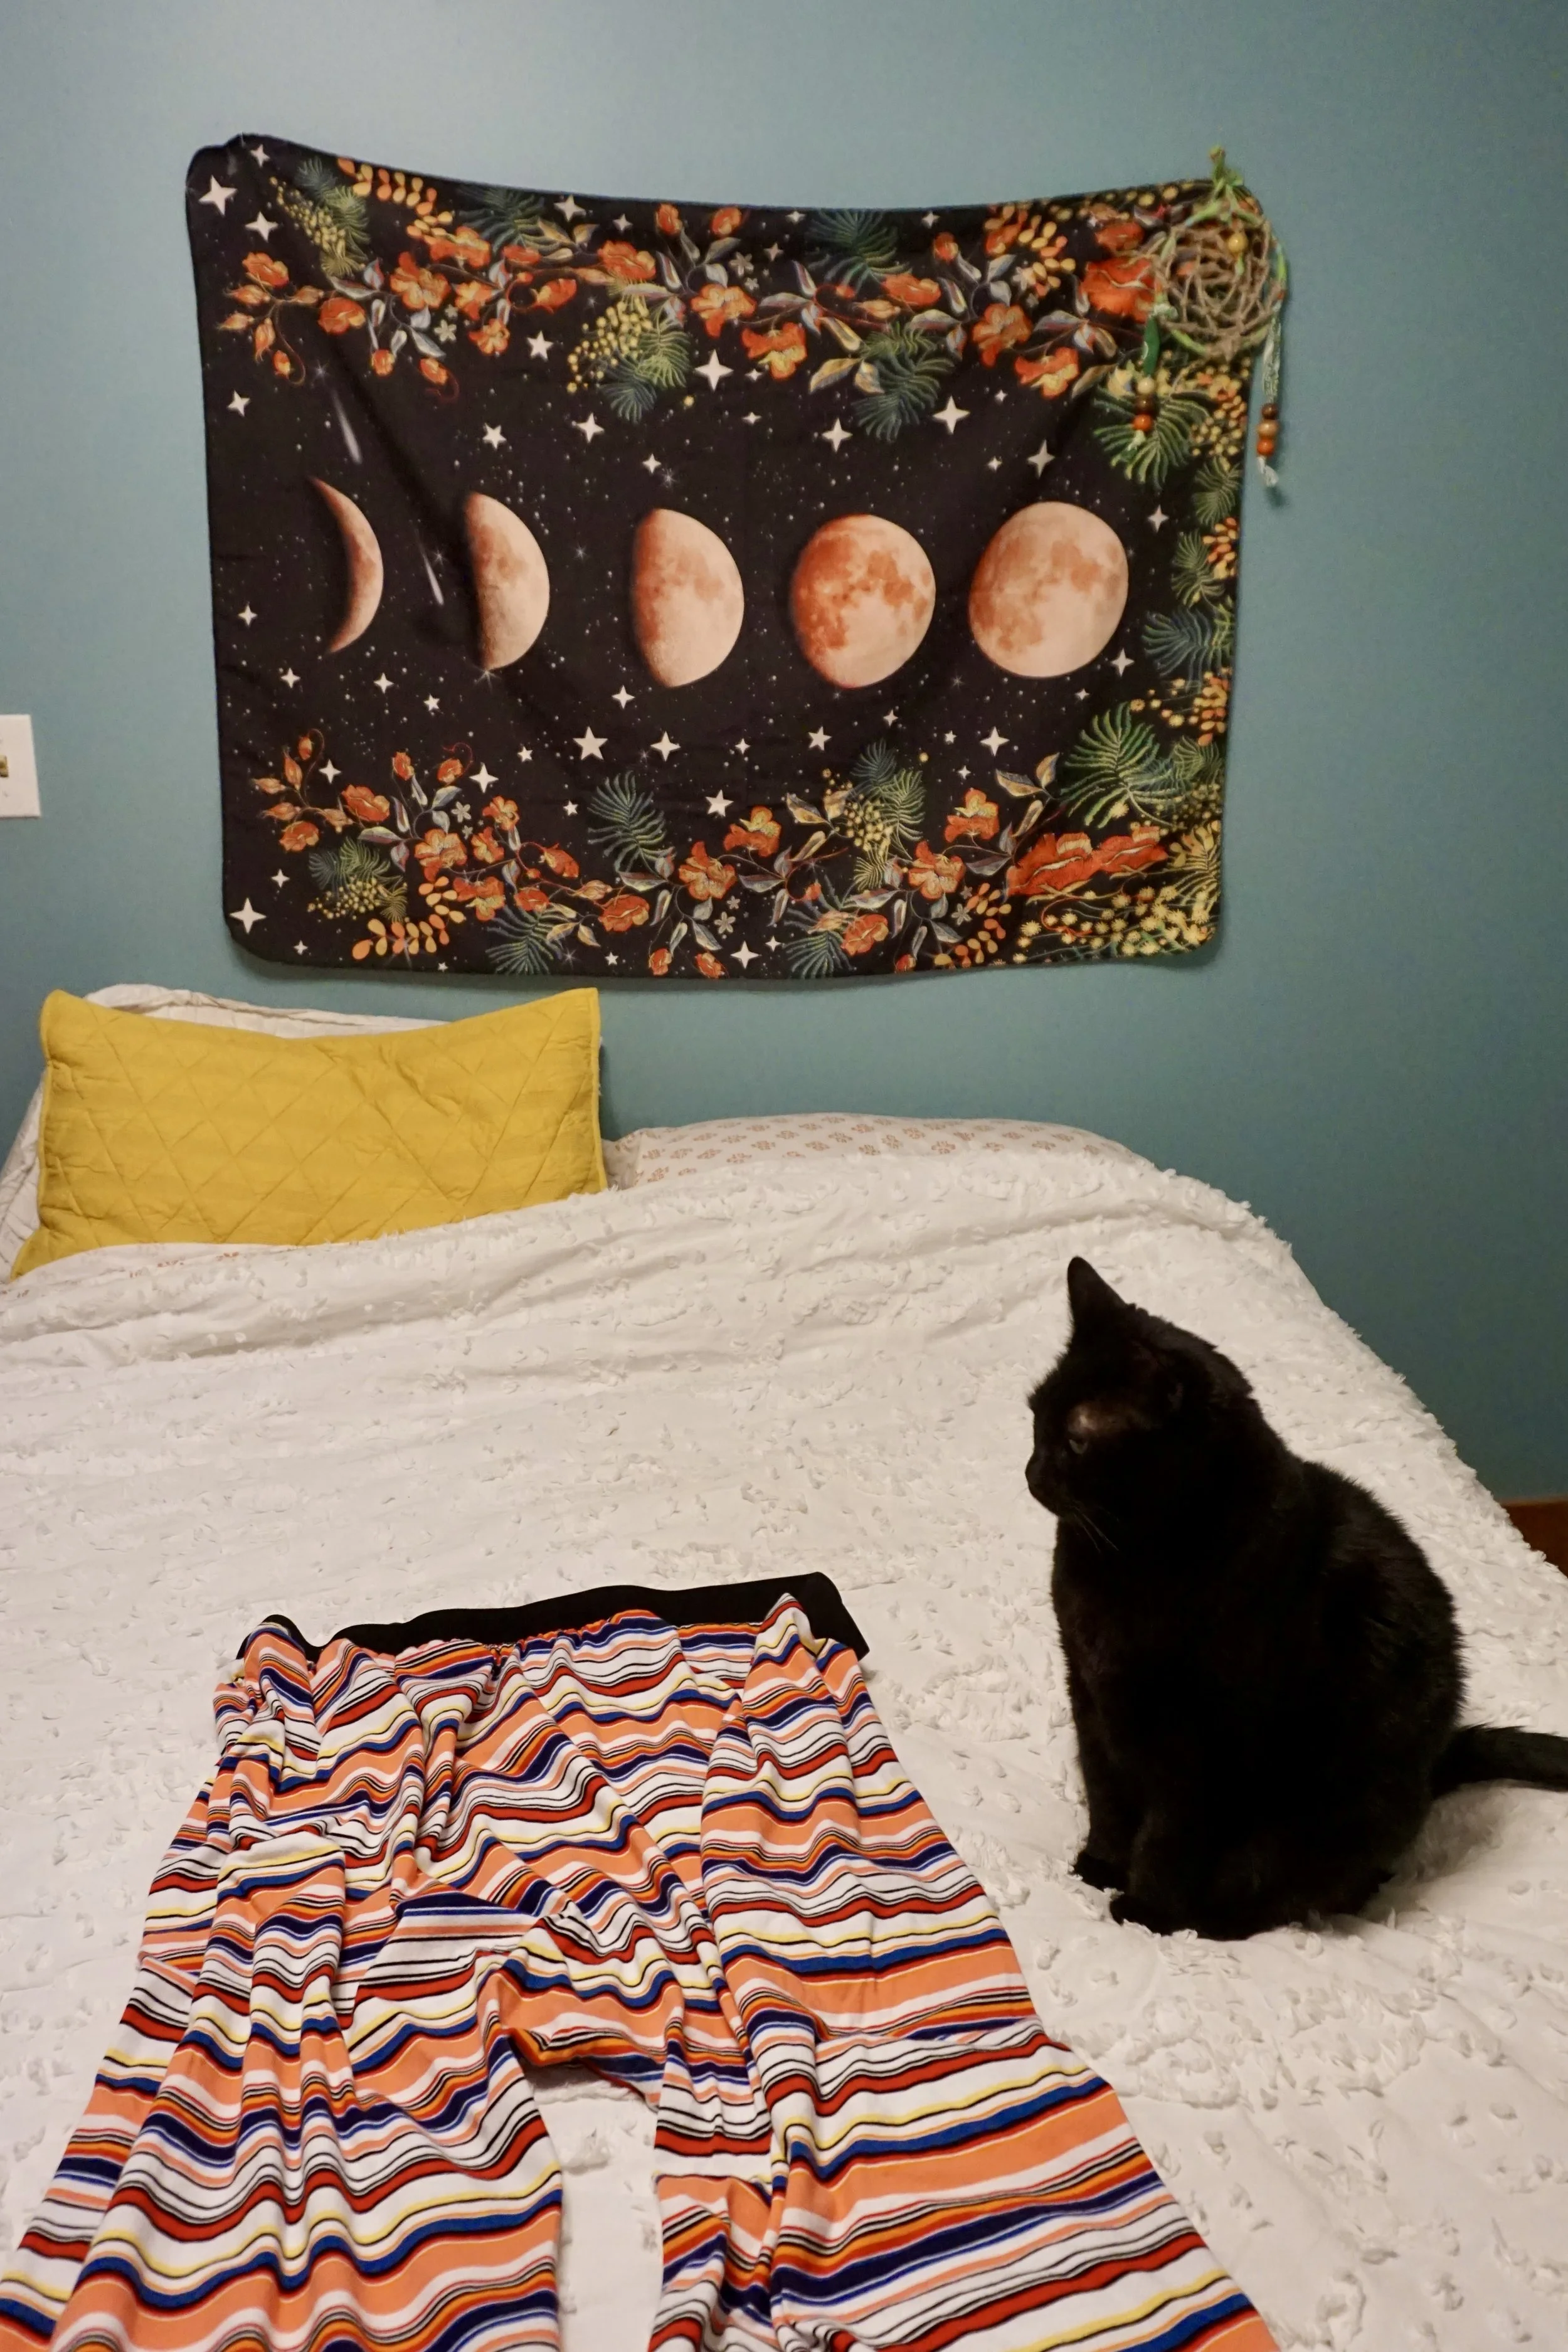
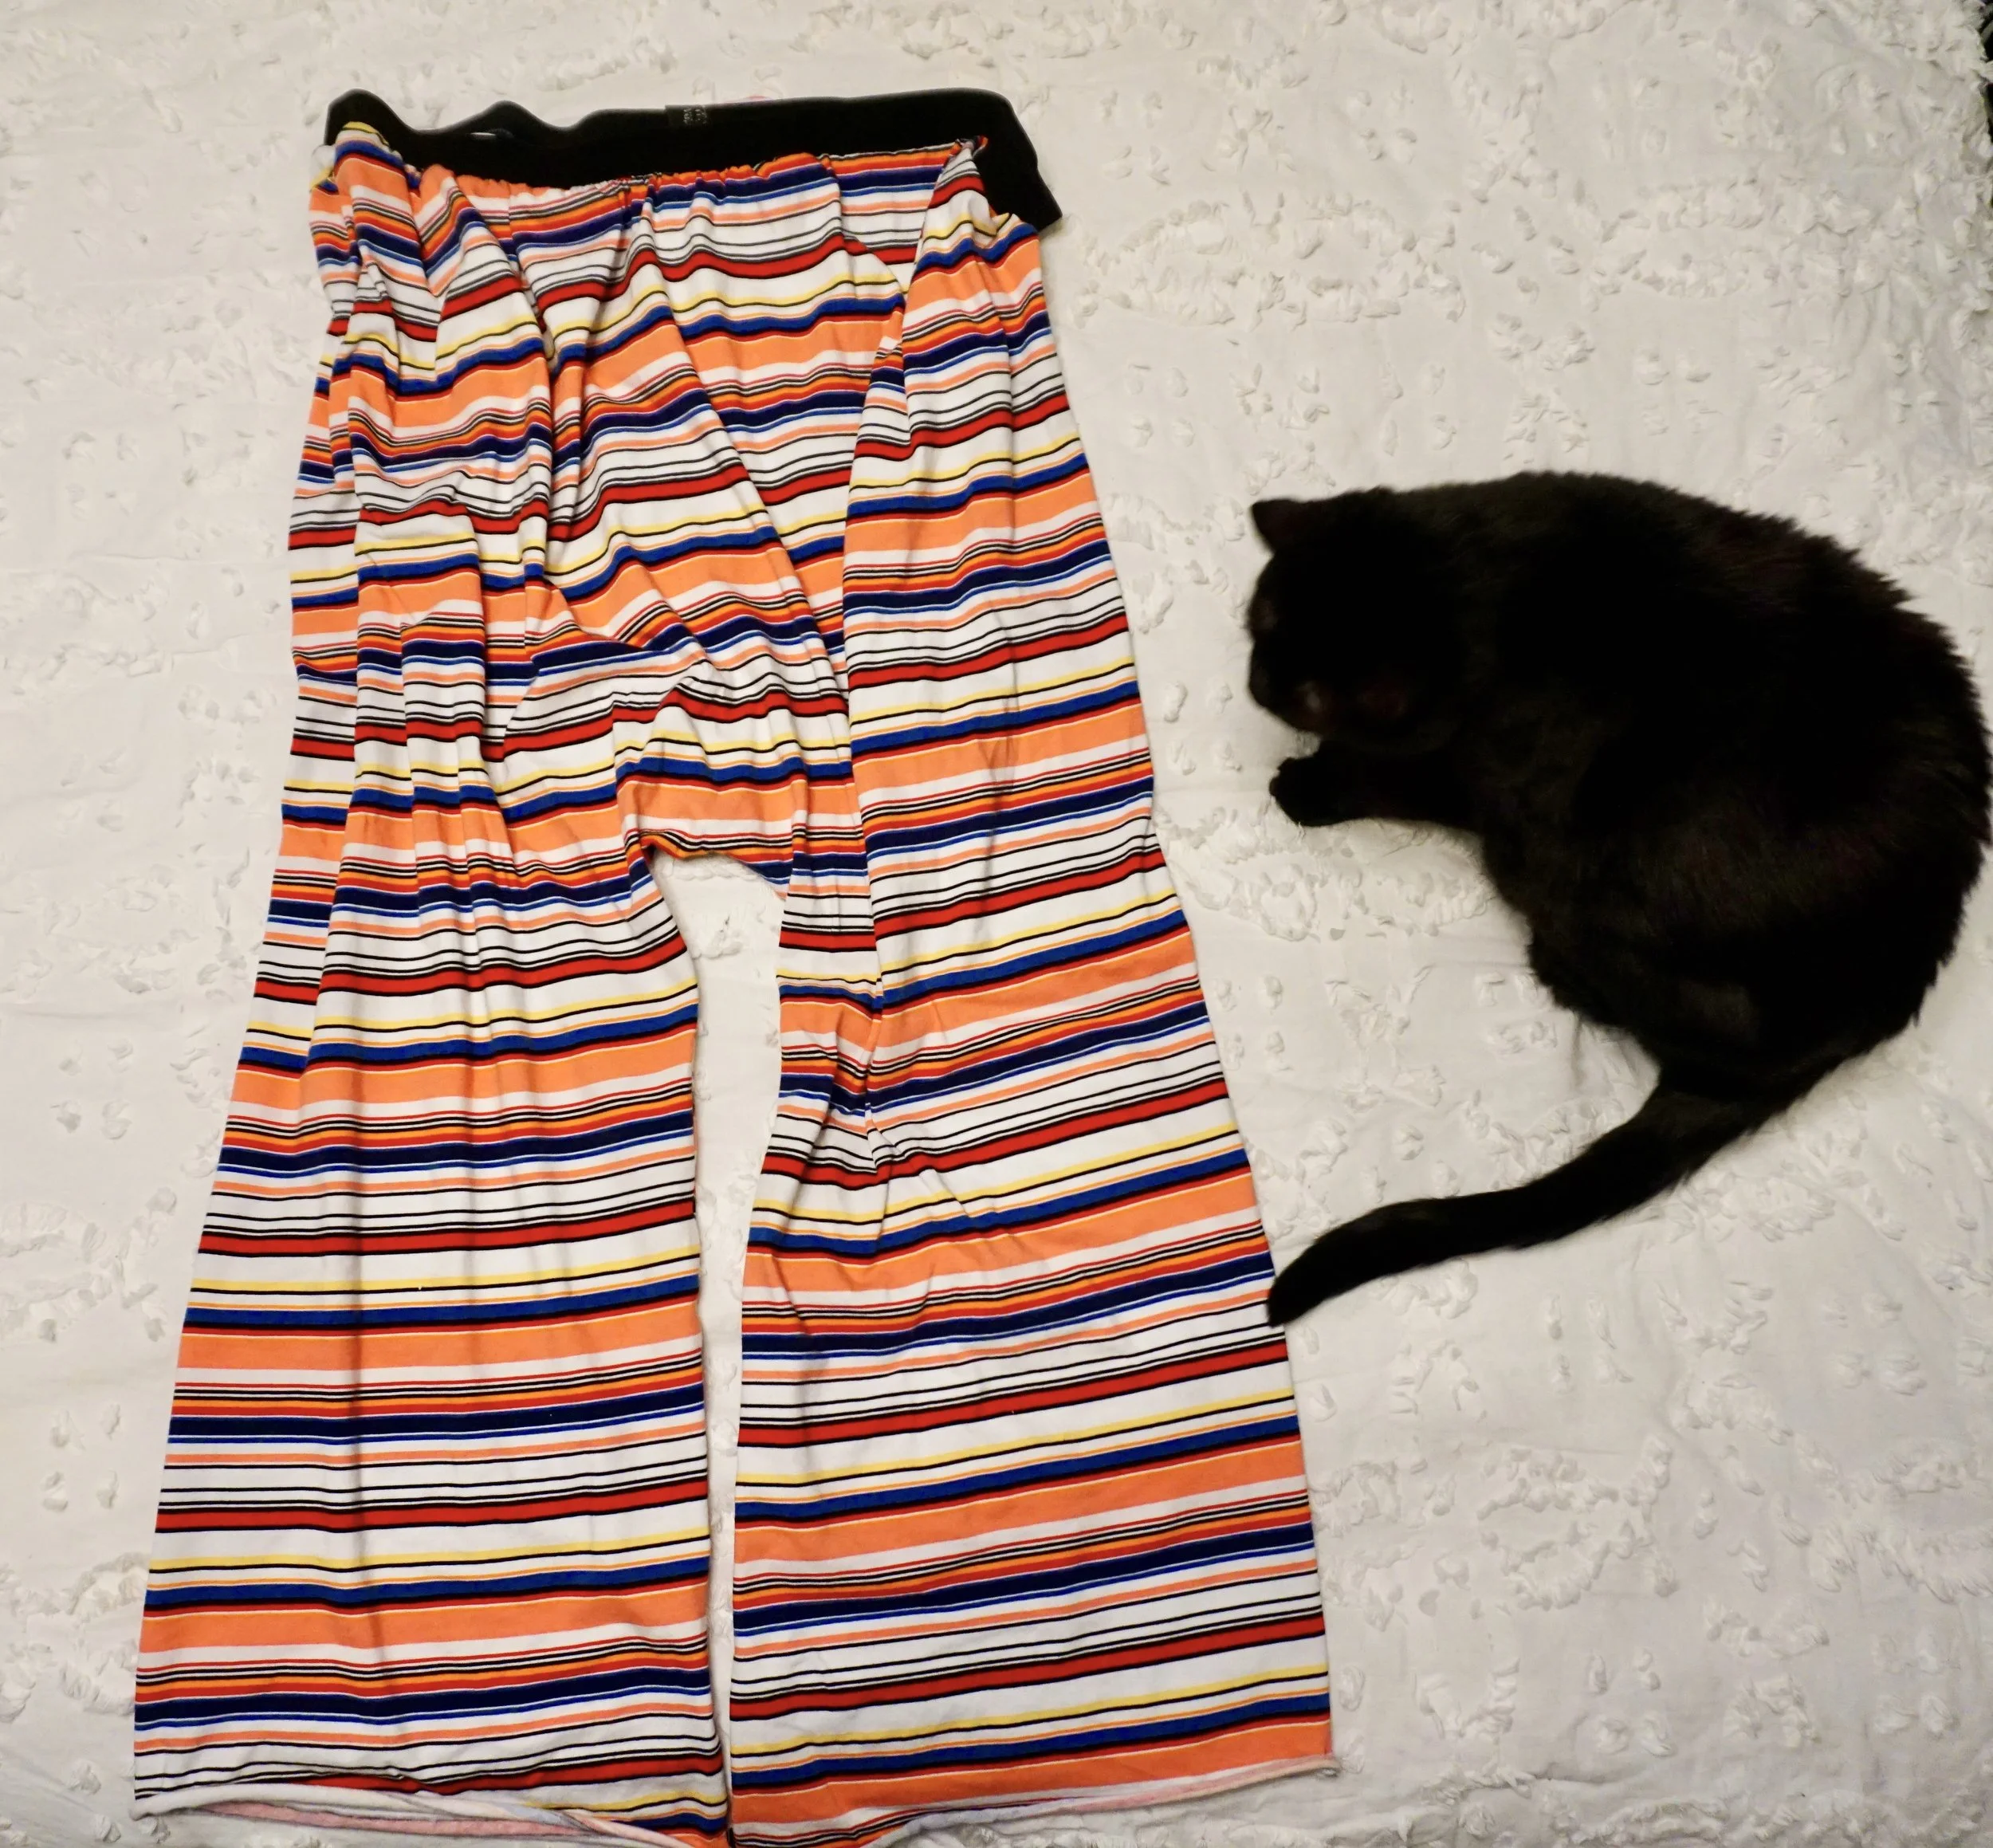
Sew Pajama Pants without a Pattern
Ok, I have to admit I had wanted to try this project idea for years! Many years back, I saw a tutorial online for turning a dress into a jumpsuit. I tried it but the project bombed. So here it is years later, and I finally decided to give a go at making pajama pants from scratch with a similar technique. You could try this basic concept with a maxi knit or t shirt dress to make a jumpsuit too! I made one pair, and had so much fun that I made two more! Each pair turned out slightly different, so here is an updated walkthrough. It might take a little experimentation to get the measurements exactly right for your own body shape!
This project is super easy! Depending on your waist size, it takes about 1 yard of fabric, give or take depending on width of fabric. You will also need elastic…either a wide piece to be the waistband or a smaller width elastic to fit into a waistband casing.
Grab your piece of fabric, and wrap it around your midsection. Make sure the two sides overlap by a few inches, to account for seams. The fabric should fit fairly snug around your belly and hips, and because it is stretchy it will have some give. I simply wrapped a single one yard piece of stretch knit fabric around my waist, so that the short side went down to the ground. The length of the fabric should go to a few inches below your ankles. If the fabric is slightly longer, you can always trim away the extra along the top edge, or fold it down to create a casing for the elastic.
Next, sew the raw edges together at the side, with wrong sides of the fabric together. Trim the seam so that it is only around a half inch or less. Next, bring that seam around to the back middle of the pants. Yes…these are basically two seam pants created from one piece of fabric! Can I get a woop woop! These are as simple as it gets, and the end result is so cute!
Take a ruler to measure to the left and right of that middle seam, because you really want to be sure the seam goes right down the middle. The left and right sides will wind up as legs, and the seam will go along the middle of your backside. Believe me, it will look best if it is right in the middle!
Next, take your ruler and measure from the floor to your the middle of your inner thigh. It can be an estimate, with a little give or take. My measurement wound up right around 18 inches. So I estimated how wide I wanted each leg to be, from the outside of the fabric to the inner seam. I drew a line that was 23 inches long, with about three inches in between the lines. At the top of those lines, connect them with a curved line. It will look like an upside down U shape.
Pin along the upside down U shape you just drew, and then sew with a narrow zig zag stitch with the side edge of the presser foot lined up with the outer edge of that marked line. Cut away the excess fabric between the legs, and cut some notches (simply clip the edges of the fabric) at the curve.
Add the waistband! Wrap the elastic around your waist and pull it kind of tight so that it stretches and cut. I did this with a 2 inch wide black elastic. So the waistband will fit snugly, but you can still pull it on over your hips. Overlap the ends of the elastic and sew with a zig zag stitch multiple times to make the hold secure. Then attach the elastic onto the waist. I pulled the elastic to stretch most of the way it would go as I went around, and when I got near the end of the waistband it worked out just about alright.
If you want to use a narrower elastic, fold down the top edge of the waist to create a casing and stitch down with enough room for the elastic to be woven through. Be sure to leave an opening to fit the elastic in. Feed the elastic through the casing and you are good to go!
I didn’t hem the ends of the leg openings, but you totally could if you wanted to! Or just trim the hem with pinking shears. You could even add a little trim or lace for a cute look!
These pants came together in about a half hour, and I can’t wait to make some more! Homemade pajama bottoms are always welcome in my wardrobe! This project would also be a great way to upcycle knit pajama dresses. I have a couple that would be a perfect fit for these pj bottoms, and I cannot wait to get sewing.
Sew a Quick Phone Sling Belt
in Sewing
Ok, this idea has been just nagging at me. I have wanted a hip pack because I wear a lot of pants and dresses that don’t have pockets. Lately I find myself carrying my phone a lot, but I didn’t want to buy yet another bag! In order to reduce the amount of things I’m buying, I recently cut my monthly budget down to less than half of what I was spending. I mean…the number one thing I can do to help the environment is to buy less stuff. But buying less stuff is really challenging for me! So reducing my budget is a win for my long term goals and for the environment as well!
This sling belt is a super quick project. I literally sewed it in less than ten minutes! You can use knit fabric, or upcycle a t shirt that is one to two sizes too big for the project. It is basically just a strip of fabric with a pocket. If you can do something with simplicity, why complicate it? That’s my motto anyway! I sewed a button on the pocket so that I can tell where the pocket is when I’m putting my phone away.
Now I can carry my phone on those days I don’t wear pockets! I love my new sling belt, and I plan on rocking this a lot! Make some in different colors if you are worried about it clashing with your outfit. Or make it fancy and add longer ties, or piece together a few smaller pieces of fabric for a multi print belt. It just ties on the side, so be sure to place the pocket in a spot where you can easily access your phone.


Phone Sling Belt by Kathryn Sturges
Sweatshirt Jacket Tutorial
Ok, so it’s officially sweatshirt season here in the Midwest, yay! I was so excited to do this upcycle, I had a sweatshirt that had a really cute pattern but it was just to big and frumpy, so it was just begging to be upcycled. The sweatshirt I used has that super warm fluffy pile, and this one was a bit of work. It is easy enough for just about any seamstress to do, but if you need to learn any of the techniques, my recommendation is to try them out first on a sample piece of fabric.

Let’s get upcycling!
Materials:
A baggy sweatshirt
Basic sewing kit
Sewing machine
About a half yard of quilting cotton or other fabric without stretch
A matching button

Step One: Cut the sweatshirt down the middle of the front, and if need be zig zag stitch the edges. Most sweatshirts don’t unravel, so you can skip this step with an ordinary sweatshirt. If it is made of a fabric that unravels or falls apart easily at the edges then add the zig zag stitch.
Step Two: Remove all of the banding around the top, bottom and optionally the sleeves. My sleeves had some slight stains on them, so this was a must for my project. Finish those edges with another wide zig zag stitch if need be.
Step Three: Create binding with the quilting cotton fabric. I created 1 1/2 inch wide strips and sewed them together, but if you are new to making your own binding you might want to make it slightly wider. It also depends on the look you want because if you want a wide binding you will want to make the strips 2 inches wide.
Step Four: Sew on the binding around the collar and bottom of the jacket. Here is a link to a website with pics of how to do so. When I connect pieces of binding together, I just use a 1/2 inch seam allowance with a straight stitch, instead of using an angled edge. Don’t worry about the start and finish having raw edges because when you bind the front middle of the jacket it will create a finished edge. https://weallsew.com/binding-3-ways/
Step Five: This step is a little more complicated, but once you get the hang of it you will be a binding pro! Now we are going to bind the front of the jacket on the left and right sides straight down the middle front. Make sure you use a binding that is longer than that length by at least two inches. Fold down the top of the binding about an inch, and then start at the top of the left side and attach the binding. Folding the binding down will create a finished edge. When you get to the bottom, stop sewing about an inch before the end and fold the binding to create that finished edge, then continue sewing. Finish by doing the same fold over technique in Step Four, and get the binding attached securely. Now repeat this step to the right side of the front.
Step Five: Binding the sleeves is a bit more tricky, so take it slow. First, attach the binding to the front side of one of the sleeves with a straight stitch, but when you get to the end stop and leave about an inch extra material. Flip the sleeve inside out, and do the double fold technique and starting at where you first sewed on the binding, secure down about an inch with a narrow zig zag stitch. Then stop, and go back to the spot where you left the extra fabric. Fold the fabric down to create a finished edge, and complete the first pass of sewing down the binding with the straight stitch. Next flip the sleeve inside out again and finish sewing the binding on with a narrow zig zag stitch.
Step Six: Figure out where you want the button, and create a buttonhole. You can either look in your sewing machine manual and use the buttonhole foot, or just draw a line where you want the buttonhole and do a very narrow zig zag stitch on either side of the line. If you do this method, be sure to use a zig zag stitch set to zero stitch length at the start and end to add strength to the buttonhole. Then use a seam ripper or small scissors and cut the middle of the zig zag stitch rows to create the hole.
Step Seven: Sew on the button!
And you are done!

Wow, this project was a lot of work, and kinda tricky to explain…but it was so worth it! Now you can rock your sweatshirt jacket all fall, and feel fabulous knowing you created it yourself!

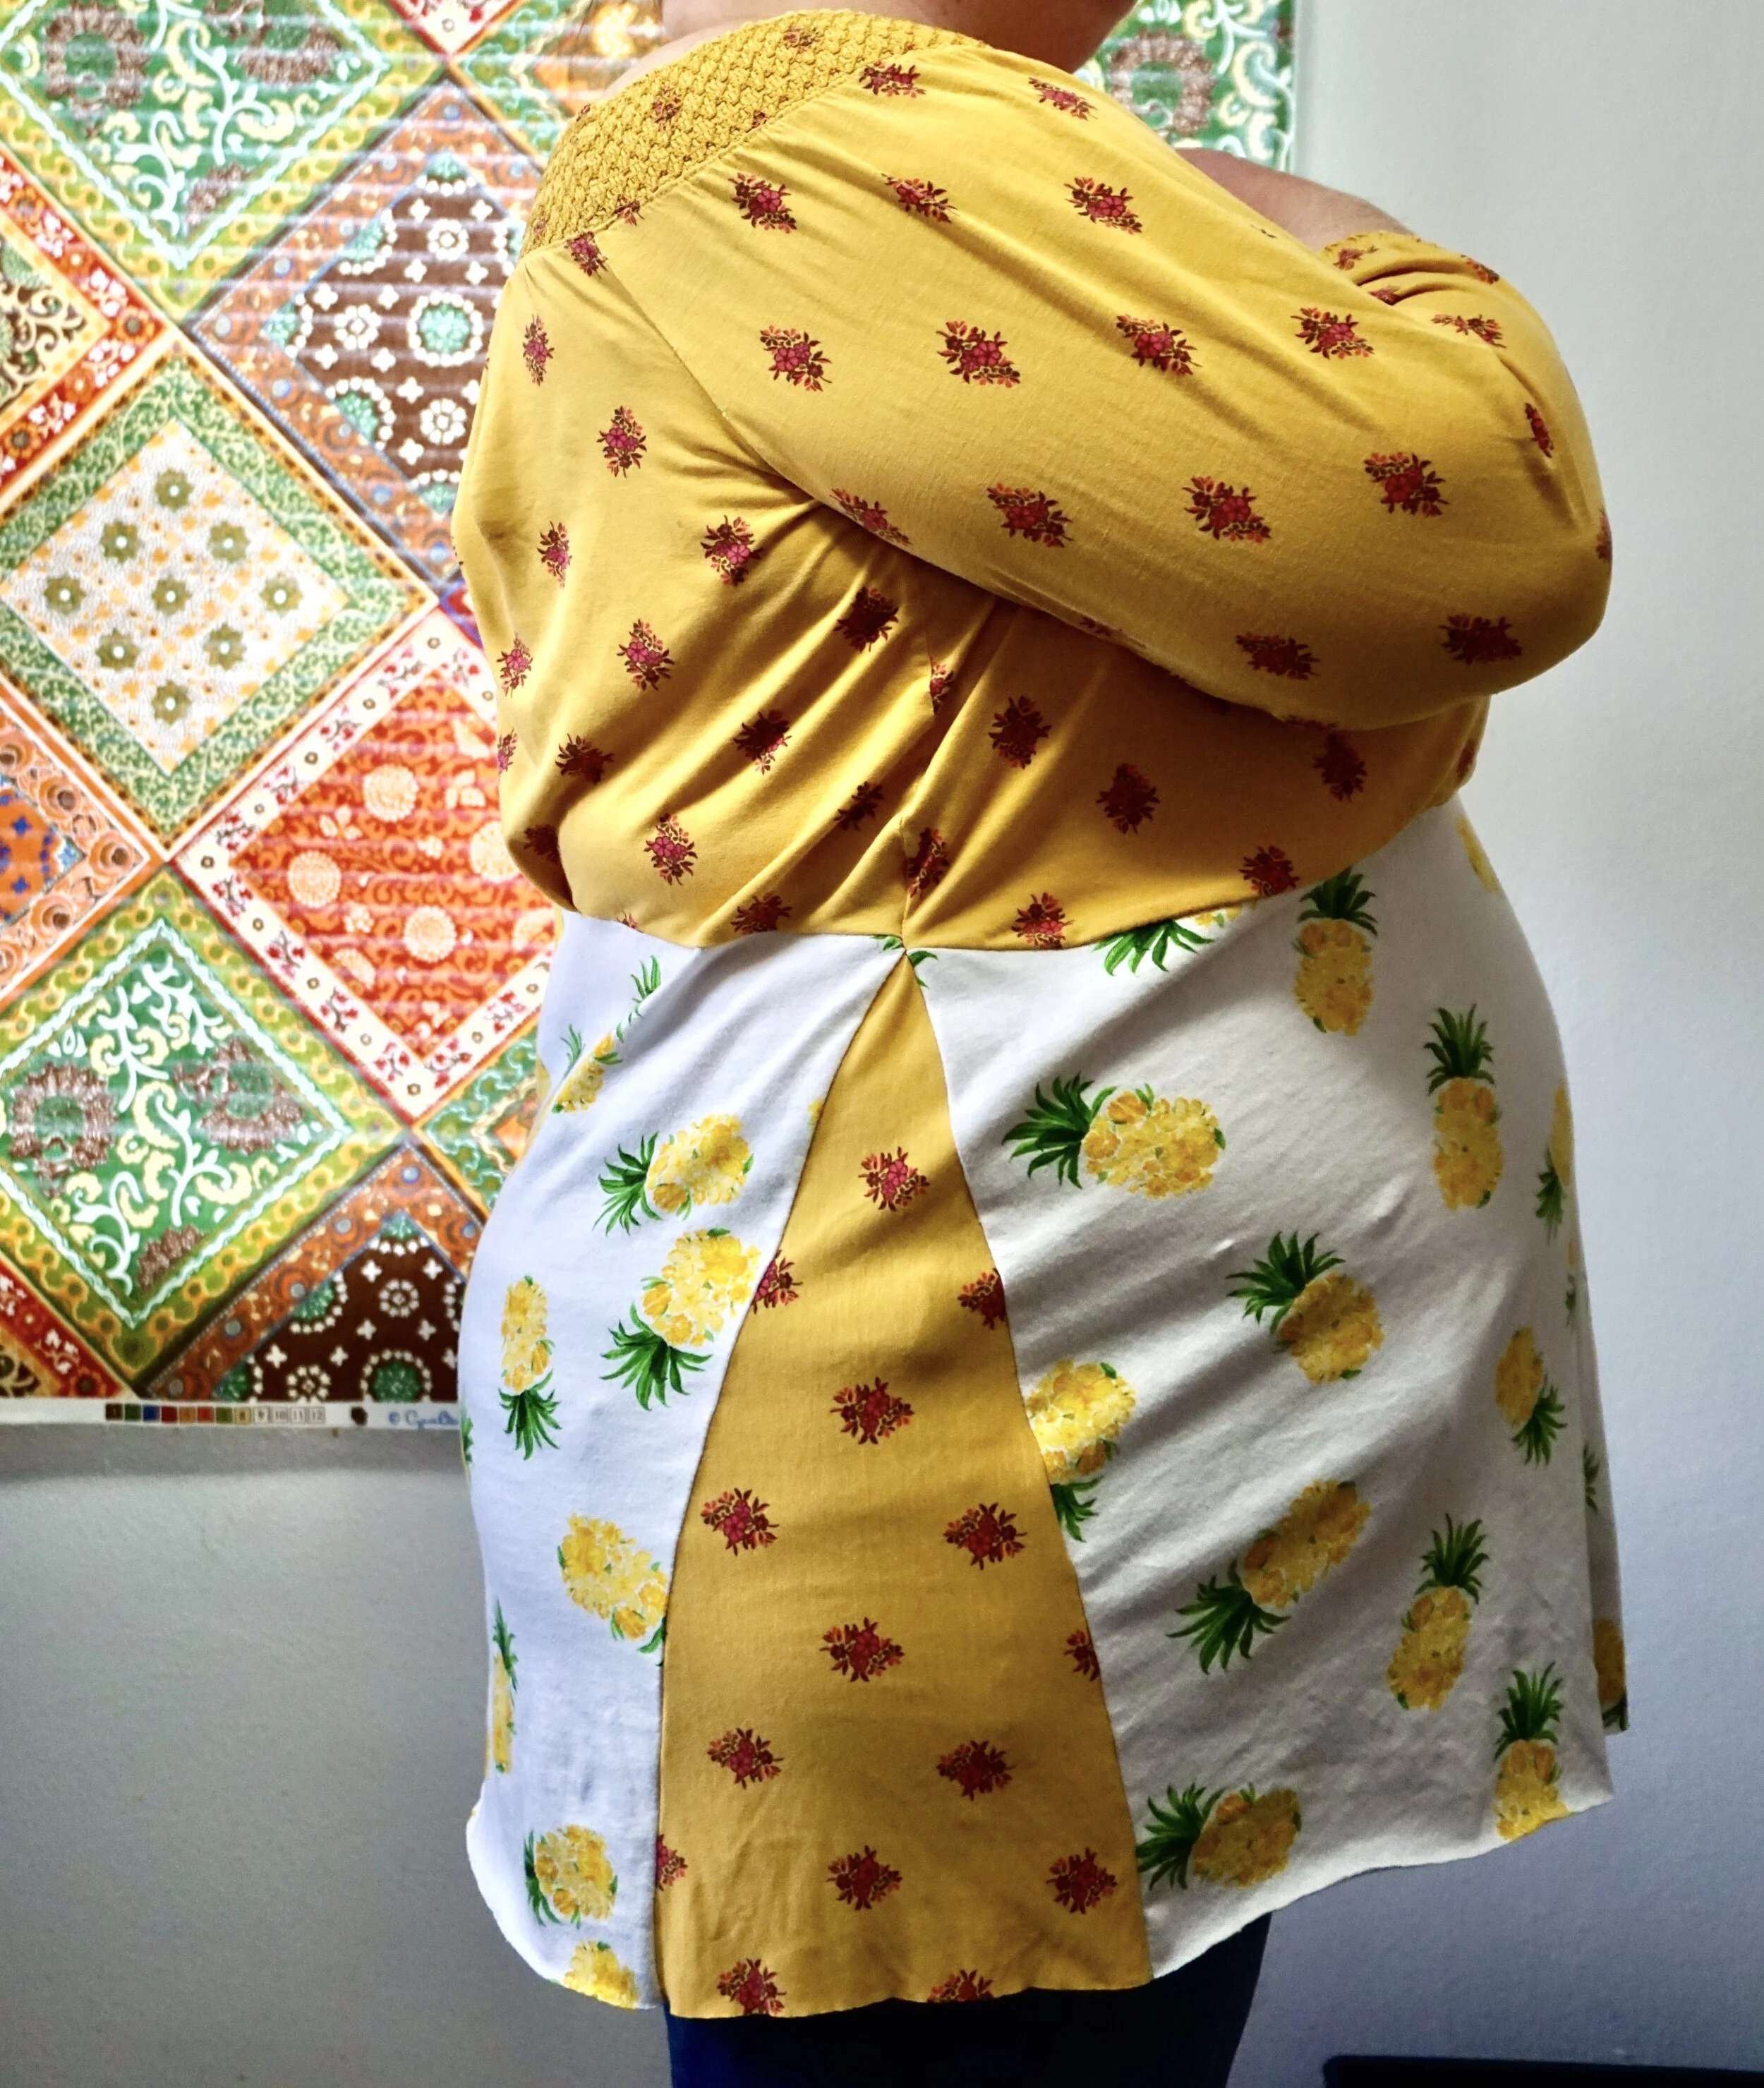
Tropical T Shirt Dress
I dove in this past week and started my upcycling adventure…and let me say right at the start that upcycling is not for the faint of heart. It is important to plan out your project before you start, instead of winging it like I did. I’ve sewn basic t shirt dresses before by combining two t shirts, but this time one of the shirts was bigger than the other which posed some challenges.
If you enjoy collecting t shirts, there is a potential that you might have a couple of tropical prints you could destroy and reconstruct into this dress! If not, any two t shirts will work. Just be sure you love the color combination. I chose a yellow shirt that I really love, but just was kind of past it’s prime. It had been washed so many times that the color had faded a little bit. I love the top of the shirt because it is off the shoulder, and if you have a shirt that has an interesting top or sleeves you will want to make that the top portion of the dress.
Because I just grabbed the two shirts, cut and then sewed, I’m going to update this tutorial to explain a more precise way to do this project instead of just winging it. At one point during the upcycle, I wasn’t sure that this dress was even going to turn out. But fortunately I had a few tricks up my sleeve and it turned out really pretty!
Tropical T Shirt Dress
Gather Your Materials:
Two jersey knit tops, with long or short sleeves
Cutting mat, ruler and rotary cutter
Basic Sewing Kit
Serger or Sewing Machine (If you are using a sewing machine, sew with a narrow zig zag stitch…I normally set my sewing machine to three when sewing knits.)
And Courage to try something new…
Step One:
Choose one shirt to be the top portion of the dress, try it on and measure from the top of the shoulder down to just below the bustline. I used a measurement of twelve inches, but yours might be different. Using the rotary cutter and mat, cut a straight line at that measurement. You will be left with the top of the shirt and a bottom portion. Set the bottom portion aside.
Step Two:
Cut the second shirt just below the sleeves. Then hold it up against the bottom of the top portion and if there is excess fabric, cut the bottom portion at the sides to be the same measurement as the top. Include seam allowances on either side, then sew the bottom portion along the sides. Pin to the top with right sides together and sew with a quarter inch seam allowance.
Or do this instead:
I did mine a little different than this, because I just grabbed the two pieces and sewed them together. If the bottom portion is larger than the top, pin the two pieces with right sides together starting at the side seams. Then create improvisational pleats along the edge of whichever shirt is larger, spaced evenly apart all the way along the back. On the front, create one large pleat right in the middle. Doing this will make it so that both edges wind up the same length when sewn. Sew along the line with a quarter inch seam allowance, being sure to sew the pleats slowly to prevent them from getting warped or caught in the seam.
Step Three:
Trim off the bottom hem and then lay the dress out flat on top of your cutting mat. Carefully position the dress so that just the side seam is flat against the cutting board, and be sure the rest of the dress is out of the way. Cut out a narrow triangle shape starting at the side seam, just above where the two pieces meet going down to the bottom hem. This will form a narrow triangle. Do the same thing to the other side seam, making sure that the two triangles are roughly the same size.
Step Four:
This step is similar to adding bell bottom panels into a pair of pants. Measure the length of the triangle on each side, and then using the bottom portion leftover from the top, cut two triangles that are a little larger than the triangles you cut. (If your dress is a little snug this is a great way to add some volume in a stylish way.). Make the triangles the same size by creating one of them first, and then use the first one as a template to make the second triangle. Then flip the dress wrong side out, pin one side of the triangle insert to the opening with right sides of the fabric together and sew. Sew the other side of the triangle. Then repeat with the alternate side of the dress.
And there you go! A fabulous new dress out of two cast off t shirts! If you are wondering how to do any of these steps, there are endless resources online to meet your needs. Or if you want to tweak the project and change it up a little bit, be my guest!

Flora Dress Before Hemming by Kathryn Sturges
The Flora Dress Tutorial
You know when you order a dress online, but when it gets to you it is just a flat out NO? This dress was like that. I actually paid $40 plus dollars for it from Old Navy, thinking it would look cute with cardigans and leggings. But the fit was all wrong, and it just seemed so matronly to me because of the traditional cut of the skirt. It was not very comfortable to wear. I typically love a dress with some flow and movement to the skirting, and this dress just plain fell short! I didn’t wear this dress one time, it immediately got gently placed into my Donate bag.
Now that I’m upcycling clothing, I thought I would experiment with the dress…and I’m so glad I did! This upcycle is so easy, even a total beginner could do it! It only has a few steps and voila! A beautifully transformed dress!
I used a home decor fabric for the side panels. The only reason I used it was because I already had some in my fabric bin. I am of the mind to use what I already have instead of constantly buying new before each project, so I went through my fabrics and this ivory fabric was just perfect! It has texture to it, and because the weight of the dress fabric is heavier I thought the home decor fabric would suit it perfectly.
Materials:
a dowdy dress that needs a bit of love
about a yard of fabric that is a similar weight to the dress
(If the dress is stretchy, use a stretchy fabric…if it isn’t then use a woven fabric)
Basic sewing kit
Sewing Machine
Rotary cutter, mat and ruler
Try on the dress and figure out how short you want it to be when finished. Initially this dress hit below the knee so I cut off the bottom portion just above knee length.
Next, lay out the dress so one side seam is on top, and slip the rotary mat into the skirt. Be sure the rest of the fabric is out of the way so that you don’t mistakenly cut the wrong fabric. (This has happened to me before!)
You will be cutting out a triangle from the seam. If you want it to be exact, measure out from the seam at the bottom to about five inches and place a pin, then do the same on the other side of the bottom edge. So you will have two pins that are equally spaced from the side seam. .
Using your ruler and rotary cutter, cut a straight line starting at the waistline and ending right beside one of the pins. Then do the same thing on the other side. This will create a large triangle. Save the triangle to use as a template.
Do the same thing on the other side of the dress. Then set aside the dress. (Another way you could go with this dress is to only add a triangle on one side, it just depends on the look you are going for. Or you could add the triangle down the middle of the front or back.)
Using the fabric template from the first triangle, cut out two triangles of the insert fabric. I simply placed the triangle template on the home decor fabric and traced around it with a purple sharpie. Cut out the two triangles and sew them into the sides of the dress. Flip the dress inside out, pin in the triangle with right sides together, and sew. Then sew the other side. Repeat for the opposite side of the dress.
Finally, hem the dress. I used a hemming ruler and iron and pressed the hem first, then folded it again as I sewed using a straight stitch. You could use a decorative stitch to add another element of style.

Adding triangle inserts to dresses is so much fun, and it can really liven up a boring dress. You can add them in to the front or back if a dress is too small, you can make them wider or smaller depending on the look you want. If you are trying to make a dress bigger that doesn’t fit, you can remove a smaller triangle portion from the dress in step three and then add a much bigger triangle insert to give more room.
This dress is up for grabs in the shop! Onto the next upcycle…

.

Fall Harvest Dress


This UPcycle was inspired by a tutorial I found online. The dress was initially a bodycon fit, but I really love a loser fit for Plus Sizes. When a dress is a bit looser it is just more comfortable, and since I had the perfect fabric to go with the dress I wanted to give this a shot.
I based the upcycle on a tutorial I found online, and unfortunately I cannot find the tutorial to share a link. But here is a basic outline of the steps I took to achieve this look. It was a fairly simple upcycle but it took some bravery to cut the back of the dress. So you might want to try this on an old bodycon that you no longer wear, or that no longer fits.
Step One: Cut out a large triangle from the back of the dress. It can be about eight inches wide at the base, meeting at the middle of the back at the neckline.
Step Two: Using another knit fabric, create a triangle that is about sixteen to twenty inches wide at the base and two to three inches wide at the top. Use the fabric that you cut out in step one to get the right length, and be sure to include about an inch extra at the top and bottom for the hem.
Step Three: Sew the insert into the dress. Make sure you do right sides together, and do one side at a time. Then hem the top and bottom to line up with the rest of the dress. If you love the look of an unfinished hem, trim off the hem on the dress and just even everything out.
Step Four: If you want to create a hi-lo dress, make the back piece angle down on each side to create a gentle triangle in the middle back of the dress. I added mini pom pom trim to the lower hem to give the dress a softer look.
Step Five: Cut out a square from the fabric you used for the back, or in another color that is about seven inches square. Fold in the edges and sew, creating finished seams on the square. Then attach to the dress for a front pocket. I created a pleat in my pocket and it has a drapey look, because the jersey I used was really fine.
And you are done!!
Whew!! This dress was more work than I originally thought it would be, but I love it so much. I would do this upcycle again in a heartbeat, only mix up the colors to be bolder next time. A dress like this is so perfect for fall, and is great with layers.
Have fun sewing!

Altered Slip Dress
in Sewing
This is a super quick altered slip, that turns lingerie into something you can rock anytime. The initial inspiration for this upcycle came from the book, “50 Nifty Thrifted Upcycled Fashions” by Cynthia Anderson. I went my own way with the project, because in the book you cover the entire slip with yardage of laces in different textures and colors. I wanted a more patchy look, so I ordered a package of lace pieces from a shop on Etsy. This slip was thrifted, and the lace edging fell off when I washed it! UGH! So I removed parts of the trim, hit all the edges with a zig zag stitch to stop it from unraveling and then added some sky blue quilt trim from my stash. You could easily try this with a tank top or camisole and it would turn out even better! I’m a little disappointed with how the slip fits overall, but love the concept behind the project! It’s amazing what a few scraps of lace can do to freshen up the vibe of your look!

Sew Harem Pants
in Sewing
I’ve wanted to try this project for years! Recently after sewing pants without a pattern, I got the courage to try and make some harem pants. The trickiest part to these pants is getting the pattern right, but you can adjust the pants a bit if they wind up not big enough after you get the initial pattern created.
Materials to make the pattern:
Watercolor paper, newsprint or some other junk paper
Tape
Ruler and marker

Ok, so I taped three pieces of cheap watercolor paper together, but the tape wouldn’t stick! I was trying to make a pattern that I can use over and over, so I wound up using watercolor paper and packing tape. The paper is thick enough that I can store it and then get it back out for multiple uses!
First, measure your low hip measurement, and then add eight inches to that measurement. Divide that number by 4. This will be the top horizontal measurement on the pattern. Mark where the measurement is, and draw a vertical line down the pattern on the right side. Cut out your paper so that the horizontal width of the pattern equals this measurement.
Next, measure from your waist where you like pants to sit down to just below your knee. If you botch this measurement, you can always add a band at the top of the pants later so that the pants have drape. This will be the vertical measurement along the left side. Make a dot on the pattern at the end of that measurement.
Figure out the length of the leg portion by measuring from your knee to the ground. Also, figure out how wide you want the legs opening to be so that the pants fit your lower legs. Make a dot at the width of the leg opening. Remember that the measurement is a half measurement, because the pattern is only for one half of the front or back of the pants. You can always adjust the length once the pants are finished, so add a bit to that measurement to make the legs long enough. Now, starting at the dot you made in the last step where the bottom of the knee hits, draw a line that is straight at first, but that curves down to the bottom measurement. My line was curved at first and then was a straight line going down.
The right line of the pattern will be the side you place on the fold of the fabric, so write “cut two on fold” along that line! You will be cutting out two of the pattern shapes onto folded fabric, so that the fold of the fabric is along the long side of the pattern.
Materials to make the pants:
Stretchy fabric like knit or other stretch fabric
Elastic
Basic sewing kit
Lay out your fabric, and fold it. Then place the pattern onto the fabric so that the fold line is on the fold of the fabric, and trace. Cut out the shape, then do it again!
Now you have two pieces of fabric. Sew the vertical edges of one piece of fabric to the other piece. Those vertical lines will be the front and back center of the pants. Then sew starting at one leg, along the curved area and then down the other leg. Try on the pants! This step is important to make sure they fit right! Mine wound up being too short, so the drape of the middle was not low enough. I added an 8 inch wide strip of fabric along the waistband of the pants. I also had to cut off some of the length on the leg to suit my preferences.
Add elastic to the waist! I used wide elastic and made a casing with the knit fabric, but sewing the knit straight was a challenge. If you have a wide elastic, you could just sew it on as is without doing a casing.

Upcycle a Backpack into a Belt Bag!
Alright, I’m checking in to the blog with a quick and dirty project! This only took me about twenty minutes to make. If there are any eco heroines or heroes out there who feel like rescuing some thrifted backpacks and turning them into cash…this is the project for you!
Amazon sells the clasps and sliders to make belt bags, so I ordered some with some nylon straps. It all came in at around $15, and I now have materials to make a bunch of belt bags! If you are looking for a fun, quick project to sell on Etsy…belt bags are really popular right now and super fun to make.
Look for pre loved backpacks that have a pocket on the front of the outside when you thrift next, and I bet you will score some bags to use! I had an old backpack that I didn’t entirely love. The bag didn’t really have shape so I found myself not wanting to use it.
Enter the belt bag! I’ve been wanting a proper belt bag, because I love toting around items when I’m in the yard or doing stuff around the house. And a lot of my pants don’t have pockets. I looked online, and it is nearly impossible to find plus size belt bags anywhere! I did find one for $45, but that seemed way too expensive. So I made one in twenty minutes, and it probably only wound up costing me $5 all said and done!
Here are the steps quickly to upcycle an old backpack into a belt bag. I did not include steps to add the buckle clasp and slider to make it adjustable, but if you need help with that there are lots of other tutorials online. Make one for yourself, make some as gifts, or even make some to sell!

A backpack I didn’t love to use, but that front pocket was perfect for a belt bag!

Cut off the front pocket, leaving room around the pocket to be able to turn the fabric under and sew.

Break down the backpack and remove the foam and other parts. They might come in handy for another project down the road!

Fold the edges under and sew with a zig zag stitch. You will need to be sure to shift the pocket out of the way of the presser foot as you go along.

Add a strap with buckle! I will be adding a slider at a later point, so that the bag will be adjustable.
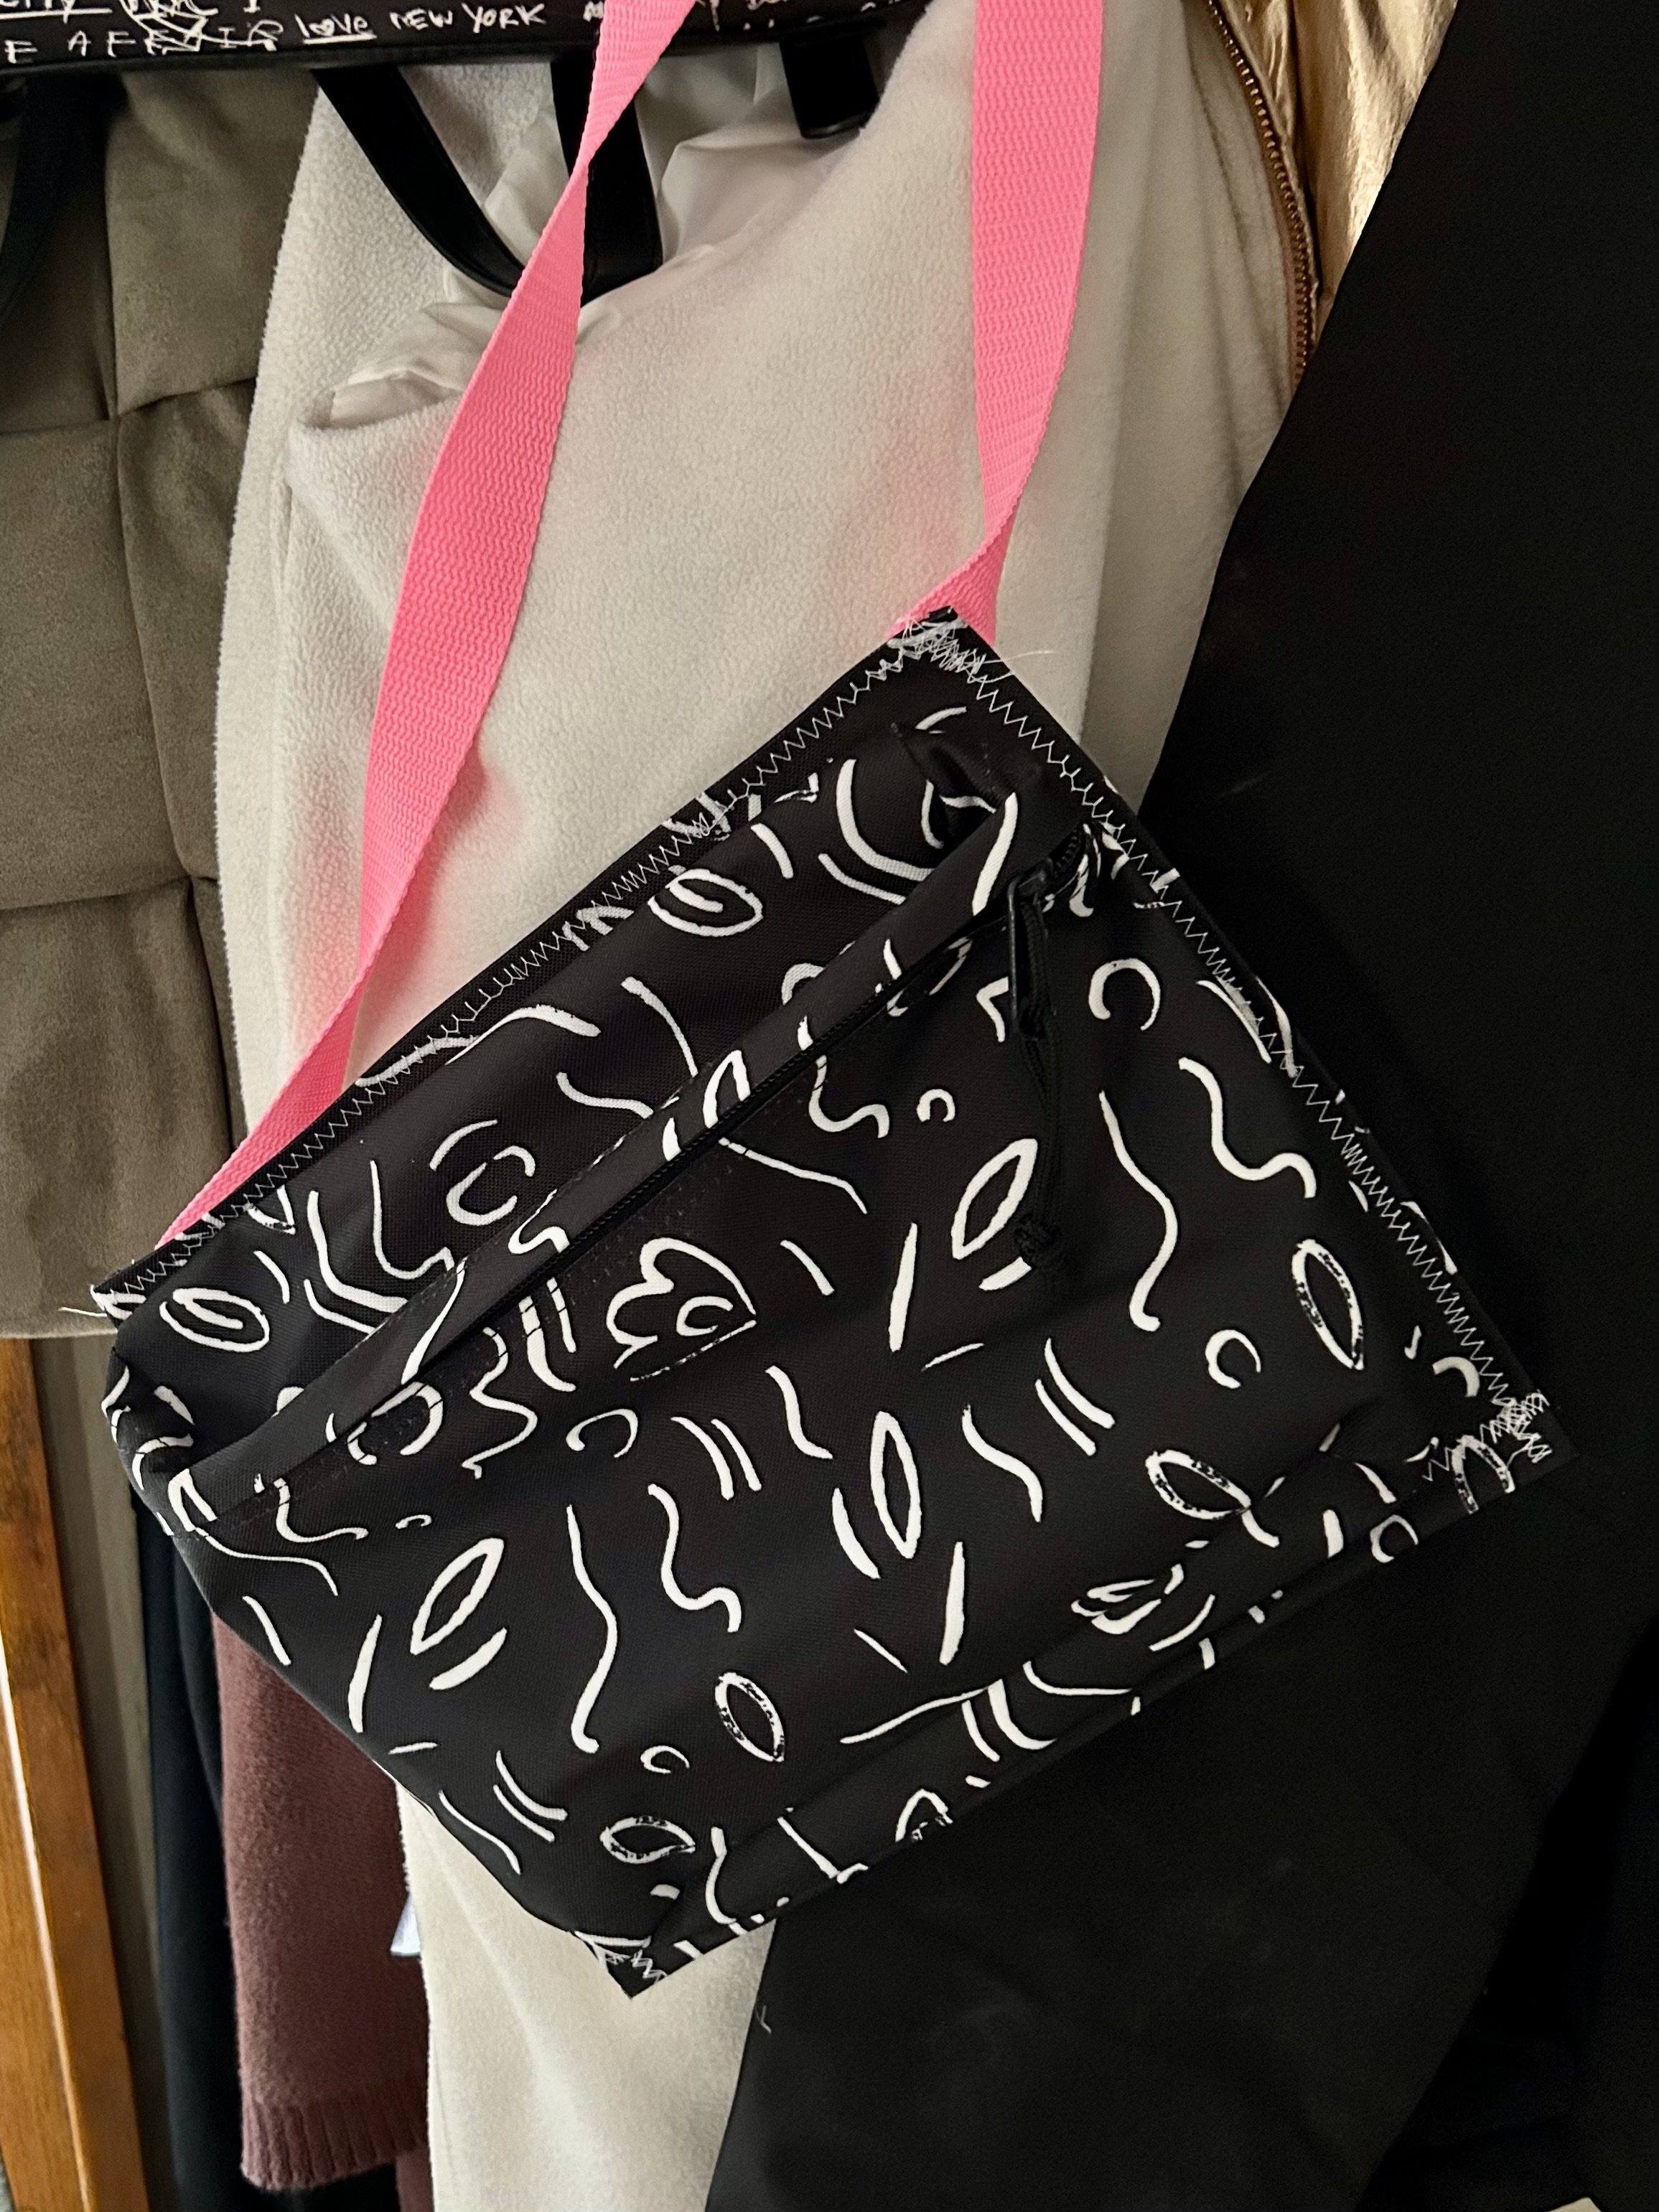
Rock your new belt bag! Make one for yourself, make some to give away, make some to sell! $$$
A Book of Illustrated Scripture by Jen Alward
in Book Club
Jen Alward of Hope and Healing at Home is a missionary with a big heart! She has put together a book for outreach to a group of kids in Thailand! My art is just one of the beautiful pieces in the book, which features 50 Bible Verses, and art by 18 artists! Grab a copy of the book to see my painting and read the beautiful Bible verses which go with the art! The book has space for journaling, and it written in English, Laos and Thai!
Proceeds for the book go to support Jen’s work. I am always praying that my works will make an impact in some way, and it feels great to be a part of projects that are doing good in this world! “I am confident of this, that the one who began a good work among you will bring it to completion by the day of Jesus Christ” (Phil. 1:6)

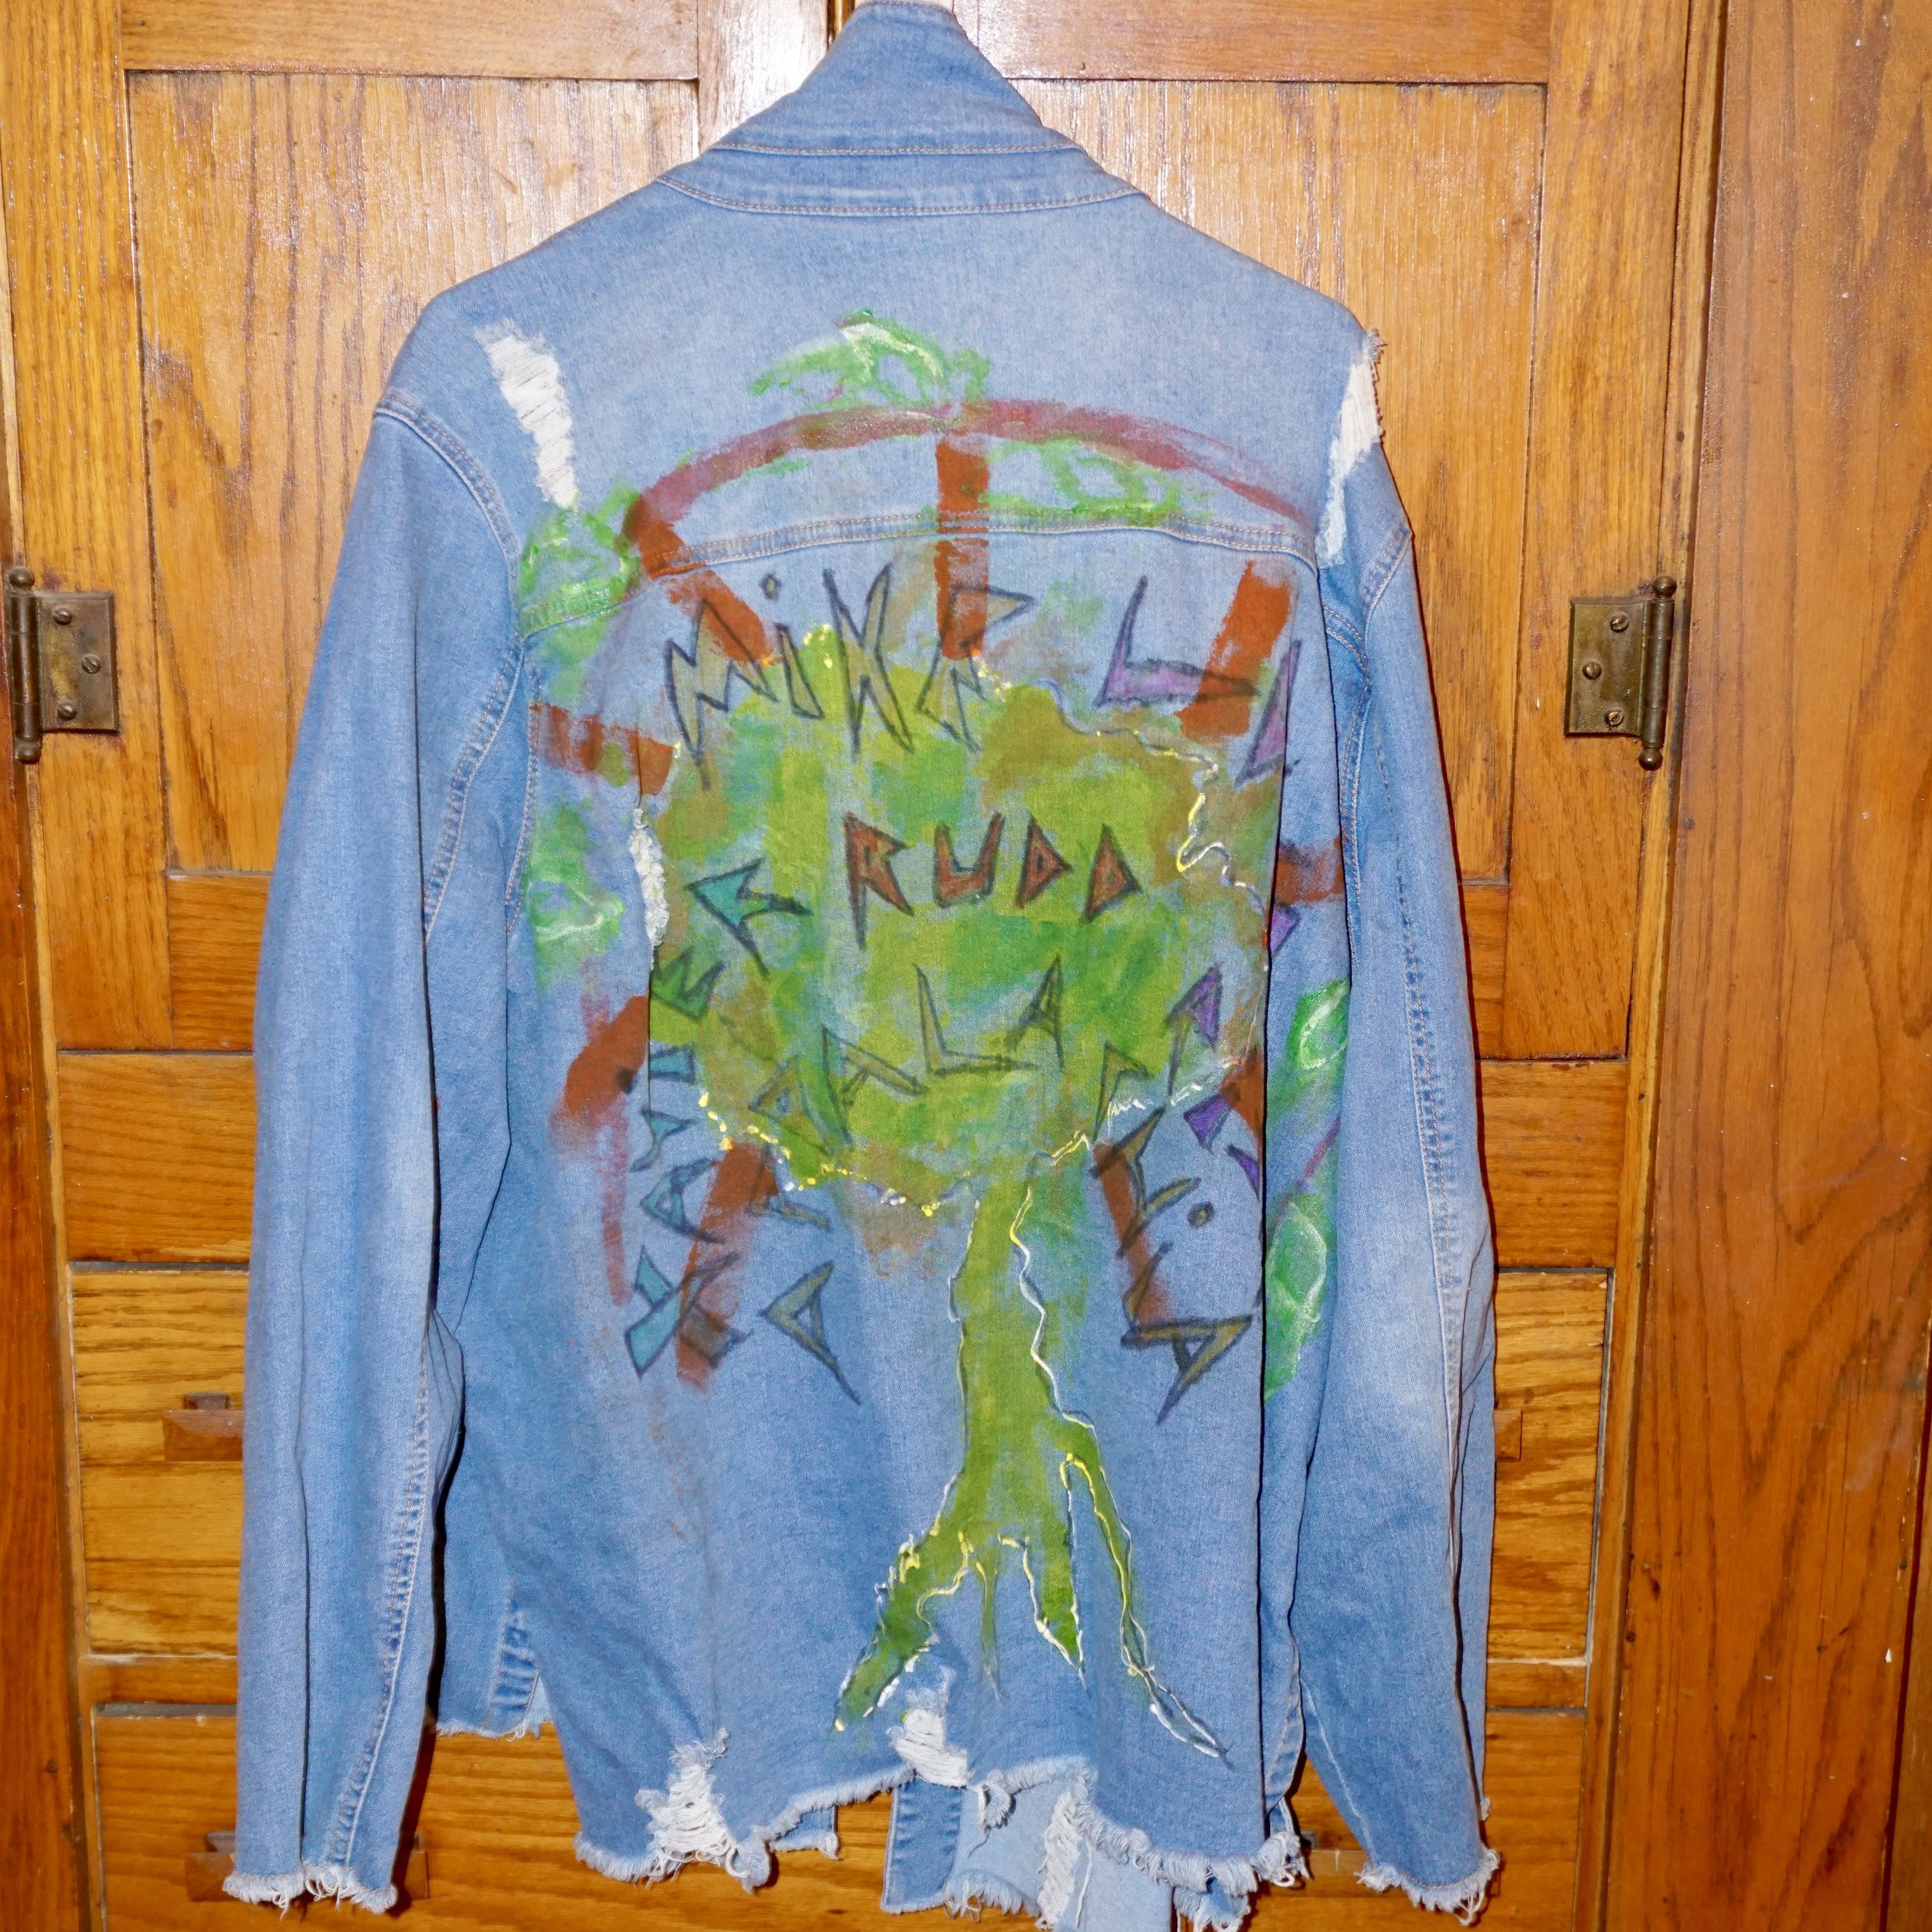
Jean Jacket Makeover
I need to start with a little backstory first, and then I’ll get to the project! For many long years I had kind of a surly approach to art making! I would start each work by making a mess on the page. I would start with splashes of color and make a real mess of it. Once I had something to start with, my creativity would take over and a memory or idea would come to mind…a way to turn the mess into something tangible…beautiful even!
I still carry that torch in my art journals, but not so much in my polished art. However, this jean jacket project is kind of like that! I thought about what I was going to do for weeks! I was going to do a peace sign on the back of the jacket, and add length to it to make it a trench coat. I kept overthinking it! So one afternoon I got a srike of inspiration, that I could celebrate my favorite musicians on the back. I wanted to pay tribute to Xavier Rudd, Mike Love, and Rising Appalachia. Their music has carried me through a lot of rough times in my life, and has also been guiding me to try to be a force for good in the world!
So I filmed myself decorating the back of the jacket! Here’s the video, where I completely screw up and make a mess of the jacket! Hahahaha! Sometimes though making a mess is a part of the creative process!
I used a fabric marker first to write everything out, then I picked up some puffy paints. <Trigger warning! I am not an expert on puffy paints!> The paint did absolutely nothing for my muse at all! I kept trying to get the design how I wanted, but was sure the jacket was ruined. So I threw it in the wash, to see if the puff paint would wash away. Some of it did, but some remained. Also, because I didn’t heat set the fabric marker, it also dimmed.
So I went back over the text with Sharpies! Sharpies are great for writing on fabric, and they can withstand being washed. I filled in the letters with different Sharpies and outlined the letters in black. Then I used Jacquard Textile Paints to fill in the tree and add the orange beams surrounding the tree. I’m going to pop this in the dryer on medium, and then pop it like it’s hot!
Sometimes a mess can turn into magic! Here is the final result! I am going to wear this like a rockstar all Spring!